
Short version:
Large perennial grown for its flower buds. Choose a variety that is hardy for your conditions. Can be grown from seed or easily propagated from suckers. Preparation and cooking can be easy and eating, leisurely.
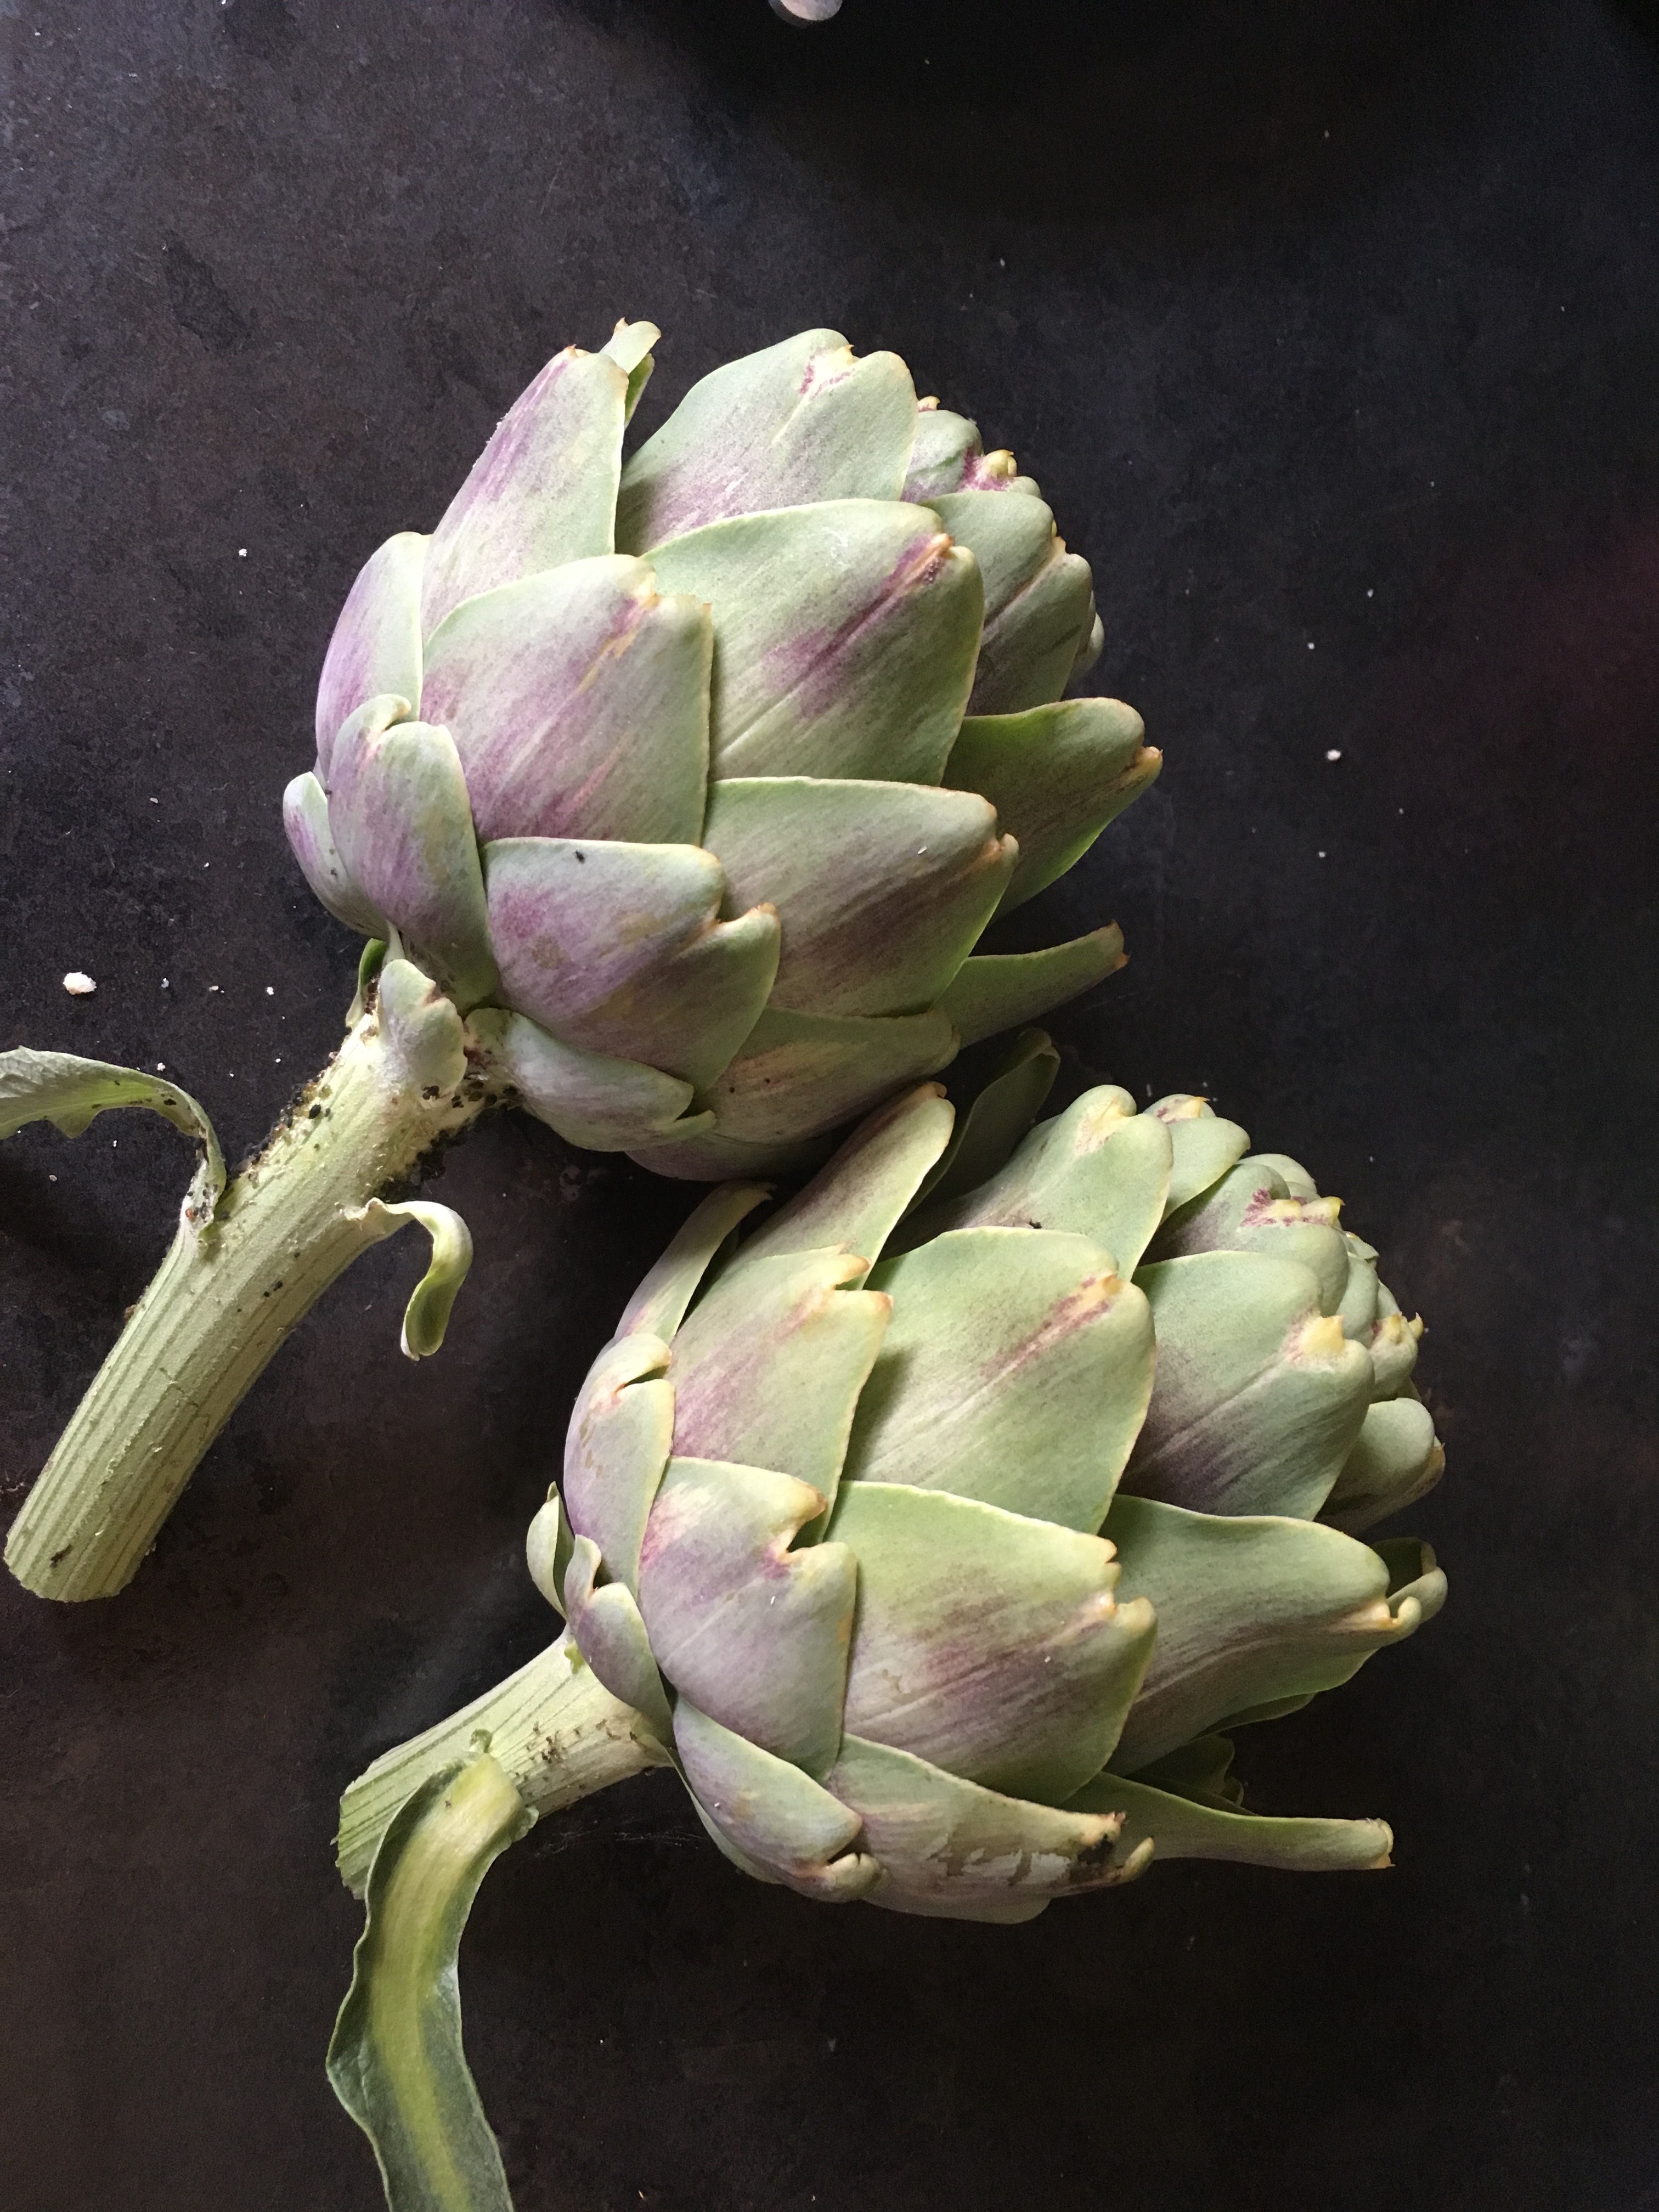
It’s probably only when you see the mature flower of an artichoke that you can see the connection to thistle flowers. Mine never get that far because we love them – and I do me we. I have never failed to get my fussy 3 year old to eat when serving artichoke. If you have very little space in the garden, then artichokes may not be for you. They do take up a substantial amount of space for the amount of food they provide (a bit like pumpkins). They block the light out at ground level so much so that I don’t usually have to weed around them. They do make a nice front garden statement though if you want something big and showy.
Growing artichokes
Seeds
One of the cheapest ways to start artichokes is to sow seeds. Seeds are easy to get hold of from retailers. The variety I see most often is Green Globe, popular for being hardy, reliable and prolific. I, therefore, figured it would be the easiest to grow. I planted 3 seeds and 2 grew. I’m sure experts could tell you what specific mix of compost, temperature and light conditions you need to ensure germination but my approach to all seeds is chuck them into a pot of whatever big bag of compost I happen to be working my way through, whack it in the porch, water it regularly and wait for it to grow as I’ve written in my ‘Sowing Seeds’ post.
Plug Plants

If you only want one or two plants and don’t have the patience for seeds, then you can buy artichokes as plug plants, though one will probably cost more than a pack of seeds. I bought the variety Tavor which is supposed to be hardier than Green Globe and matures in the first year.
I sowed the Green Globe indoors in February and then bought the Tavor plug plant in July. Both provided their first crop the following May. To be honest I can’t tell the difference in taste between the two. Both have given us a wonderful crop for a couple of years now. They’ve also survived the winters fine, even the freezing one that seemed to break half of London’s water pipes.

Green Globe 
Tavor
Propagating artichokes
So seed was only ‘one of the cheapest ways’ because in fact the totally free way of growing an artichoke is knowing someone who is growing artichokes who want to give you their offsets!
See – when I have my way and half of the people in cities are growing their own food, imagine how easy it would be to ask someone on your road for a cutting of their perennials. Or in a barter system, do a ‘swapsies’.
Anyway… Artichokes, as they mature will start sending out suckers. These are little side plants that would grow into a new plant. Generally, it’s good practise to remove these so that they don’t end up competing with your established plant.

The offshoot is just left of the much larger original stem 
This is about a month after it was separated. Be prepared for some of the original leaves to wilt and die back.
Growing conditions
Good sun is important and provide plenty of water during hot days. Yes, I’m sure there is plenty of information on how a soil rich in organic matter is best for your artichokes but the soil you have is the soil you have. Pretty much all of London (so I’ve read – I haven’t actually gone around testing samples) is clay. Mine is heavy clay and it would be too time consuming or expensive to amend it before I planted my artichokes. I have been slowly adding organic matter to the whole garden and will continue to over the next few years.
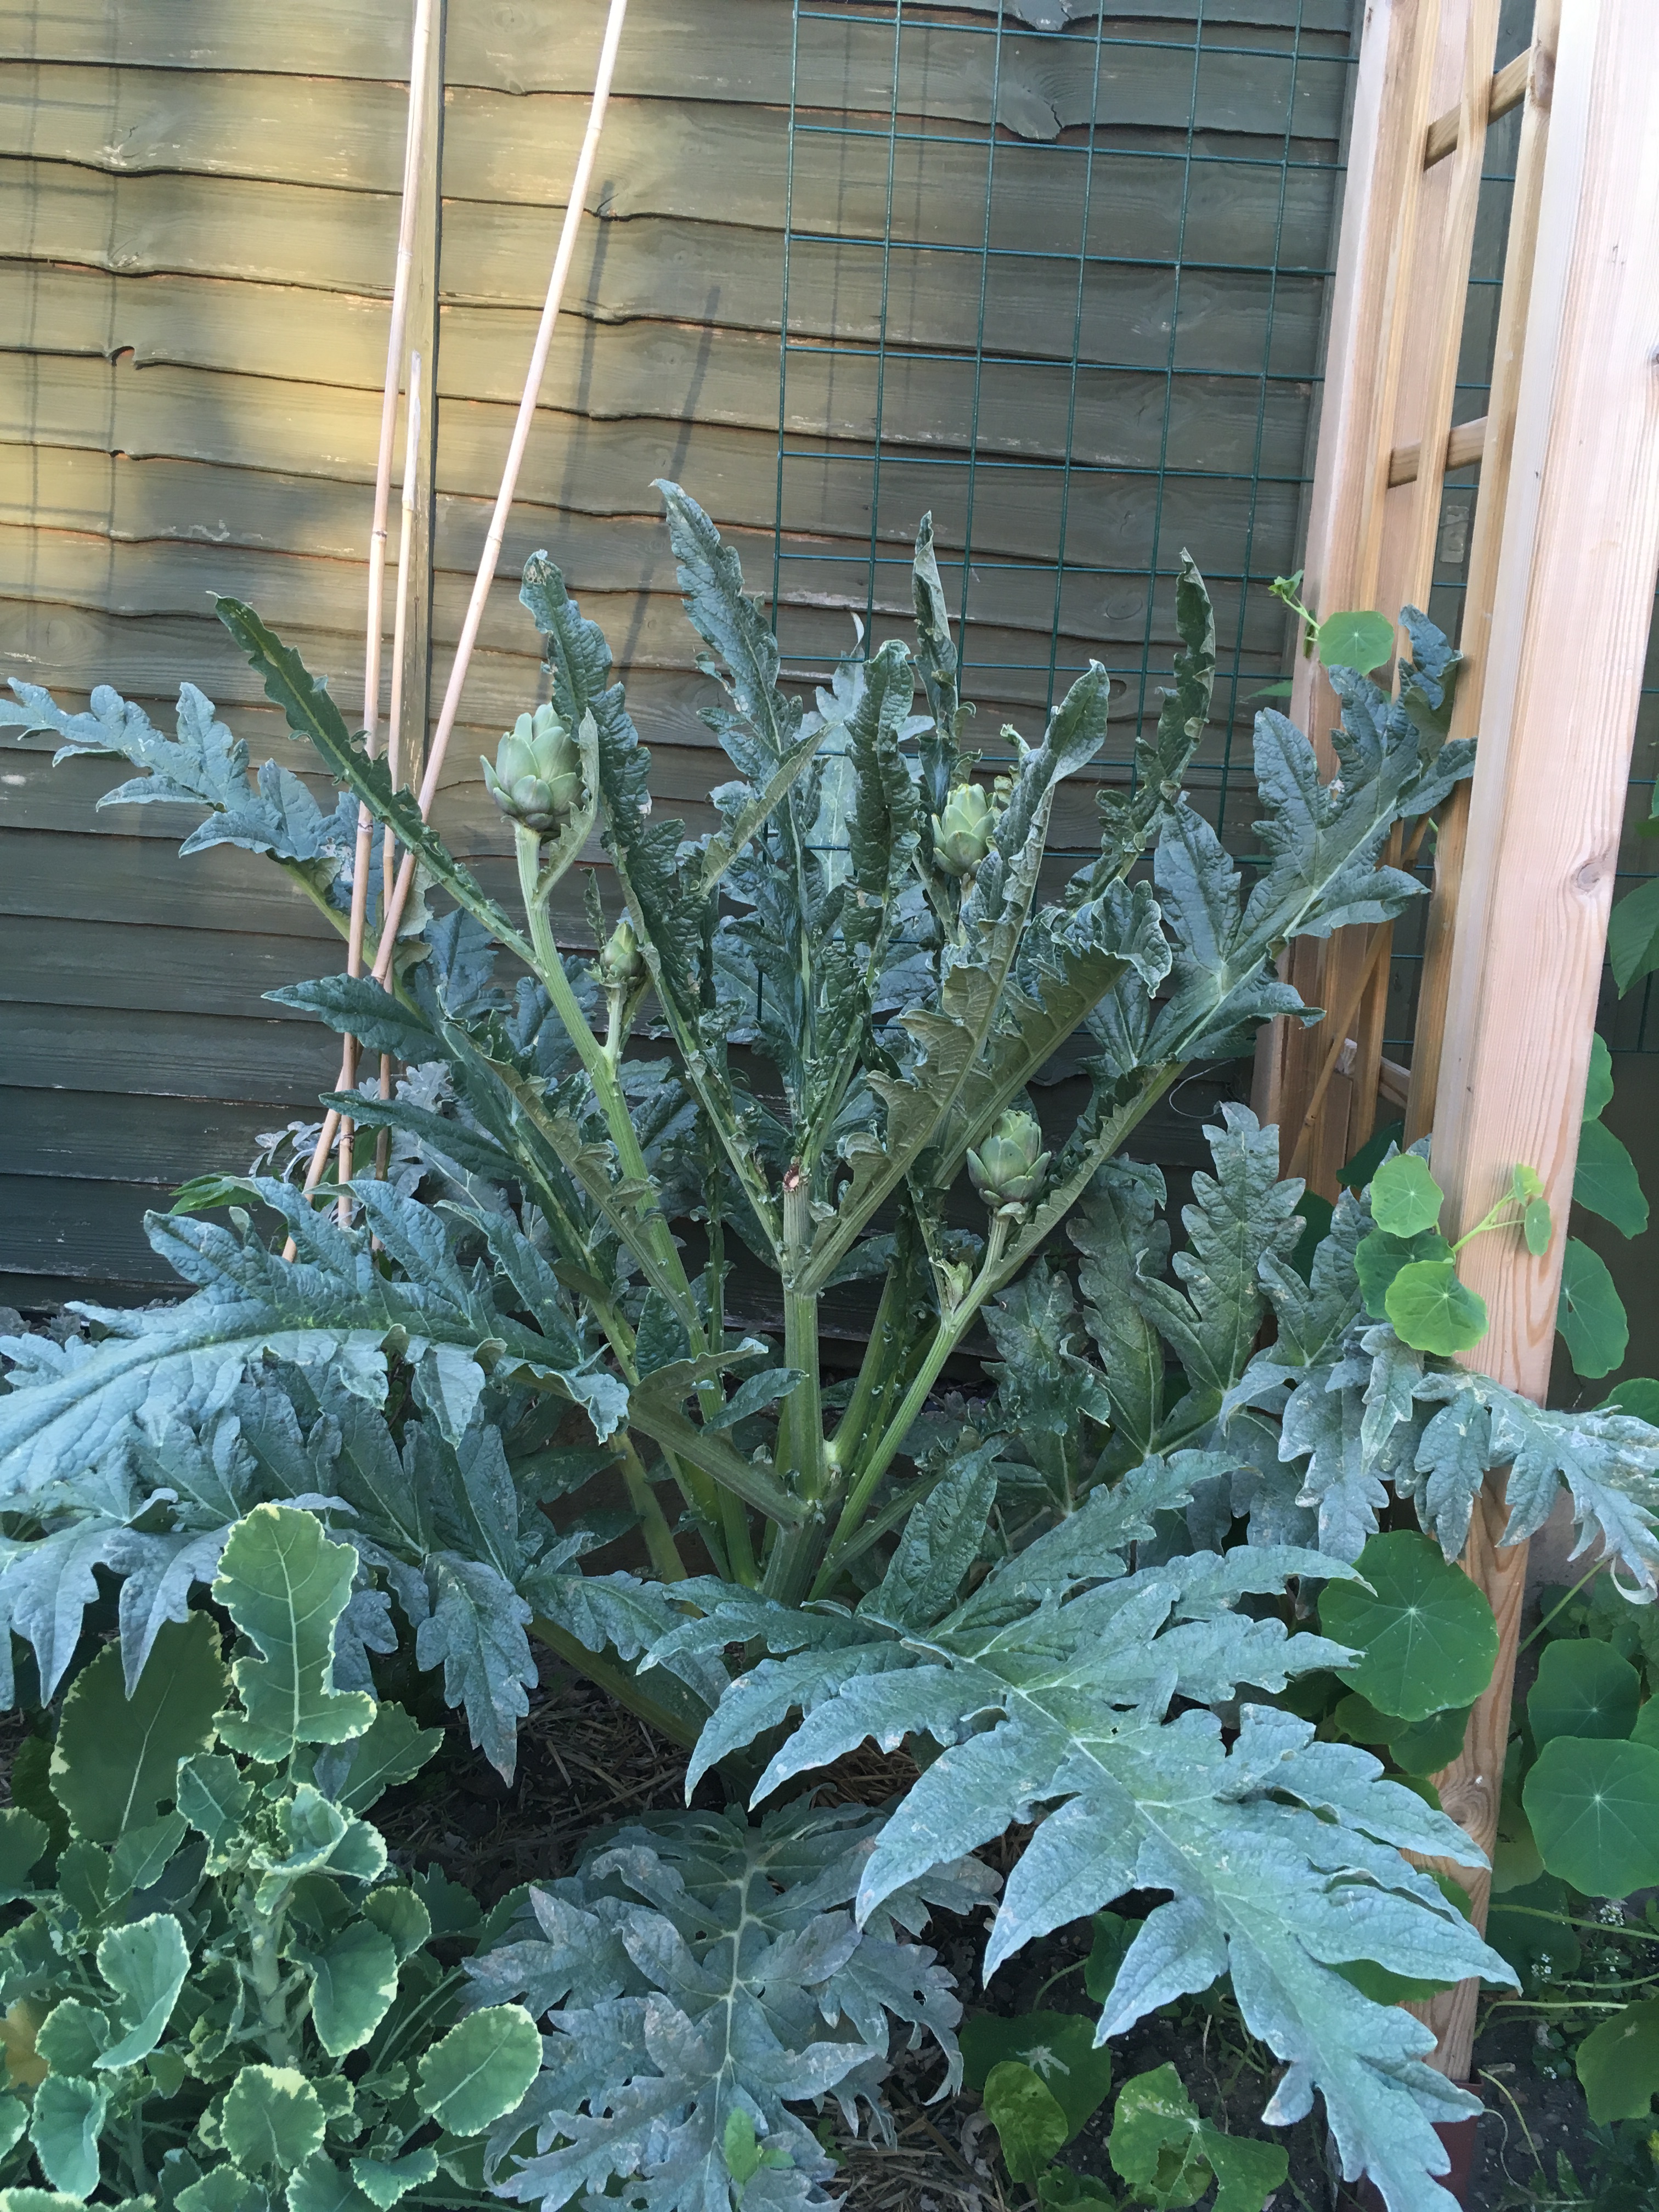
After a year the plant was about 3 foot 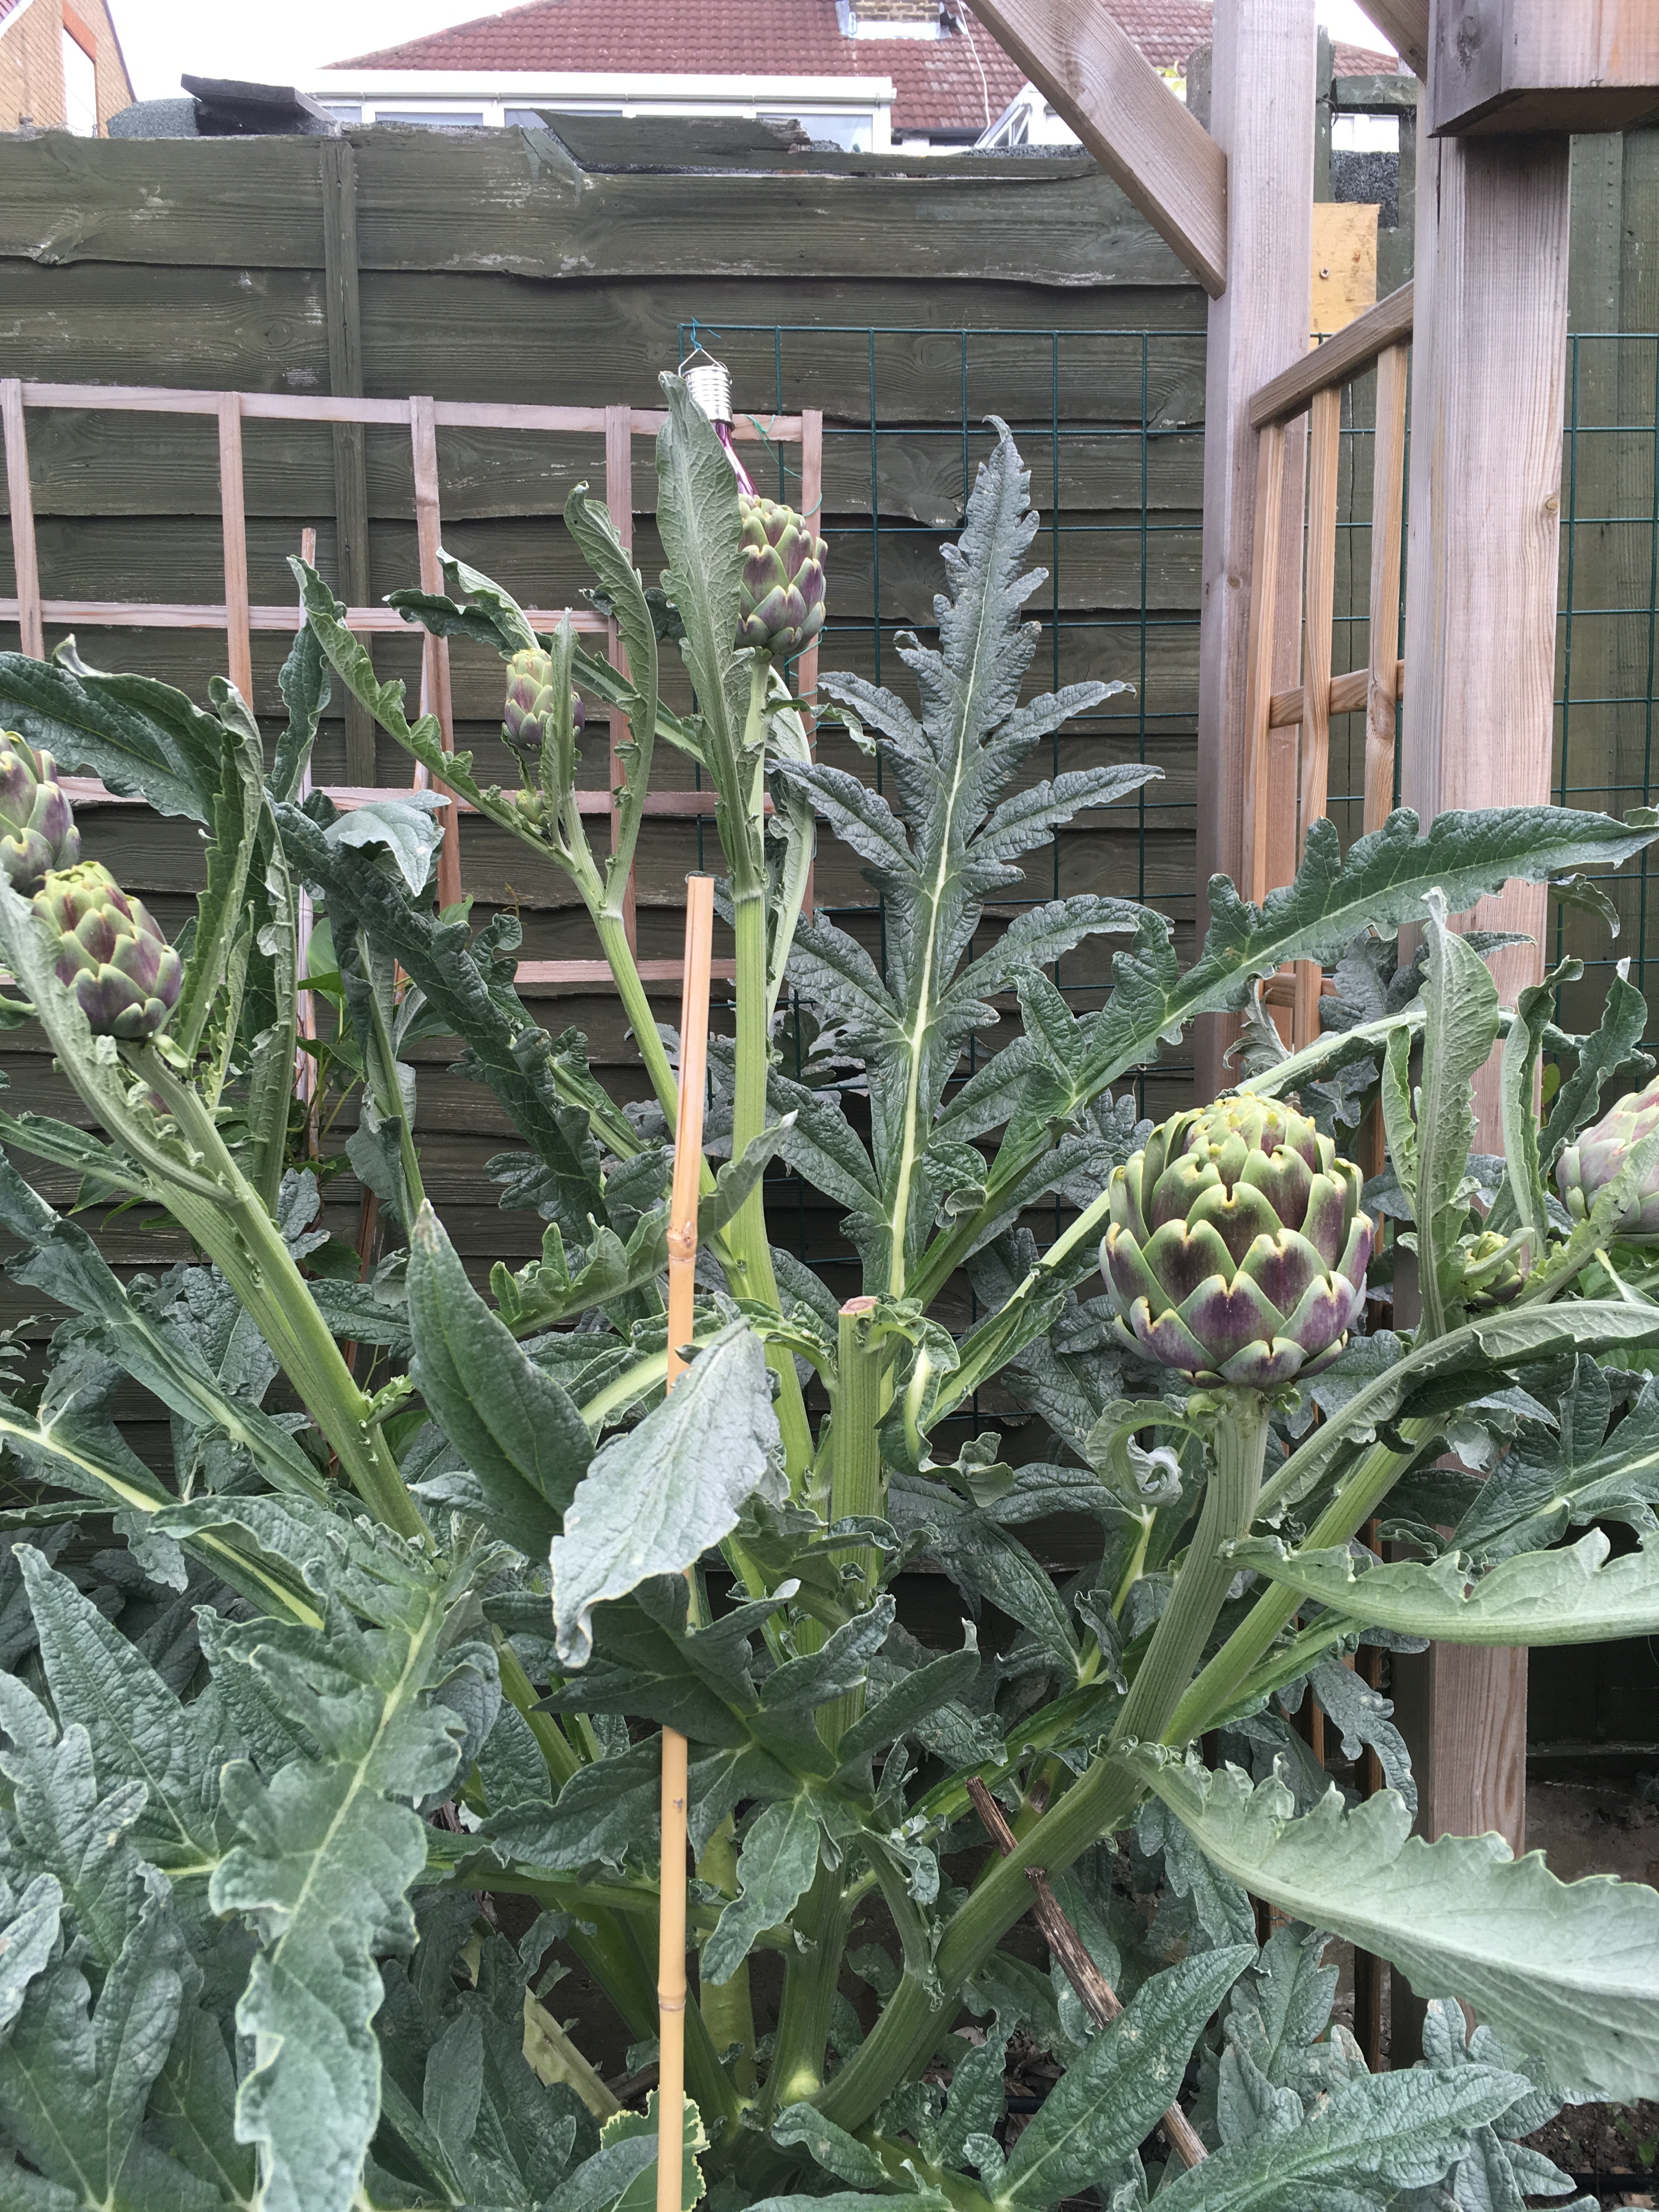
The year after the plant was about 5 foot
Harvesting Artichokes
Size is supposed to be a deciding factor on when to harvest, but the size of your buds will depend on variety and whether it’s the main bud or a side bud. Therefore, I’d say when the bud looks like it’s beginning to open it needs to be harvested. If the plant isn’t watered enough the bud will try and open prematurely and it will be tougher. I have found that my plants stay quite tight budded for a good couple of weeks and the first year I found myself harvesting them far too early for fear that I would leave it too late. That’s not a problem though as I found in these cases that the ‘choke’ wasn’t so spikey and was actually edible. You will get one big main bud and then slightly smaller side buds. I have also found that there can be some even smaller buds that appear a little while after.
To harvest, cut the stem a few inches below the base of the bud with a sharp knife or secateurs.
Preparing Artichokes
It doesn’t need to be complicated.
This is what I was told:
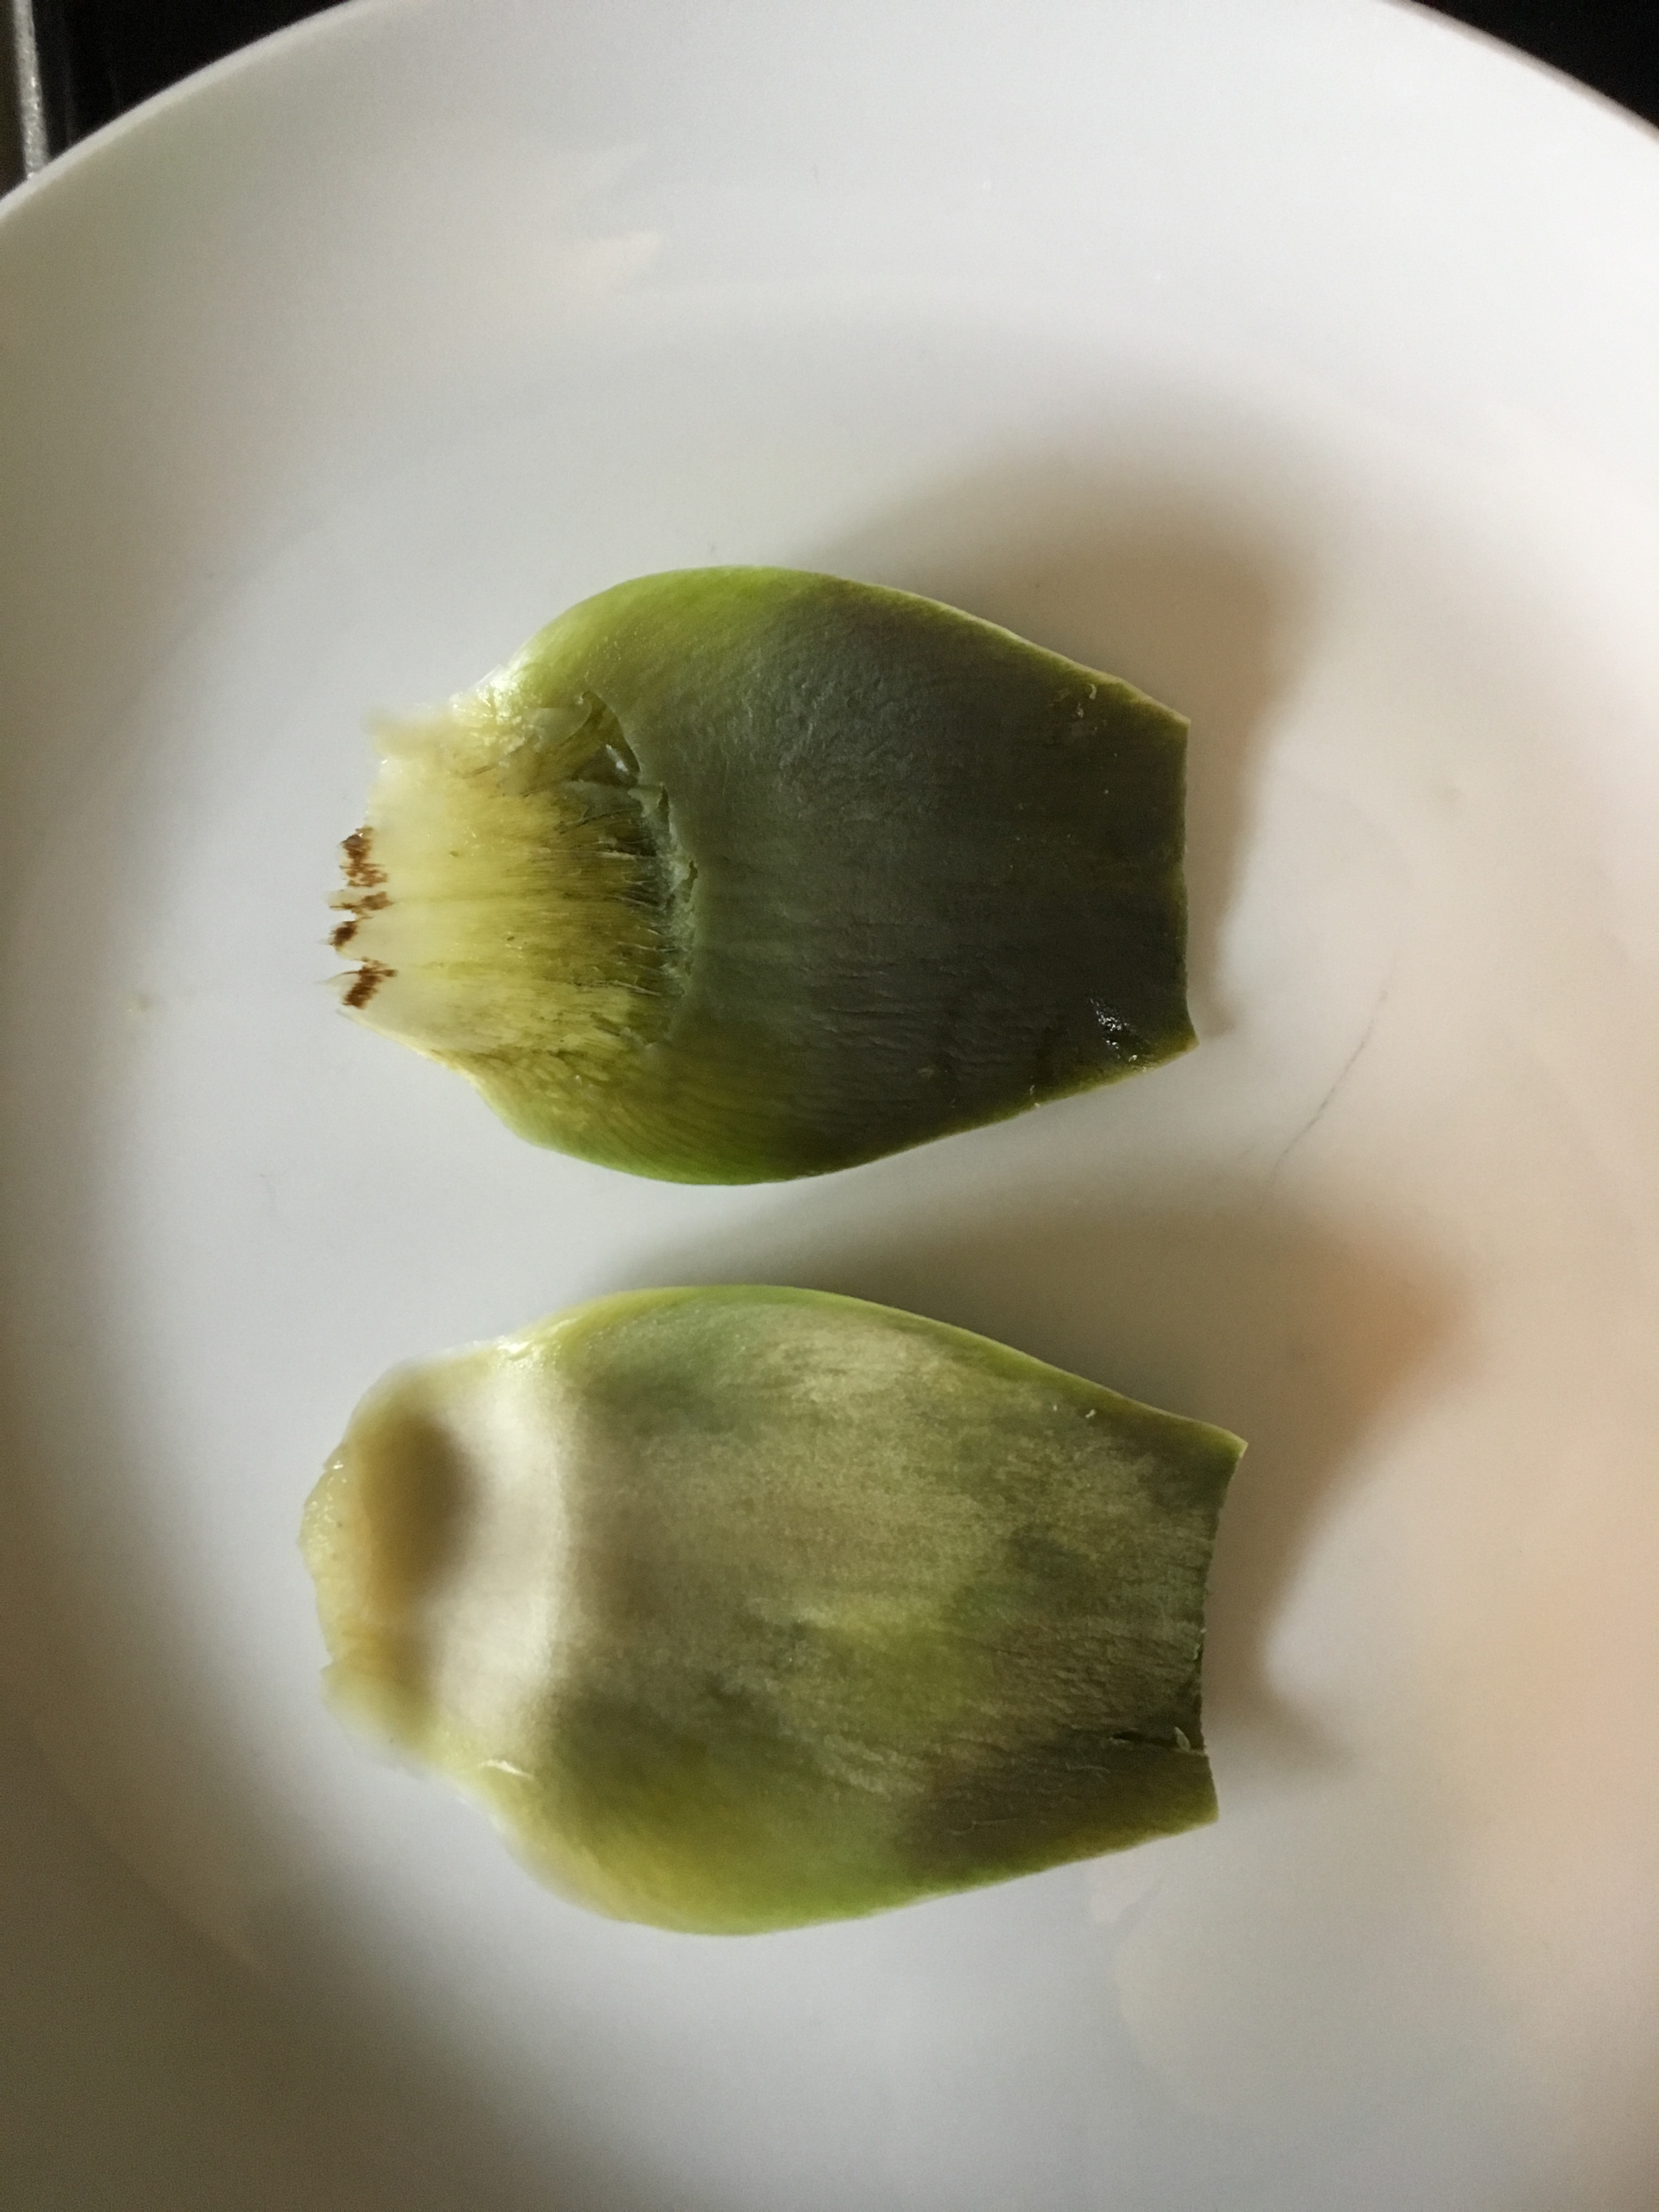
- Wash thoroughly
- Cut the stem from the base of the artichoke
- Peel the stem
- Remove the first layer or two of leathery scales
- Remove the top inch of the bud with a knife
- Using a pair of scissors cut the top of each petal to remove the thorn
- Boil in a large pan of water with a pinch of salt and a squeeze of lemon to avoid discolouration

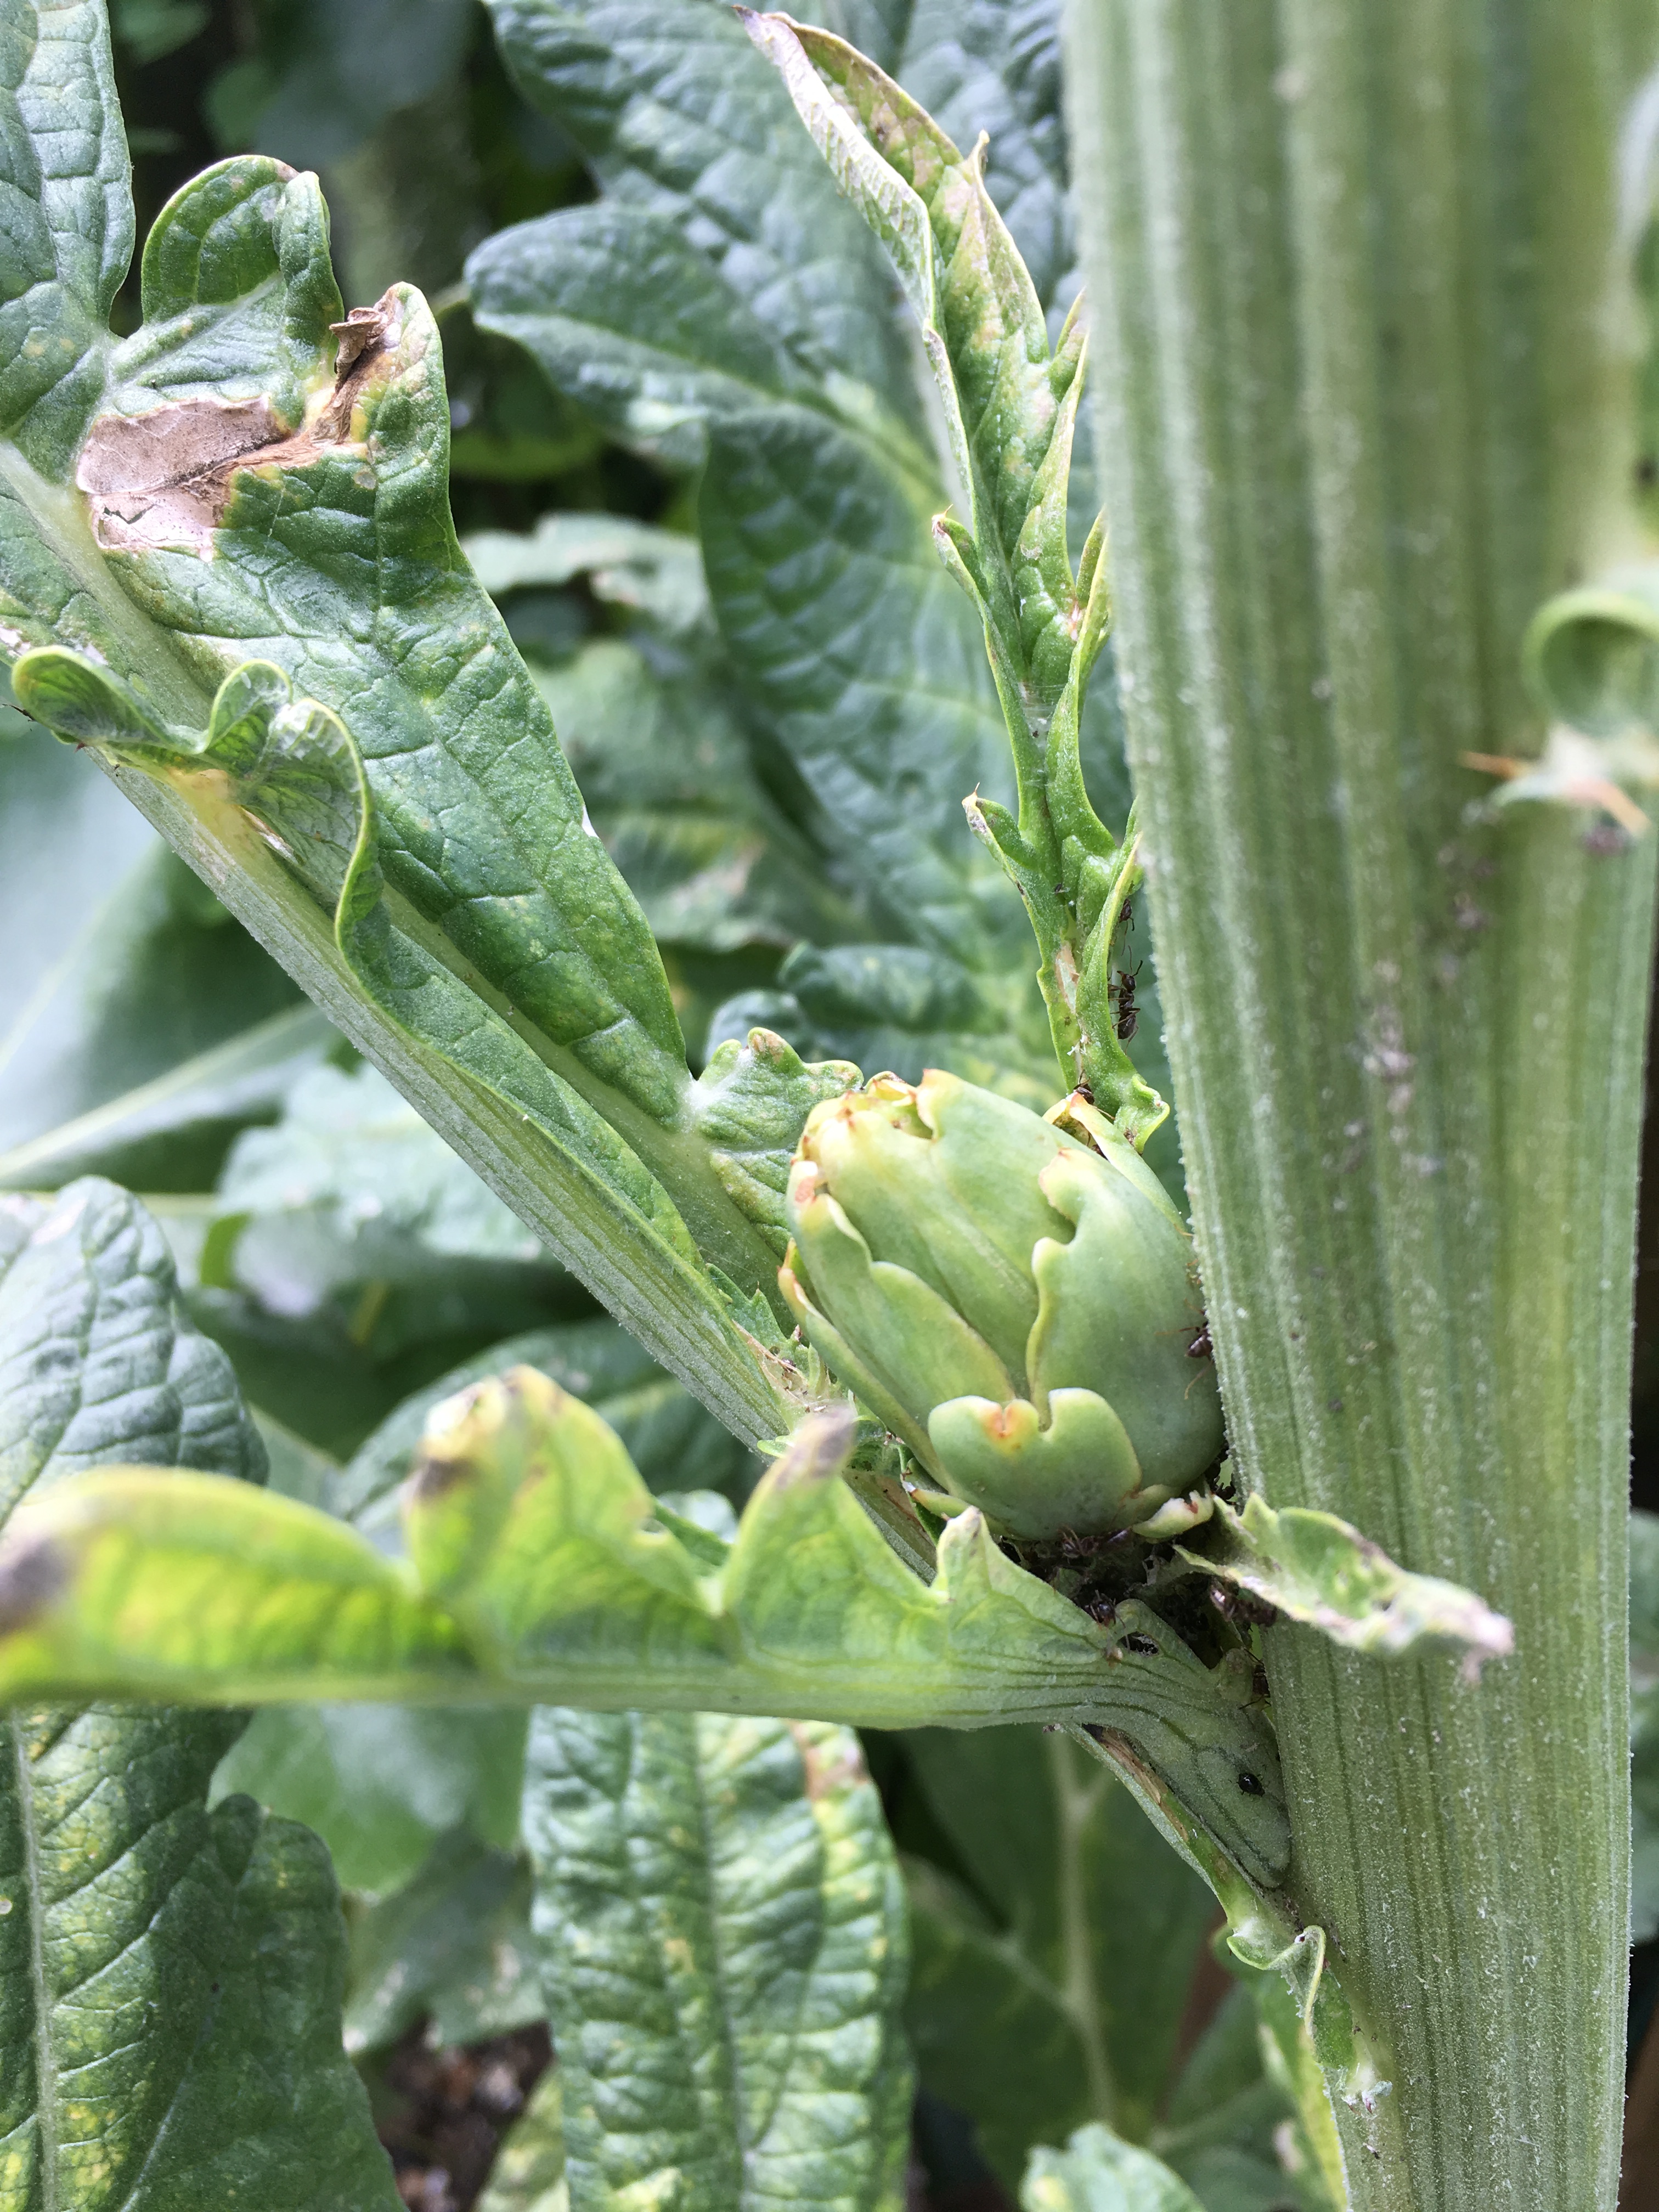
The ‘thorn’ is in the centre of the tip of the petal 
‘Properly’ prepared 
The core is the yellow bit and everything else is fibrous.
These are the only necessary steps.
- Cut the stem from the base which includes the 5 smallest petals (the first layer)
- Wash thoroughly
- Boil in a pan of water for around 20 mins or until a leaf comes away easily when you pull on it.
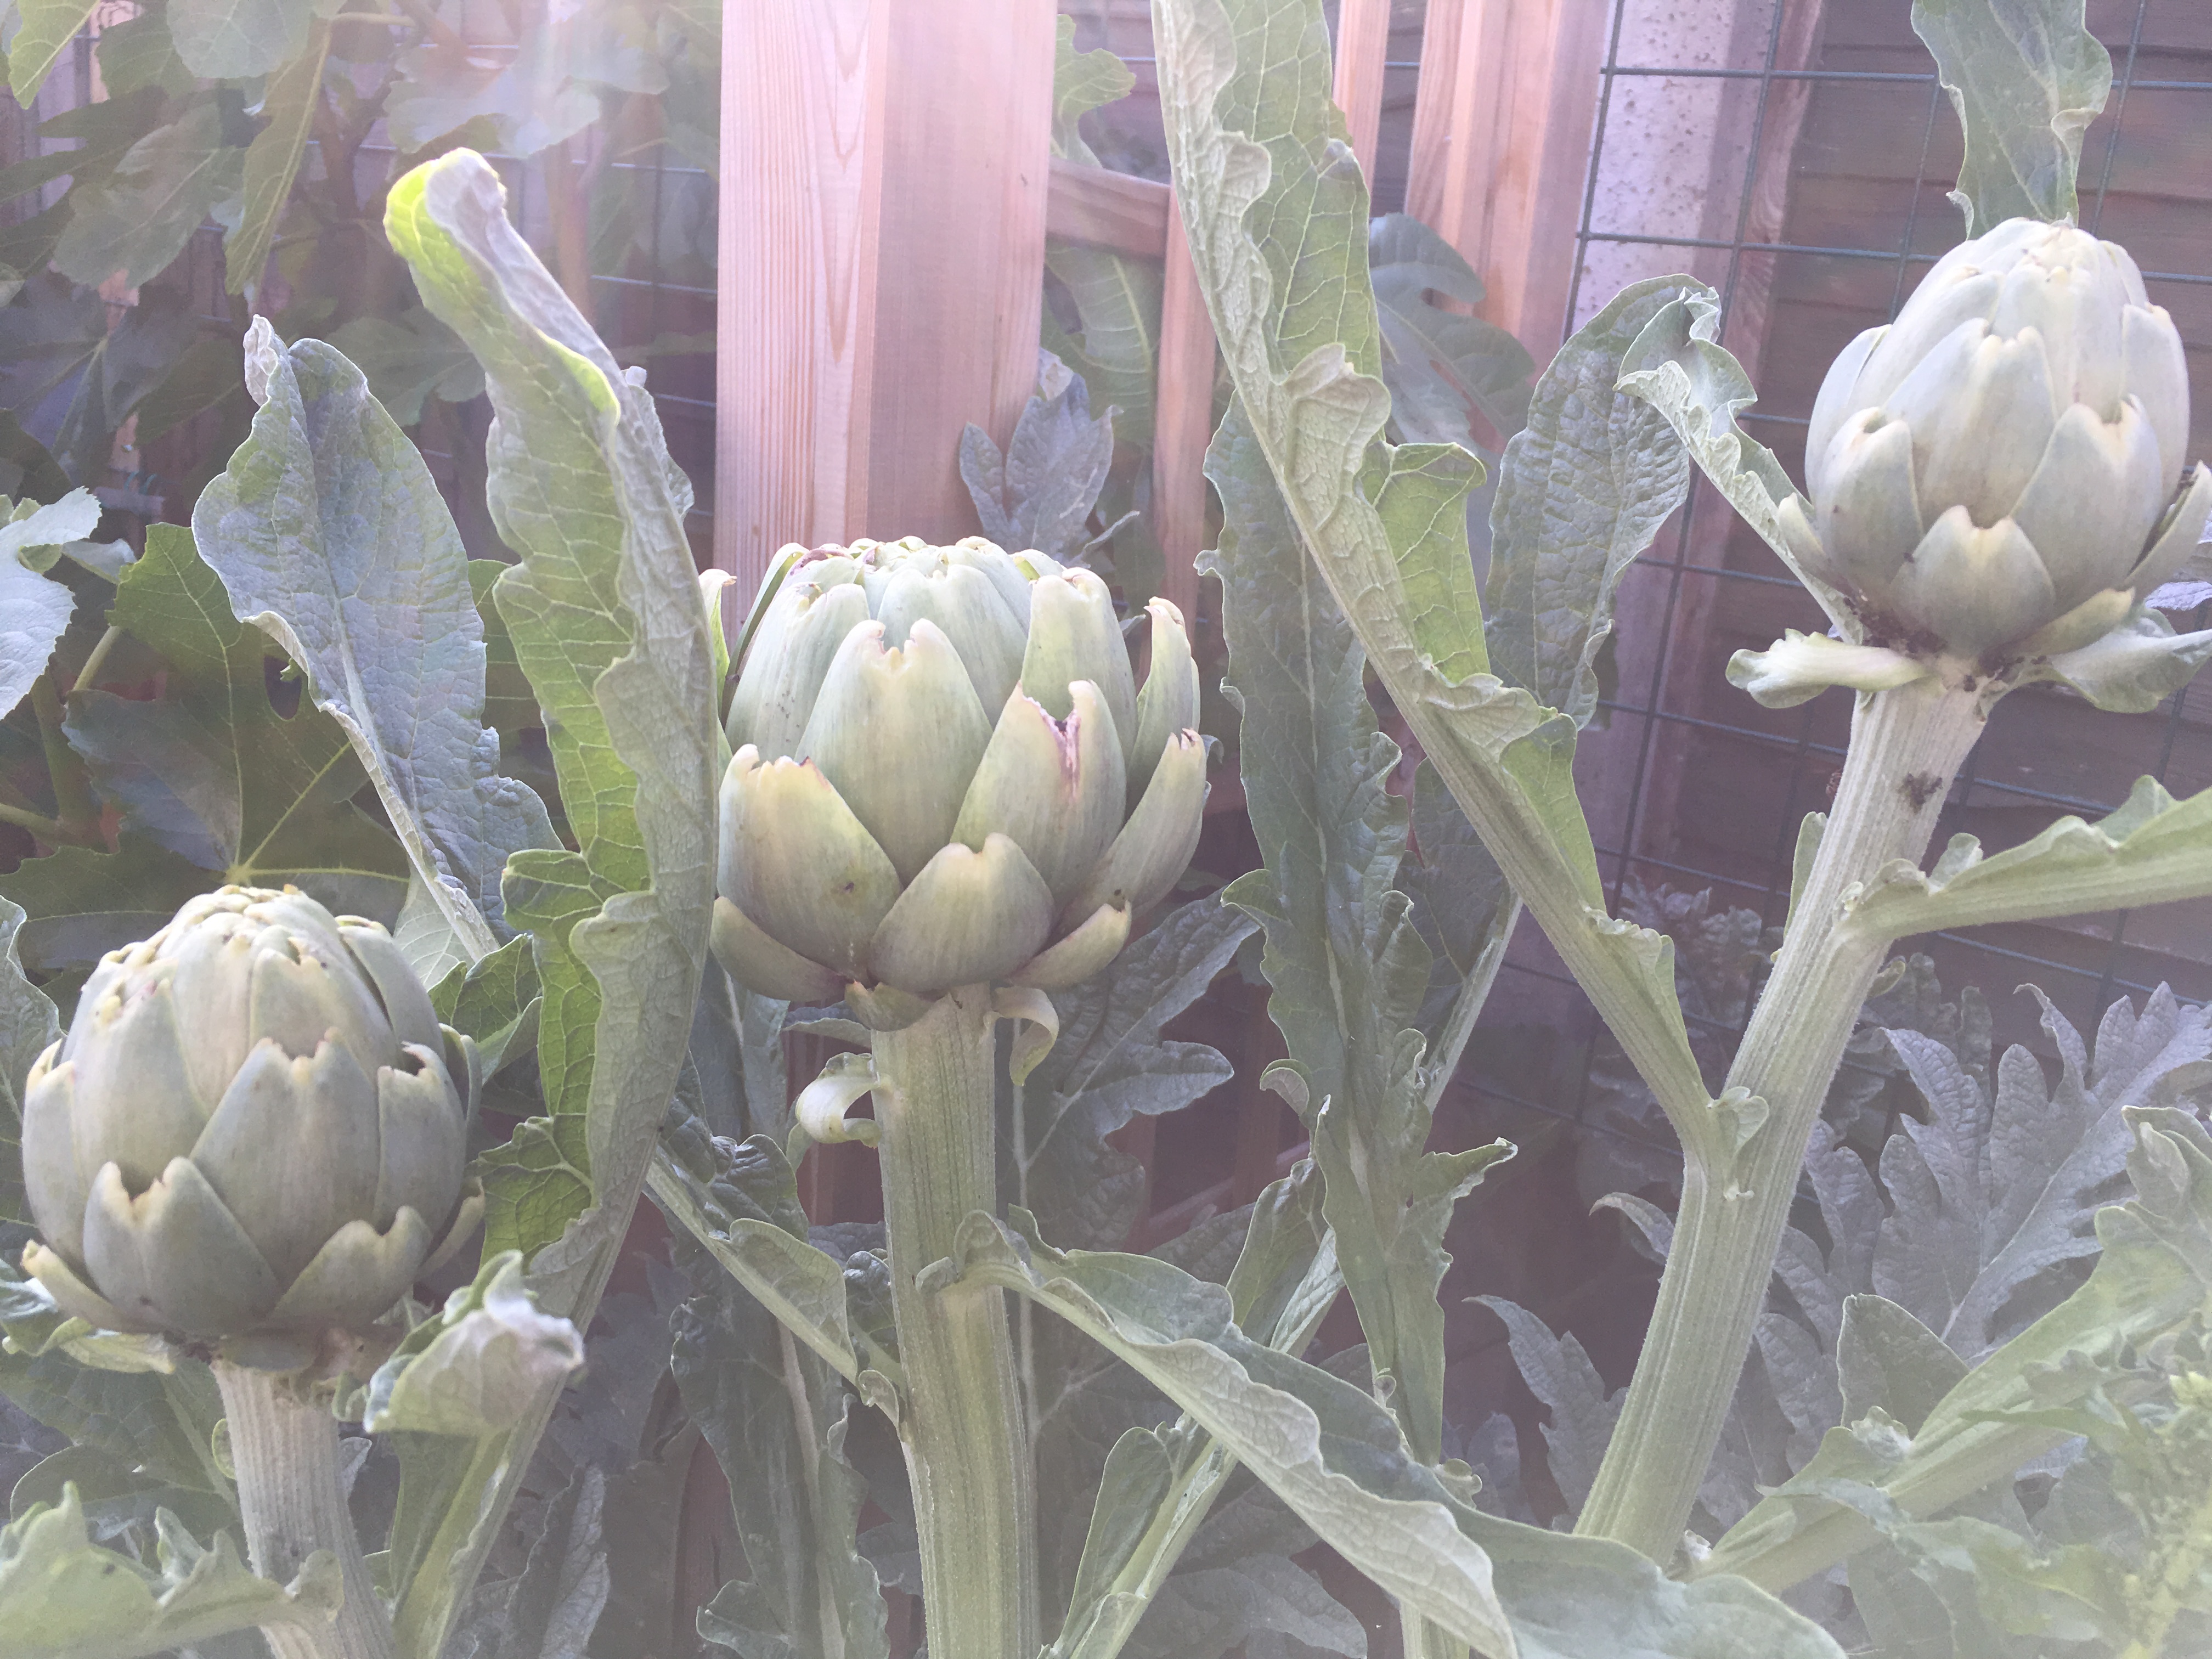
Two secondary buds of the Tavor 
Cut the base petals off when cutting the stem 
Here I prepared one fully and one the lazy way
Seriously, the rest is just minutiae. If you think the rest of the artichoke is a faff then you really won’t think the stem is worth it. If you’re trying to squeeze every last bit of eating out of the plant, then you can peel the stem and add it halfway through cooking – but it is only the very central core that isn’t fibrous. How many petals you remove is preference, but you can just cook them and try and eat them. The worst that’ll happen is you’ve left a couple of tough leaves that don’t have anything worth eating on them. Removing the top inch of the bud and the tips of the leaves is to remove the thorn but I’ve found that with most artichokes the thorn isn’t too sharp and/or the thorn becomes soft in the cooking and isn’t an issue. The last bit with the lemon and salt – sometimes I can’t find any lemon (not even bottled kind) in the fridge, or in fact I’ve forgotten both lemon and salt and it’s fine. If your bud is covered in aphids then just soak the bud in salty water for 10 mins and then rinse, pulling back the petals a little to wash in the gaps.
Eating Artichokes
So… this is where it’s fun/tedious depending on what kind of person you are.

Outer petal on top, the petals get much thinner than the one below 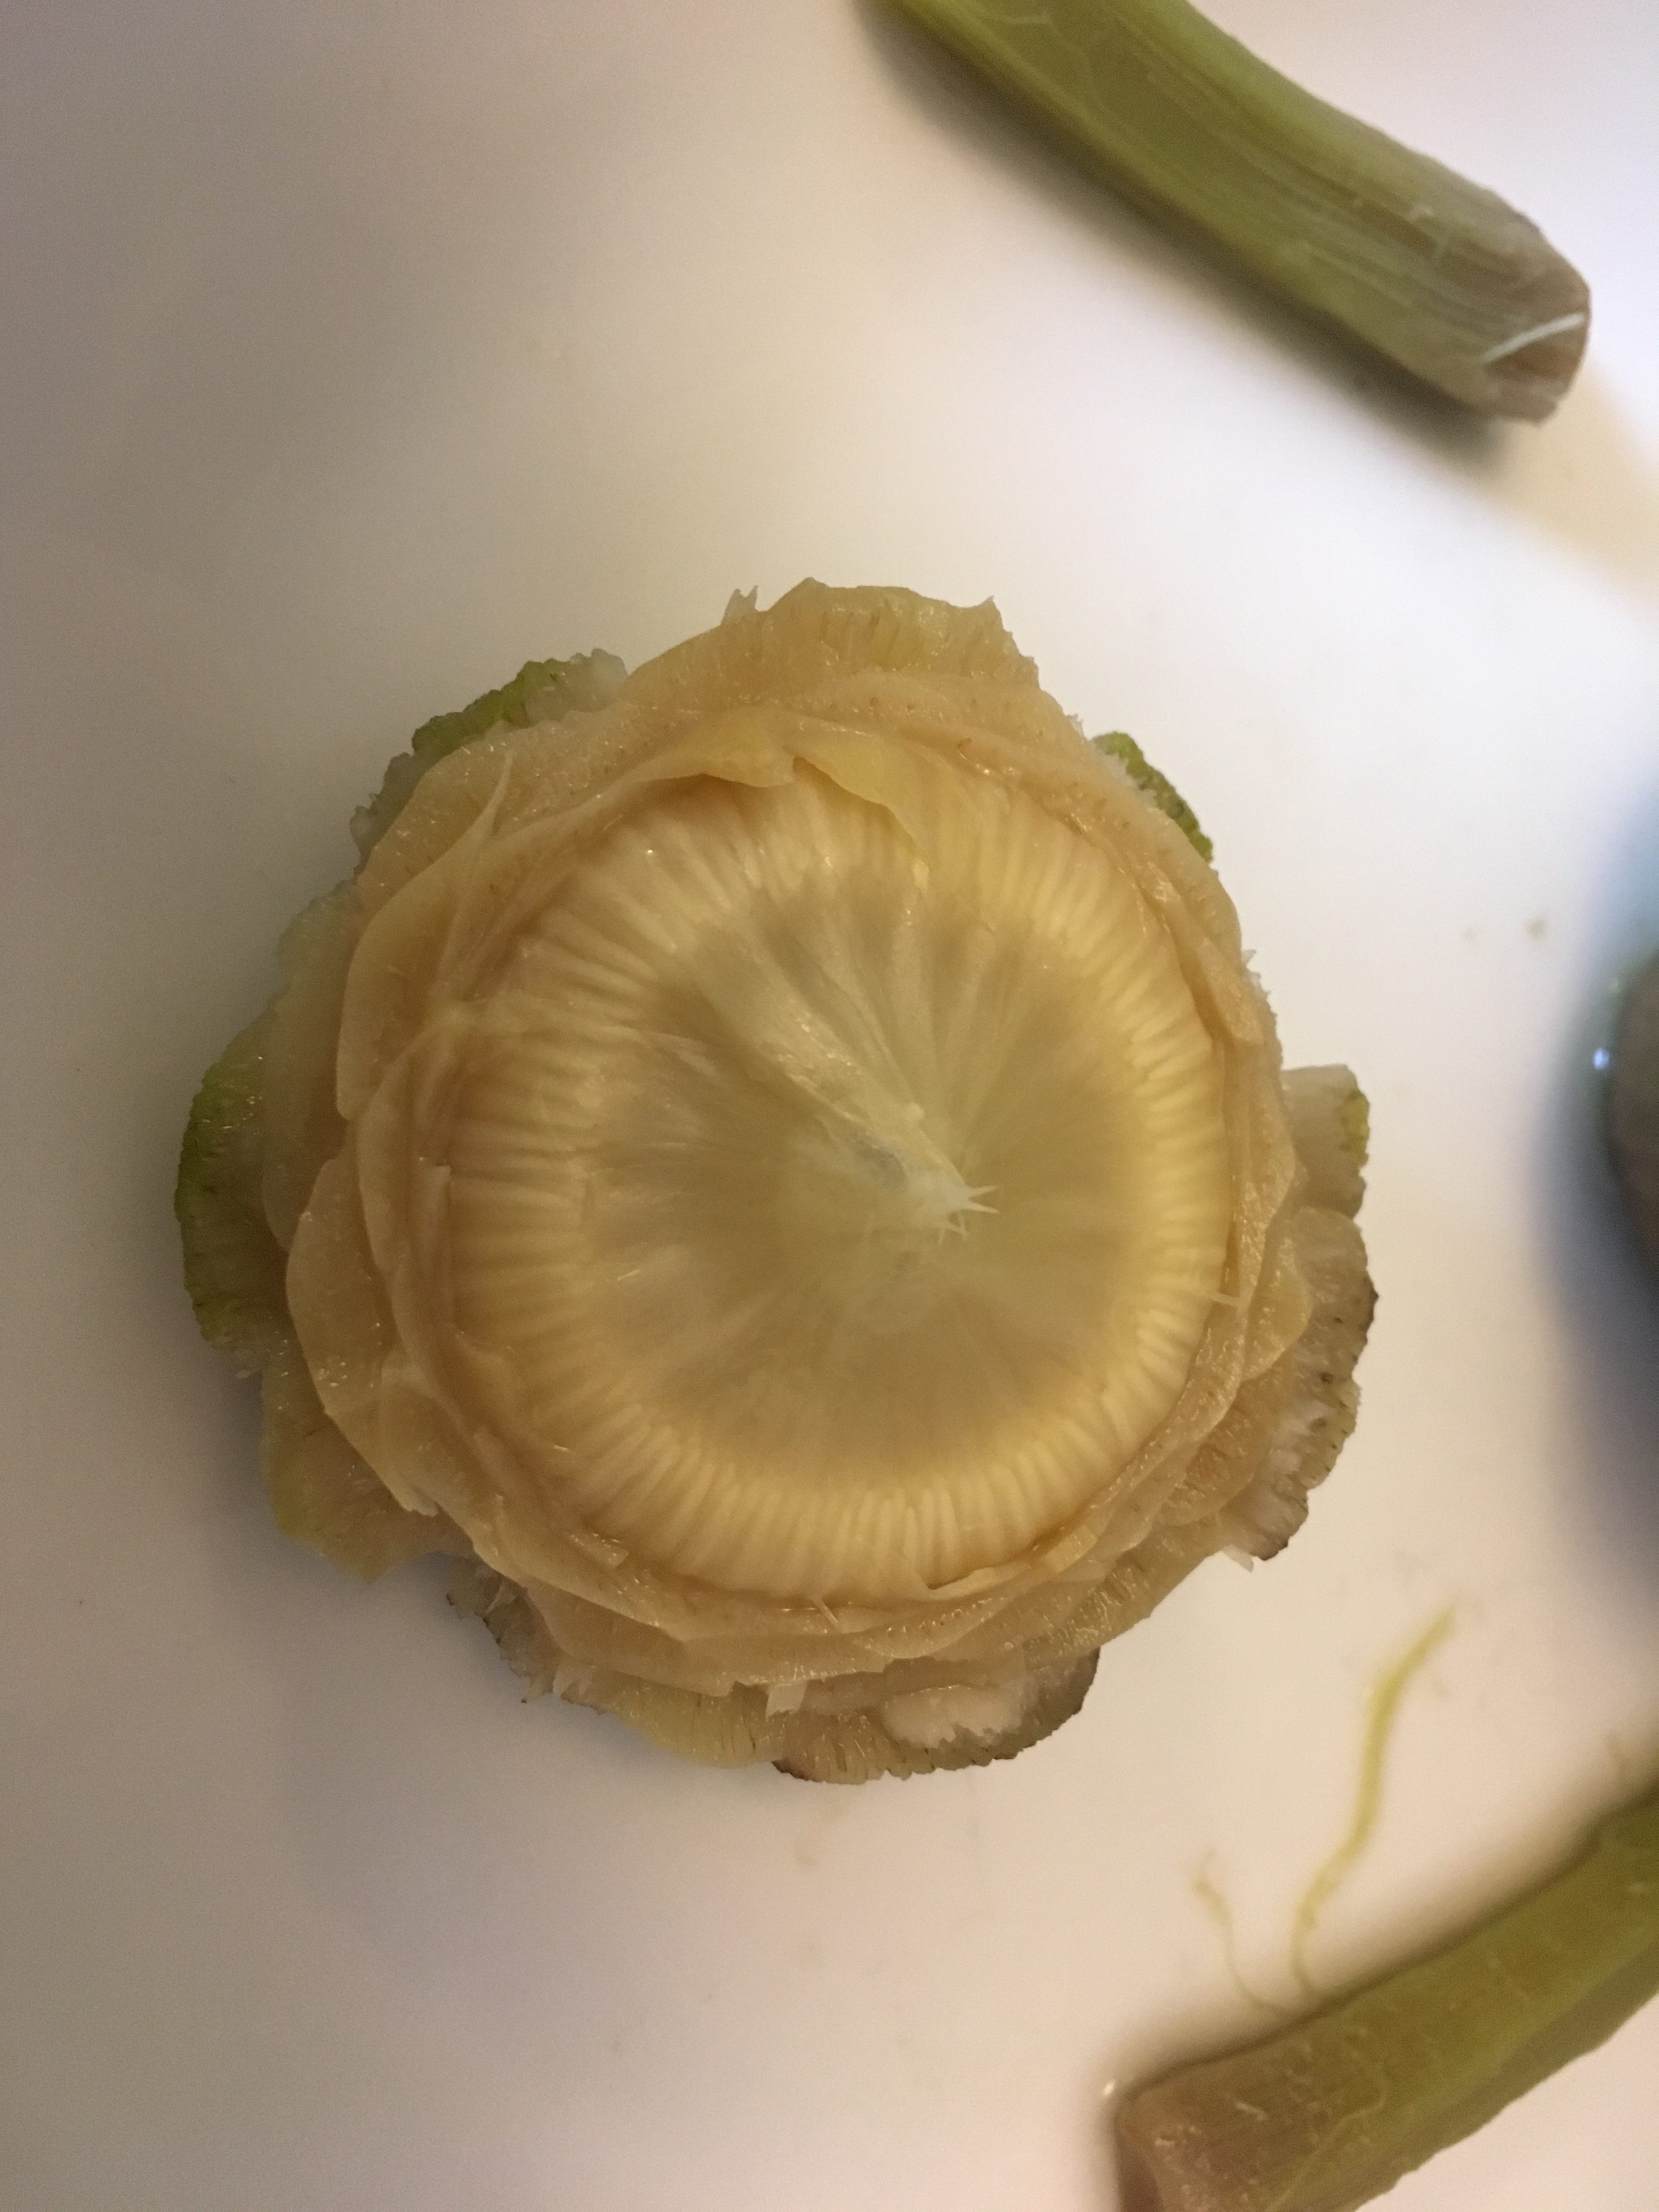
The inside with the choke on top 
The choke is easy to pull away from the heart 
Cleaned and ready to eat heart.
Using a thumb and a fingertip(s), with your thumb on the inside of the curve pull off a petal. When you lift it to your mouth, the thumb will be on the bottom. Use your teeth to scrape off the ‘flesh’ in the base inside of the petal. Do this for all the large petals. The petals get smaller and thinner as you get to the centre. For the very thin petals you can bite off anything that isn’t too fibrous. You then reach the choke in the centre. This is spikey and not edible. Scrape it off with a spoon and you’ll be left with the heart. In our family our hearts get devoured by the 3 year old.
The heart tastes a bit like taro but the artichoke (all of the bits you eat) has a funny way of making everything you eat afterwards taste sweet. It’s quite fun eating different things in between eating the petals. Try a sip of wine straight after a petal. This is because something called cynarin in the artichokes inhibits your sweet receptors. As you stop eating the artichoke and eat or drink something else the cynarin is washed away and everything taste sweet.
So literally, artichokes will make your life taste sweeter, if only for a couple of seconds.

7 thoughts on “Globe Artichokes”