I was recently contacted by Roberto at Drugwatch – a free web resource providing important health information. He asked me to share information with my readers about glyphosate, which is one of the most commonly used herbicides in the world by commercial gardeners. It is found to be highly toxic and can cause many short-term and long-term health effects. It can also be harmful to important pollinators such as honey bees.
He sent me links to two comprehensive guides that cover what it is used for, symptoms, and possible health risks.
I do appreciated a well cited article and found it to be very illuminating. I do want to share this but I’m afraid it might be a bit hypocritical of me. So, in the interest of transparency and sharing my experiences, I have to admit that I did use some Roundup when working in a community garden just over a year ago. This would be the only time I have used it though. There was some particularly difficult ivy with its roots in a crack behind a building and we just couldn’t dig it up. No matter how much we hacked at it we just couldn’t get rid of it. After much discussion and some reluctance (after reading on the packaging about the bees and the fish and the run off) we made one application. It was in winter, during a dry spell, in the hope that it would be less damaging.
In all other work I have done in people’s gardens I have always dug up ivy at the roots to remove it. In this case it was a last resort. So, there is no judgement here if you have used, or do use it. However, this is worth reading before you make your next application.
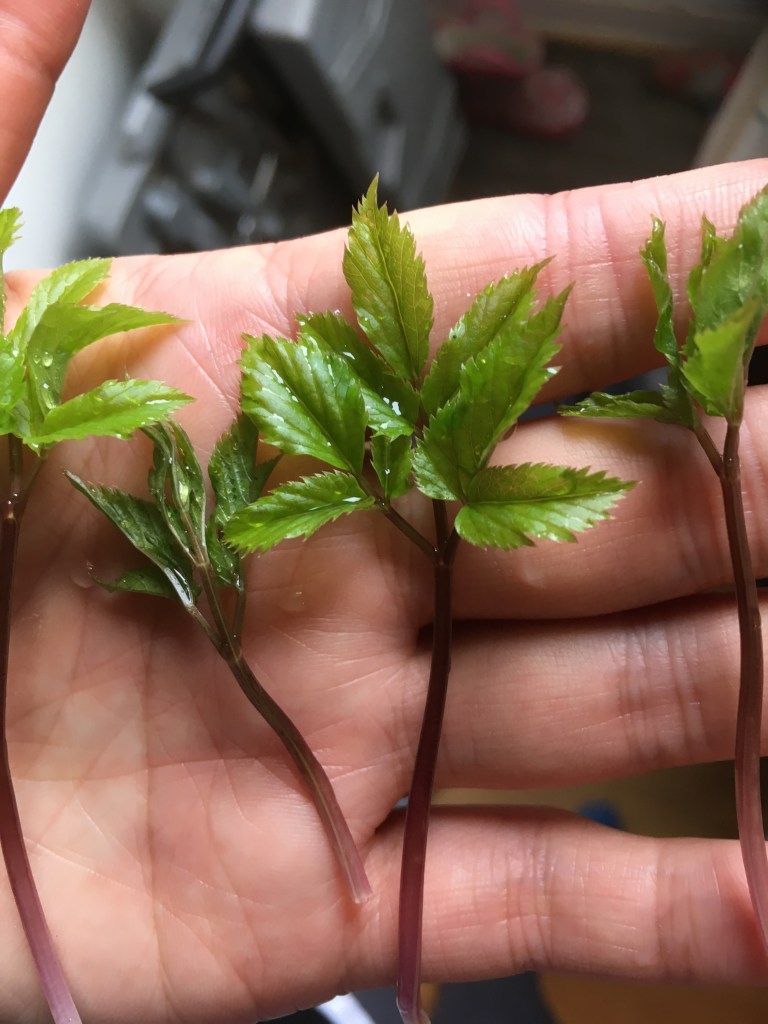
Short version: A little edible flower that fits well in little spaces. Some species are perennial and do OK in shade, some are perennial with mild winters. The biggest ones, also called pansies tend to be annual and also require more sun. They vary in taste. If you’re looking for that ‘parma violet’ flavour then you’re really looking for the very specific – viola odorata.
I am often berated by my small child for not growing more flowers. Due to the small size of our garden, I find it really difficult to sacrifice space to something attractive over edible. We compromise with edible flowers. Here is the page with more details on ‘edible flowers’. It truly is a compromise because the flowers that we do grow are often small. The bigger, showier flowers often don’t taste very nice (if they’re edible at all). There are exceptions like nasturtiums which I think are both beautiful and tasty – though little one will only eat them cooked because they are so peppery.
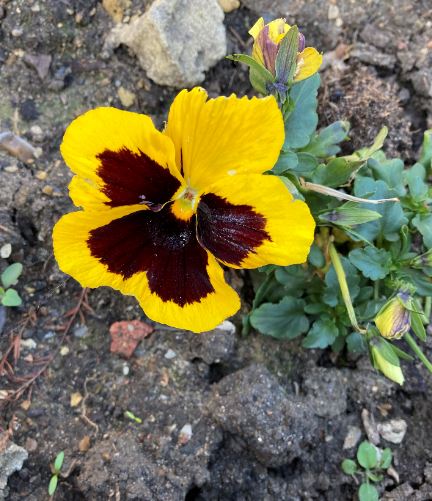
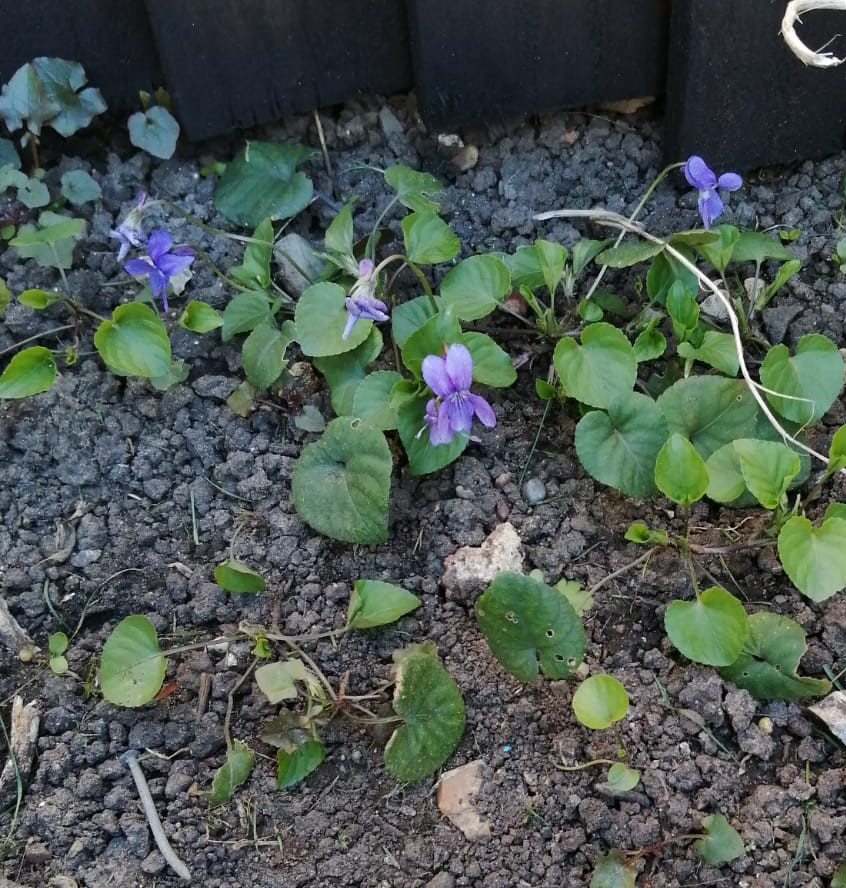
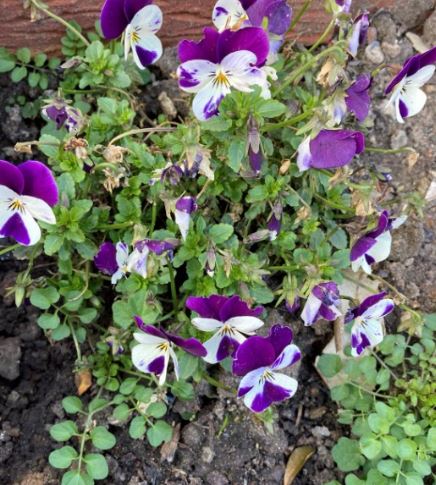
I find the nomenclature around violets are little confusing. If anyone knows better, please do feel free to correct me. I’d appreciate the education. So as far as I understand it – when people talk about violet flavour, they mean sweet violets (viola odorata). These have small purple flowers that were often crystallised and taste a bit like the Parma violets. The leaves are heart shaped. Pansies are the larger showier flowers – hybrids called viola tricolor var hortensis or viola x wittrockiana. Viola tricolor is the original wild violet, also called ‘heartsease’ or ‘Johnny jump ups’, from which other things have been hybridised. All the tricolor and tricolor hybrids have scalloped edges on their leaves (that I have seen anyway).
sweet violets / odorata
heartsease
pansy
odorata leaf on the left, pansy and other violet leaves often have the shape on the right
I have often seen the names pansy and violet used interchangeably. All of them have the distinctive overlapping two upper petals, two side petals and a bottom petal. The traditional pansy with a larger flower and blotches on the petals as opposed to lines tend to be grown more as annuals. Many of the pansy varieties have been bred to grow and bloom over winter.
How to grow
You can often find these in garden centres as little plants. The most popular ones are pansies due to their larger size and variety of colours. I found lots of different varieties grow fine from seed. It takes more effort, but it is much cheaper. The seeds are tiny, so it is tempting to sow lots together. Though there’s nothing wrong with planting a few and then thinning later, I prefer to and plant a single seed in a little pot, like half a toilet roll so that they can go straight into a hole, pot and all, when ready to go outside.
Violets are generally half hardy perennials. This means that they will do fine over winter as long as conditions are not too harsh. In the south of England, where we are, they tend to do fine even now in the snow and in the frost that have happened so far. They probably won’t survive the conditions further up north. This is why they are often grown as annuals.
They grow best in some sun, but I found they can do fine in quite a bit of shade. Because the sweet violets (viola odorata) are often found in woodlands, I plonked them in rather deep shade behind the apple tree. They survive fine there but they don’t flower particularly well. The tricolour and smaller violets do fine in shady spots. I suspect they don’t produce as many flowers the deeper into the shade they are though. They do best in spring sun and summer shade.
shady spot for heartsease
short plants in corners
odorata in shade
They generally tend to be very short plants, so do very well squeezed into little gaps in and around vegetables where they don’t compete for light. We do have a lovely trailing variety which did better in a hanging pot (made from repurposed 2 litre bottle) in the shade than in the sun. They seem to do well in pretty much all soil types and soil acidity.
the violet in the ‘hanging basket’
They can grow almost throughout the year, depending on when you’ve sown them, their position and amount of light they get. Pansies require more sun to grow and don’t fare well in shade. They are also much less hardy and only behave as annuals where the winters are short and mild and the summers are not too hot.
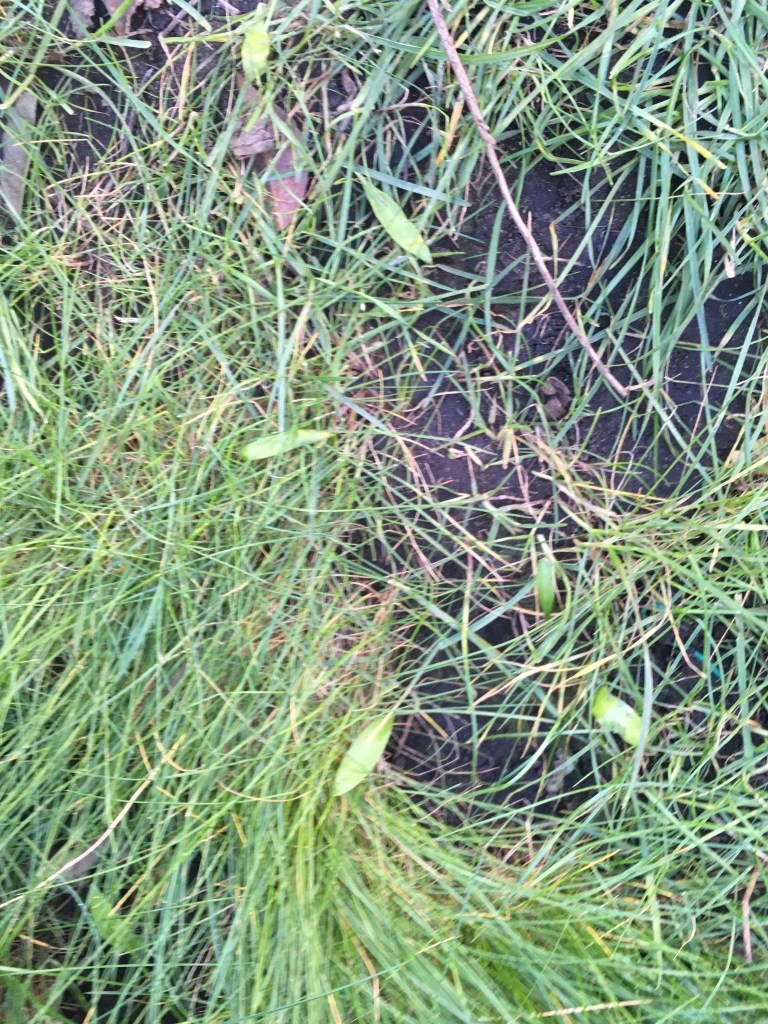
I am trying to replace the lawn with edible flowers and the low growing violets are perfect for this.
How to harvest
If you grow them close together you can get a beautiful show of colour and picking a few out for a salad doesn’t make much of a dent. However, we tend to grow them all over the place, tucked in where we feel like it. Little one finds it more satisfying when she has to hunt for flowers. We have flowers from March till about December/January, depending on how cold it gets. In the warmer months like May and June we get quite a lot dotted all over the place. Around November, December and January we only really have on average about one a week from our various plants. You can harvest the flowers whenever you see them, and you can harvest the young leaves but if you pick too many it will affect the flower production.
In early March, the sweet violets are the first to appear. The other violets are in bud. However, when they flower depends on the variety and when you sow/plant them.
How they taste
When you say violets people generally think of Parma violets. Only the sweet violets will smell and taste like these. The leaves are also pleasant and slightly mucilaginous (a bit like musk mallow leaves). I’ve read that dog violets, which look almost identical to sweet violets, taste bland and slightly bitter. I haven’t had the chance to try these yet.
Most of the other violet flowers tend to taste a bit like lettuce with varying degrees of wintergreen, depending on the variety. For anyone who doesn’t know what that taste is – imagine deep heat. Yes, the spray for muscles. The leaves have a similar flavour. It’s up to you to decide it that is an acquired taste or not. At least you can use them as a garnish without having to worry about poisoning anyone.
parma violet taste
violets sparsely in salads
violets as garnish
The bigger showier pansies taste more lettuce like. I’ve had a couple that had no wintergreen flavour at all.
Warning
Just a word of caution. African violets are a completely different family and are NOT edible. All of the viola family are edible but I’m not saying all taste great. Also I would not recommend eating flowers that you haven’t grown yourself as you don’t know if they’ve been sprayed (with chemicals… or er… by animals). Also it is possible that you may have an allergy to something you haven’t tried before. I get a funny tingle when I eat sweet violets, but not the other violets. I wasn’t sure if it was an allergic reaction or something in it makes my tongue tingle (like the way artichokes make things taste sweet) until I came across this website that talked about violet stems causing a problem. This is the only time I’ve seen this (though I have read that the seeds and roots are not for consumption). Proceed with caution and if something feels funny then it may be wise to give it a miss.
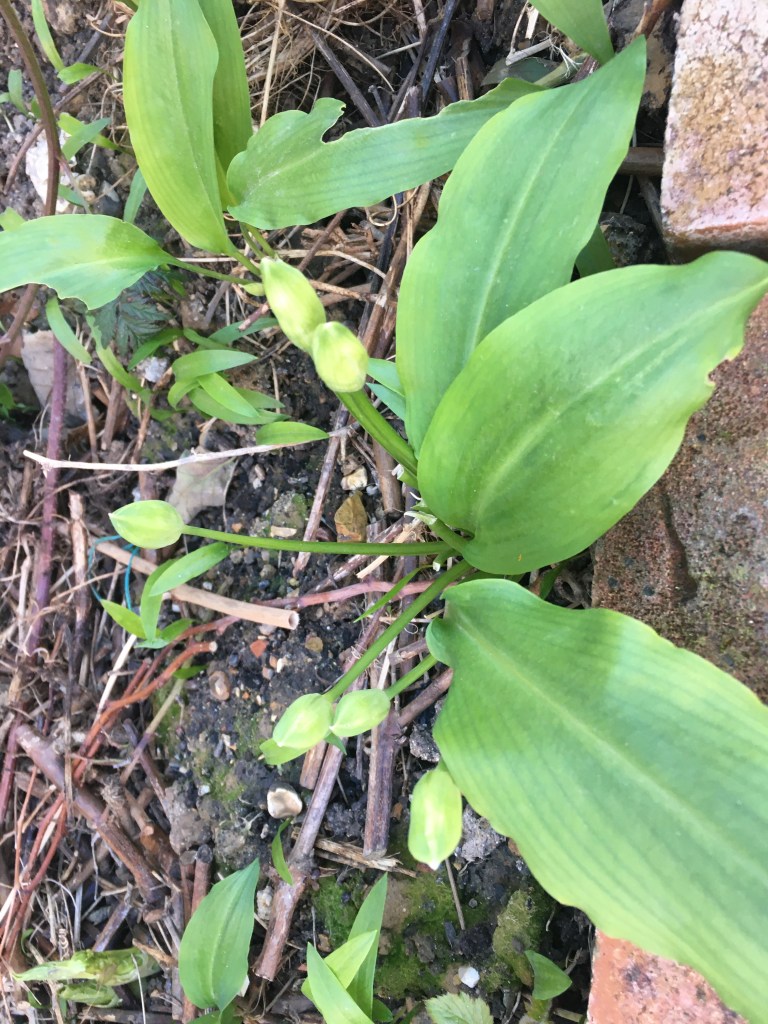
A lovely perennial allium that is a forager’s dream. It’s safer to grow it as there is a particular dangerous lookalike and the freshly picked leaves do wilt rather quickly. It will happily populate a shady corner of the garden and provide you with fresh garlicky (oniony when cooked) greens through the hungry gap and beautiful white flowers that pack a punch in a salad.
I have childhood memories of woods that smelt strongly of garlic. I found it strange that something wild could smell so strongly of food, having clearly not understood that all our cultivated plants come from wild species that we have ‘domesticated’.
Then in Easter 2017 on a family get-together in Wales we came across a wood stuffed full of wild garlic. Despite the protests of my fellow holiday goers, including my then 1 year-old child, I felt the need to forage, cook and serve a bag full of wild garlic for dinner. It was met with general approval. Just as an aside, it was very carefully sorted, and every leaf sniffed to ensure it was definitely wild garlic. Foraging for wild garlic does often come with a warning. The leaves of the wild garlic look very similar to lily of the valley, which also grows similarly well in woodlands. When not in flower I don’t think I’d be able to tell them apart. The garlic smell is the giveaway, but if you are collecting large amounts (it wilts down quite a bit upon cooking) the smell of garlic on your hands may stop you from being able to tell if you pick up an errant lily of the valley leaf. This is very important as ingesting the leaves, flowers or roots of lily of the valley is dangerous and may even be fatal. Anyone else thinking of Breaking Bad?
My little niece looking at swathes of it in Wales
Later that year, when we moved house to a place with a real garden, I knew I would want to find a spot for my own patch – where I could be sure that there was nothing dangerous growing.
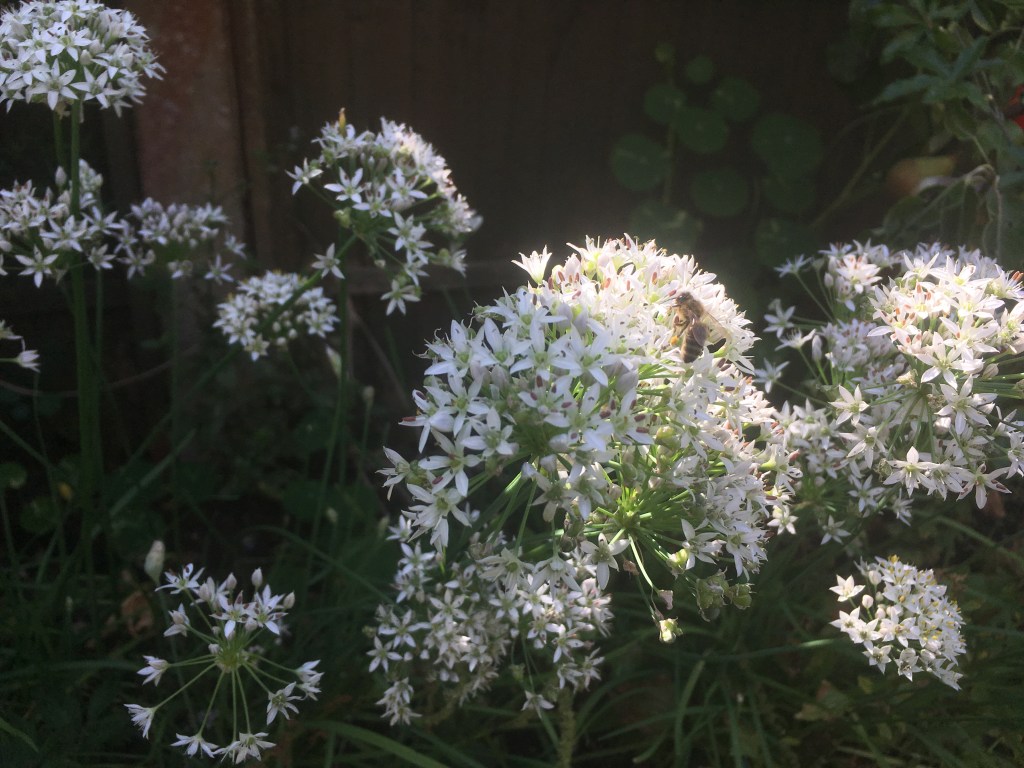
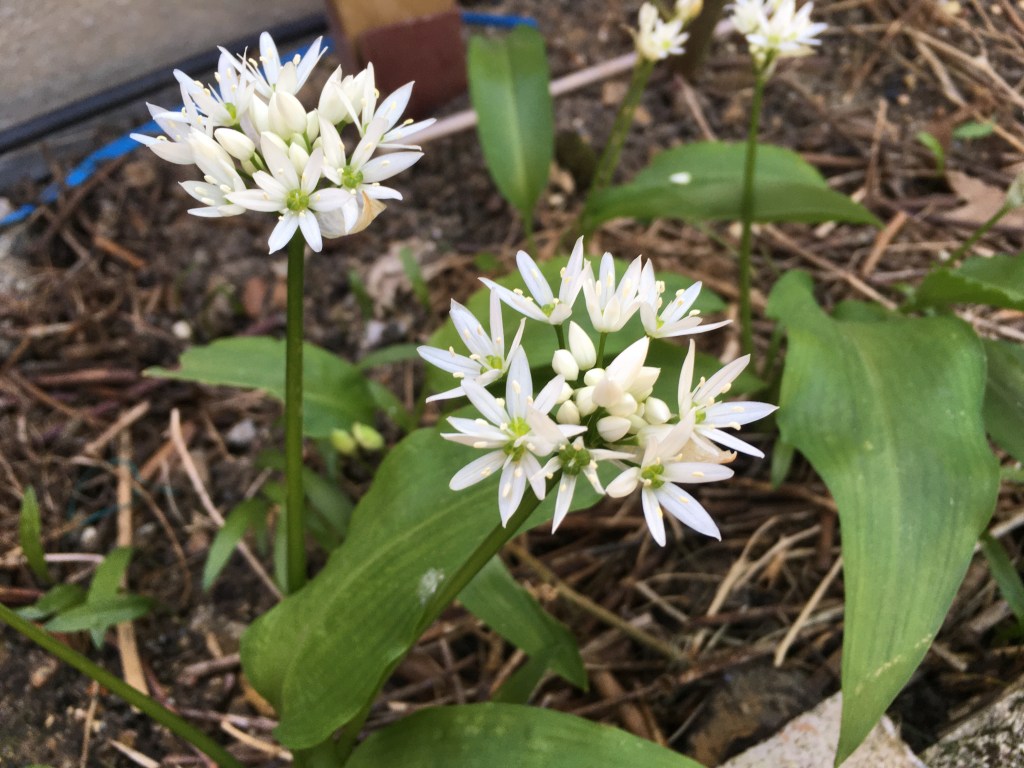
The scientific name is Allium ursinum, also called ramsons and bear garlic and unlike most alliums it has very broad lanceolate leaves that curl outwards as they grow. Their white flowers are fairly typical for alliums, but they don’t form balls the way most allium flowers do. They look very similar to the flowers of Chinese (also called garlic) chives.
How to grow
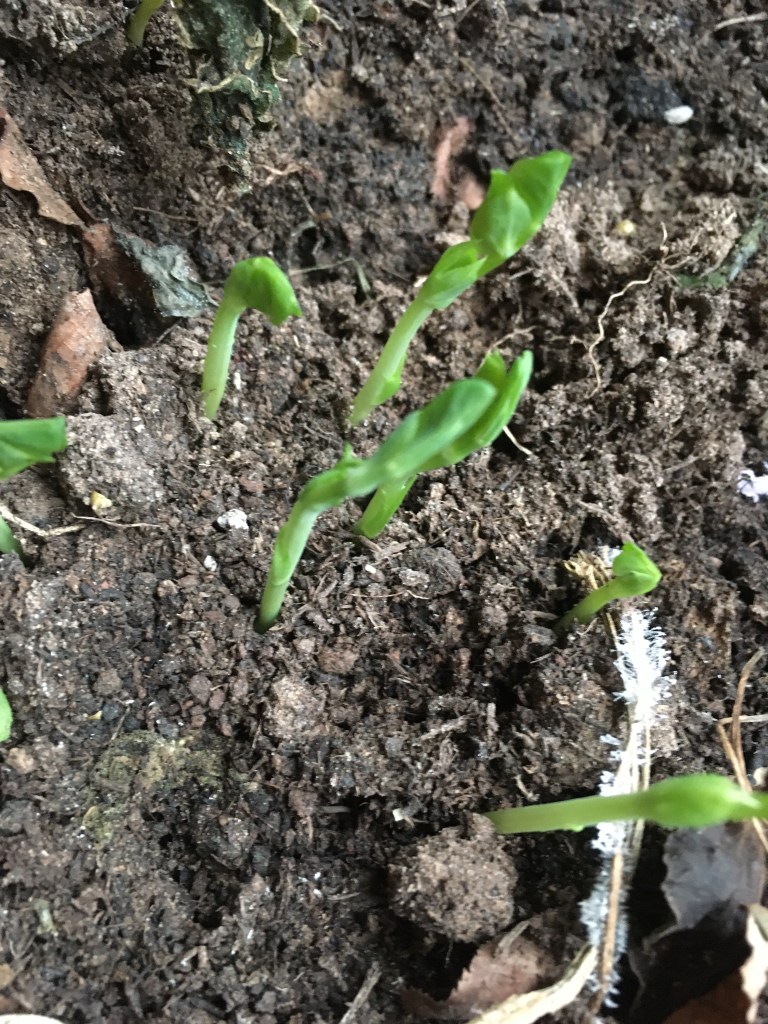
Wild garlic is fabulous because it grows really well in a deep shade. It doesn’t grow much more than a foot tall and it’s great planted under other perennials that prosper later in the year. The places I’ve seen them thrive the most is in rather shady woodland. You’ll see shoots coming up as early as the beginning of February. They send up the lovely clusters of star shaped white flowers in late May. They tend to die back in the summer when it gets too warm for them. At which point there is absolutely no evidence of there having been any wild garlic until February when it starts to appear again. If you can keep it in decent shade you may find that the leaves can persist till July. They are perennial so reappear again from the bulb the next year or happily spring up from seed.
Small hosta shoots in April will take over come June when the wild garlic dies back.
Seeds produced in a local wood in June
Growing from Bulbs
I started my bed, which is still establishing, just over 3 years ago (winter 2017) using 25 bulbs bought from https://www.naturescape.co.uk/. There are other suppliers on ebay. Just so you know it is legal in the UK to forage foliage, flowers and fruit – but it is illegal to dig up roots without the landowner’s permission. You can however take seeds. If you get bulbs it is a good idea to put them into the ground as soon as possible, or at least into a pot of compost until you’re ready to put them into their permanent home.
The bulbs I purchased were a little expensive (which is why I only got 25 of them) but they were reliable. I planted them, as instructed, in the winter, in a hole that was twice as deep as the bulb was long. All 25 bulbs came up. We managed to at least taste a few of the leaves that spring. The year after we still ate sparingly but last year, we were able to make a few meals without feeling like we would annihilate the plants.
You can also order the bulbs ‘in the green’ in March (bulbs that have sprouted). They follow the same principle, but you need to be a little more careful with the roots and shoots. It does mean that you can see where they were planted immediately.
Growing from seed
Seed is much cheaper, but you will be waiting a long time before you’ll have anything to eat. General advice is that they are best sown in summer. To me this makes sense as the seeds are produced naturally in the summer. I have read a few things like wild garlic seed only works if very fresh though and will only grow after stratification (exposure to a cold season). These ideas may be considered contradictory. If the seeds are produced in the summer, by winter when they can be subjected to cold will they still be considered fresh?
I have seen evidence in my own garden of seed setting and germinating. There have been a few seedlings appearing in between paving cracks. This means that it does self-seed rather well, much to my delight. (Edibles that grow in paving cracks just feel like bonus food.)
The seedlings from seed are rather tiny so they are best left alone in their first year of growth to allow the roots to strengthen. Even in the second year you may not be getting much to eat.
Tiny seedlings in their first year
Larger seedlings in their second year
looking strong year 3 in Feb
Here patience is a virtue, unless you can afford to spend lots of money on hundreds of bulbs that you plant straight into the ground to create a lovely dense patch. Whether you start from seed or bulb, if the wild garlic likes the conditions it will slowly expand its patch itself over time. They can self-propagate themselves into a nuisance, but if you’re eating it then that should be a happy result or a fun challenge at the very least. If you’re concerned that they may get out of control you could consider planting them in a well-defined, enclosed border. Don’t forget the bulbs will be twice as deep as the bulb length and may take some extraction should you decided you don’t like it after all (not that I can think of any reasons why).
How to harvest
It does appear in February, but you generally need to wait till mid to late March when you can start harvesting the outer leaves. If you leave the inside leaves to keep growing, you can treat the plant as a cut and come again. All of the plant is edible, and you will be able to harvest the flowers which look amazing in salads in May. The bulbs are edible but small and fiddly. And of course, if you harvest the bulbs you won’t have the plant next year. You could use bulb harvesting to control the population if it gets a bit rowdy. Alternatively, you could also dig up the bulbs and spread them around to avoid overcrowding and increase the size of your patch instead as they tend to grow in clusters. The bulbs do not dry well like cultivated garlic.
Take the lovely big broad leaves. You could even take the tender buds if they’ve self seeded too much. You can see the small seedlings of the seed dropped the year before.
I would suggest that you harvest all of what is left around June before it all dies back naturally.
It may sound like they have a very short season compared to things like three cornered leek or Chinese chives, but that season is important. They thrive during the hungry gap when there are not many garden grown edibles available in UK climes.
How they taste
As the name suggests, and as you may be able to guess from the smell, the raw fresh leaves taste very garlicky. They go really nicely, with a few shredded in salads for flavour, but the smell and taste can be overwhelming. We prefer to eat the leaves lightly stir fried or thrown in last minute in various dishes. We love them chucked on top of soups, stews and congee (savoury rice porridge). It loses the garlic flavour very quickly with cooking but happily takes on a lovely sweet onion flavour. As soon as the patch is completely established, I suspect we will cook masses of it just lightly fried in a dash of sunflower oil with a pinch pf salt or chicken stock as a spring side dish.
The flowers are prettiest in salads, but pretty garlicky raw. They’re lovely just wilted by the heat of a dish as you serve.
wild garlic flowers
Chinese chive flowers
I’m afraid I couldn’t tell you about the taste of the bulbs as I’ve been reluctant so far to remove any. Maybe I can update this blog in a couple of years when my patch becomes yobbish.
You can decorate repurposed recycling containers for both aesthetics and functionality. Here are some details on how to make both a pot with drainage and a base to collect the drips from a single plastic bottle There are some decorating ideas that involve reusing old wrapping paper, paint and craft bits. It is a great activity for little ones and it ticks a few home schooling boxes whilst being free and involving no screen time.
Our week of decorating
The majority of my indoor sowing tends to start in March, but there are a few things that I do like to start in late February like tomatoes, peppers, cucumbers some brassicas, some herbs and a few edible flowers. By the time these plants get too large for their indoor pots the weather should have warmed up enough for them to be planted out.
So, early February is the time to start preparing containers for my first batch of early indoor sowing. I have been collecting plenty of food containers over the winter so that I have lots of pots ready to go. I tend to collect old milk cartons, juice cartons, plastic bottles, grape boxes and mushroom trays. The tetra pack cartons I always cut little holes in the bottom or occasionally cut the whole base into a flap and then stick the whole carton into the soil to provide a bit of extra protection from slugs and snails. I have written lots about this in a previous blog ‘Sowing seeds’. I don’t usually care how my pots look but it’s a nice little project to do with the little one. It’s a great opportunity to show her a few new ways to reuse things. We try and keep old wrapping paper, cartons, cardboard and pretty bits of packaging for her to use to make things with – so repurposing is often at the back of her mind.
My usual way to use recycling as pots it’s just to have a container that has drainage holes in the bottom squashed inside a mushroom box. However, our windowsills are a bit thin and sometimes there’s a bit of space that would be perfect to squeeze a single pot into as opposed to ta tray of pots. This is the perfect space to put a repurposed plastic bottle pot.
How to make a repurposed plastic bottle pot
remove label if you like
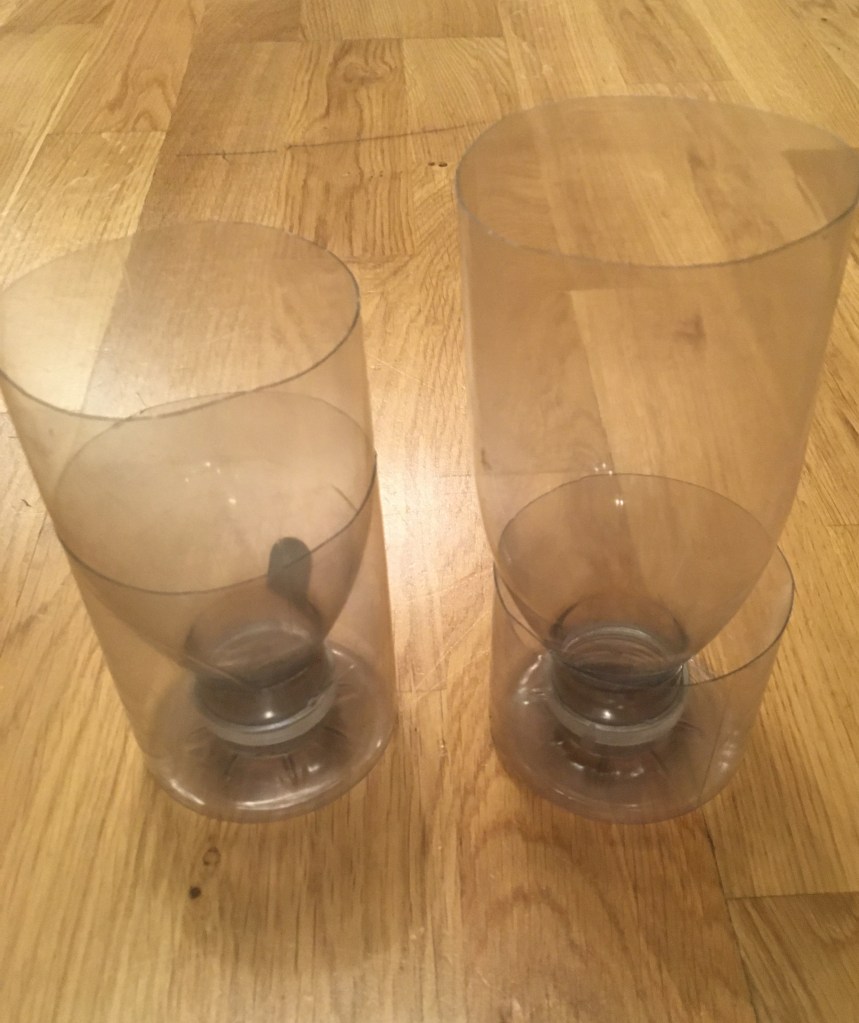
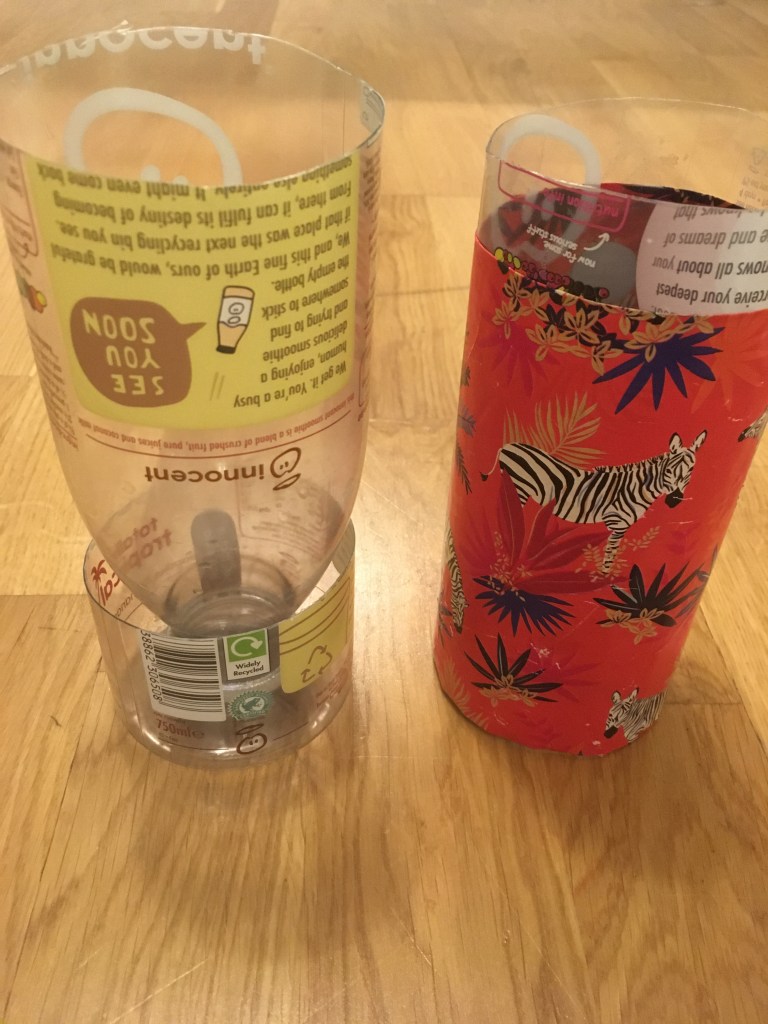
the left one has been cut with a larger base
The base on the right is now a bit short
If you swap them the short base supports a less large top
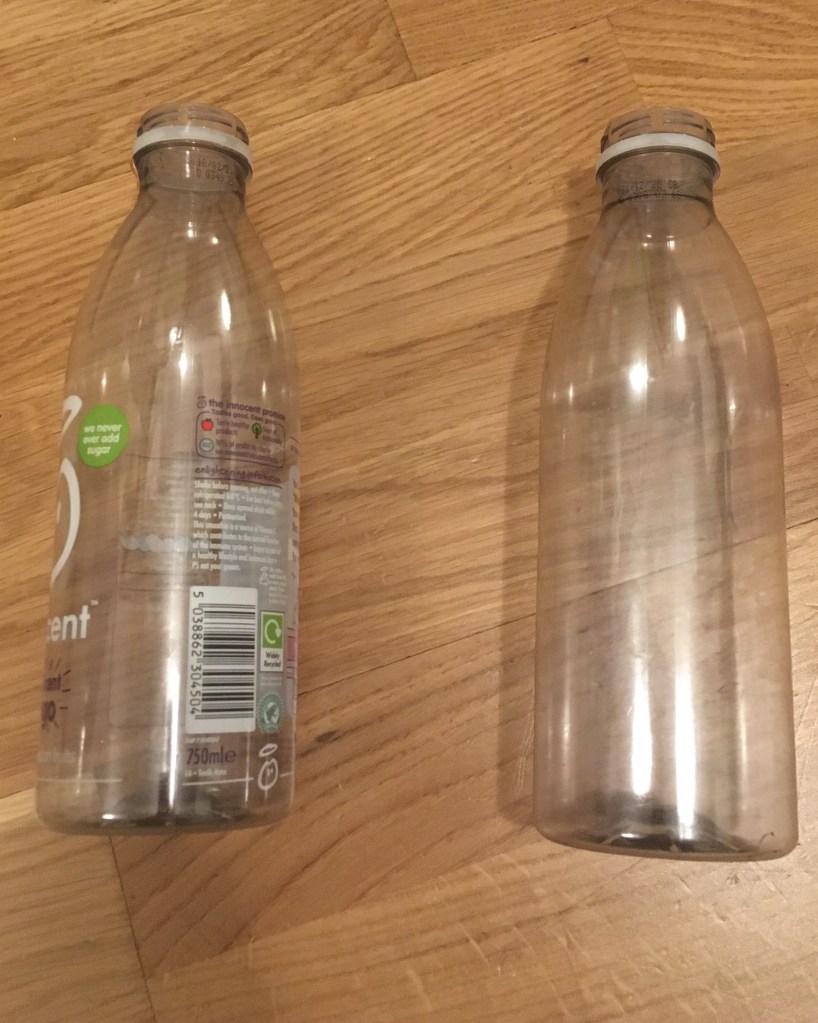
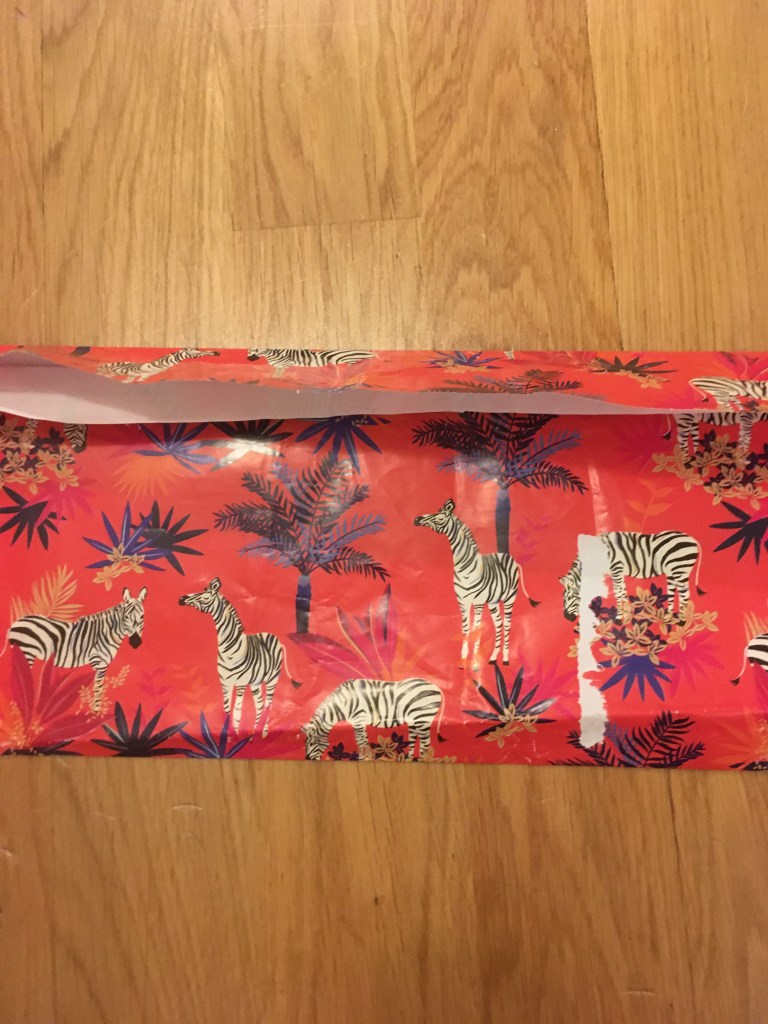
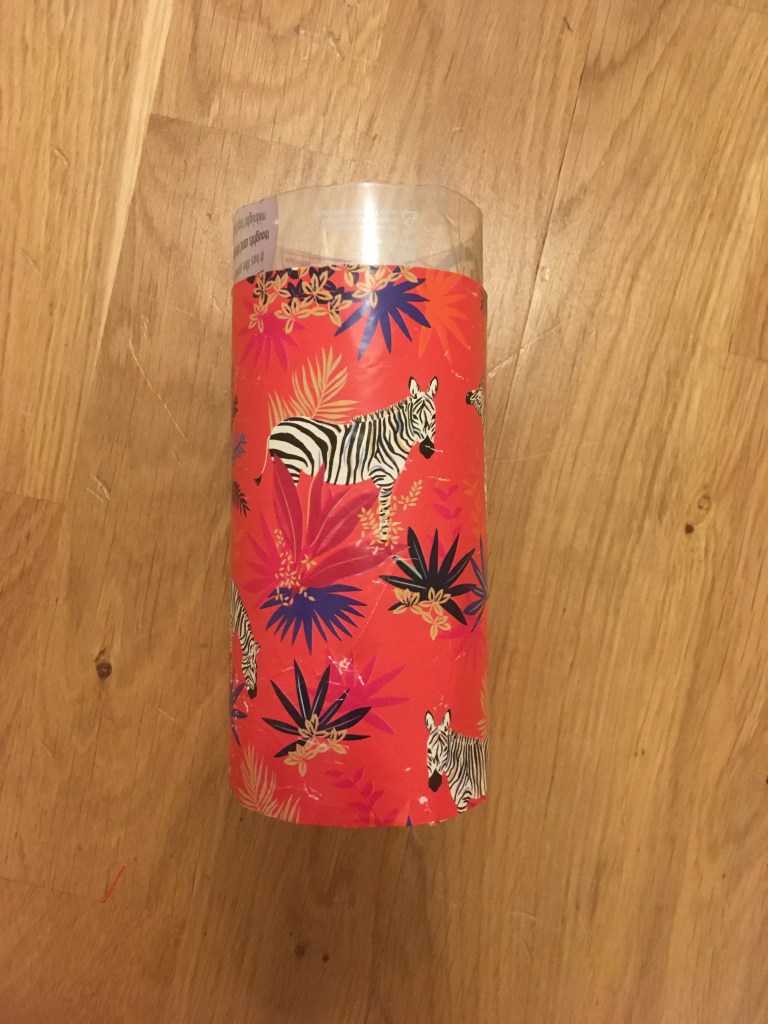
Plastic bottles smaller than 1.5litres may be a bit small for the effort. If the label is easy to remove then do so. It turns out that the innocent smoothie bottles are best left with the label on. The glue doesn’t come of very easily. Just FYI – rubbing with oil can sometimes work on glue that is not water soluble.
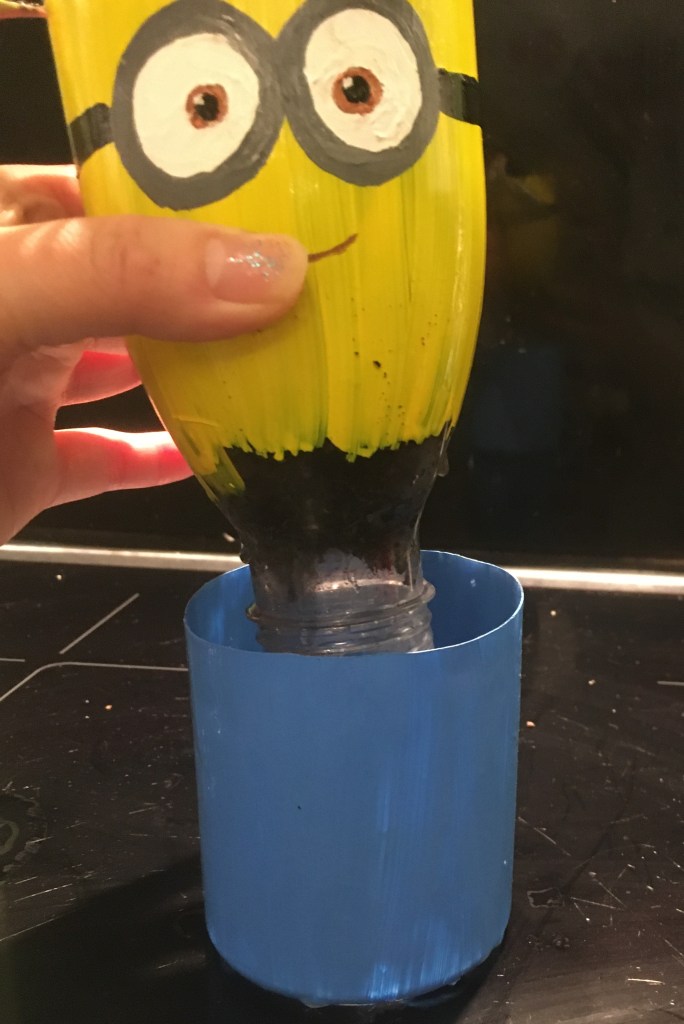
Cut the bottle in half with a stanley knife. The ratio of top to bottom is down to your own judgement. The further away from the mouth of the bottle you go the bigger a pot you create for your seeds and seedlings, but if you go too far then what is left at the bottom doesn’t provide much support for your top-heavy bottle.
Invert the top of your bottle to fit inside. You now have a pot with a drainage hole and a receptacle at the bottom to collect any water.
These are fine as they are but there is opportunity to decorate here. Also, by decorating, you can provide a bit more darkness for the roots.
Reused wrapping paper
fold rather than cut
it helps to keep the top in when sticking the paper on
this gives the base extra height
you can see the plastic is much shorter
I painted the top of the inserts
Christmas and cats!
This is the quickest method and also fantastic for using up old wrapping paper. It’s worth getting a bigger piece and folding the ends over. It’s quicker because it means less cutting and it also gives you a thicker sheath to go around the pot. This is particularly good for when you’ve got a pot that has too short a base. You can extend the height of the wrapping paper past the bottom section so that it forms a taller base for your top pot. Hopefully with careful watering and not over watering your paper shouldn’t get wet. I have tried to use the Christmas paper that is less obviously Christmas themed. Little one is a big fan of cats and this pink monstrosity is what her last birthday pressie came wrapped in.
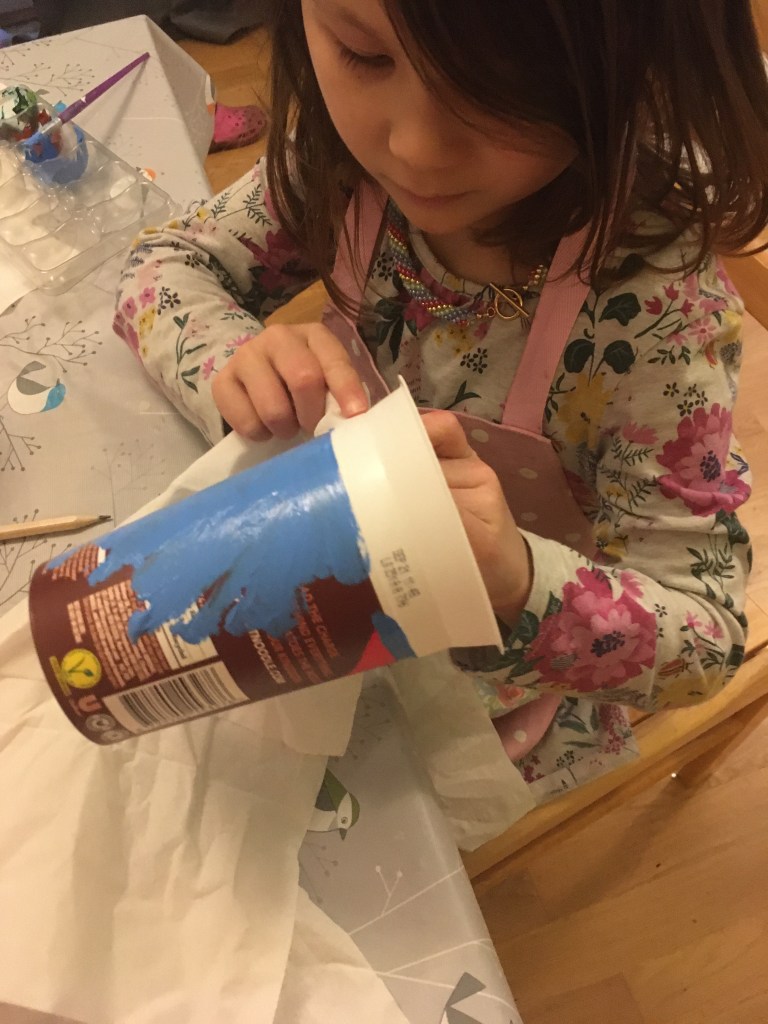
Painted pots
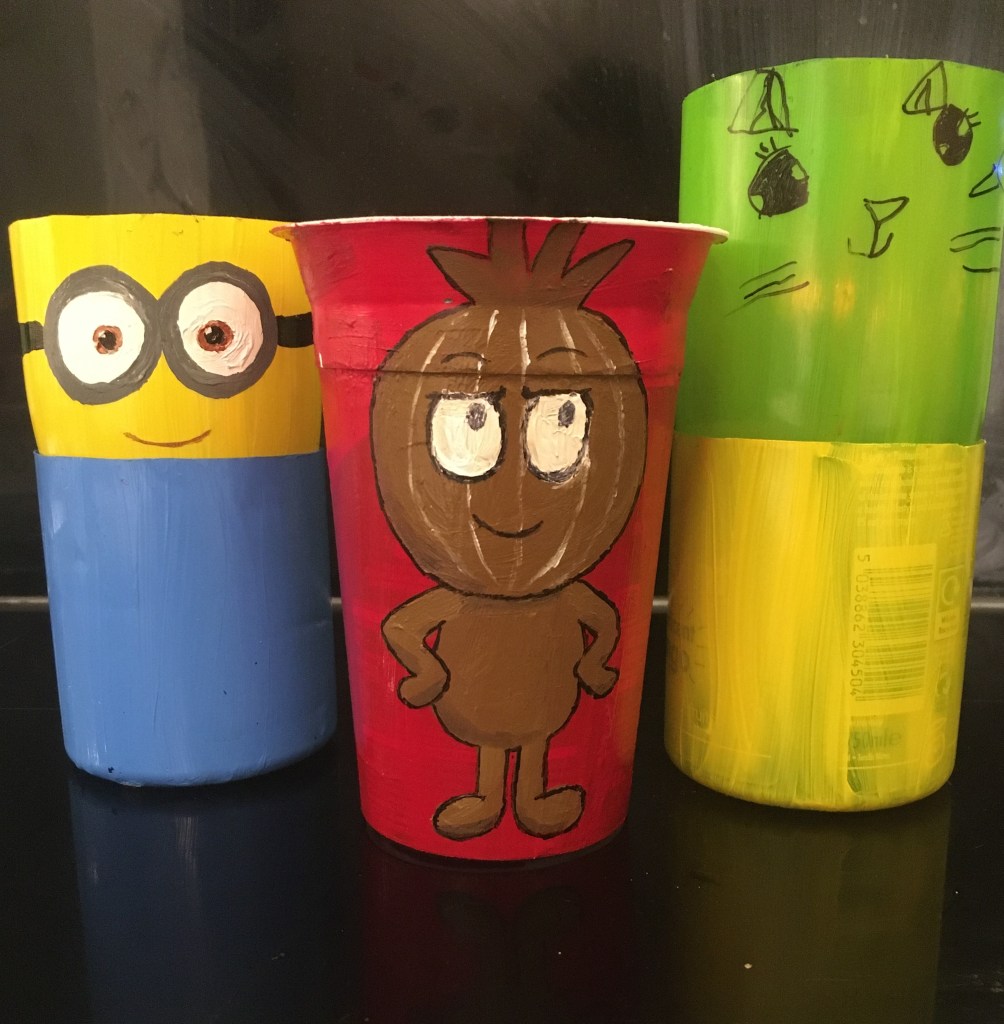
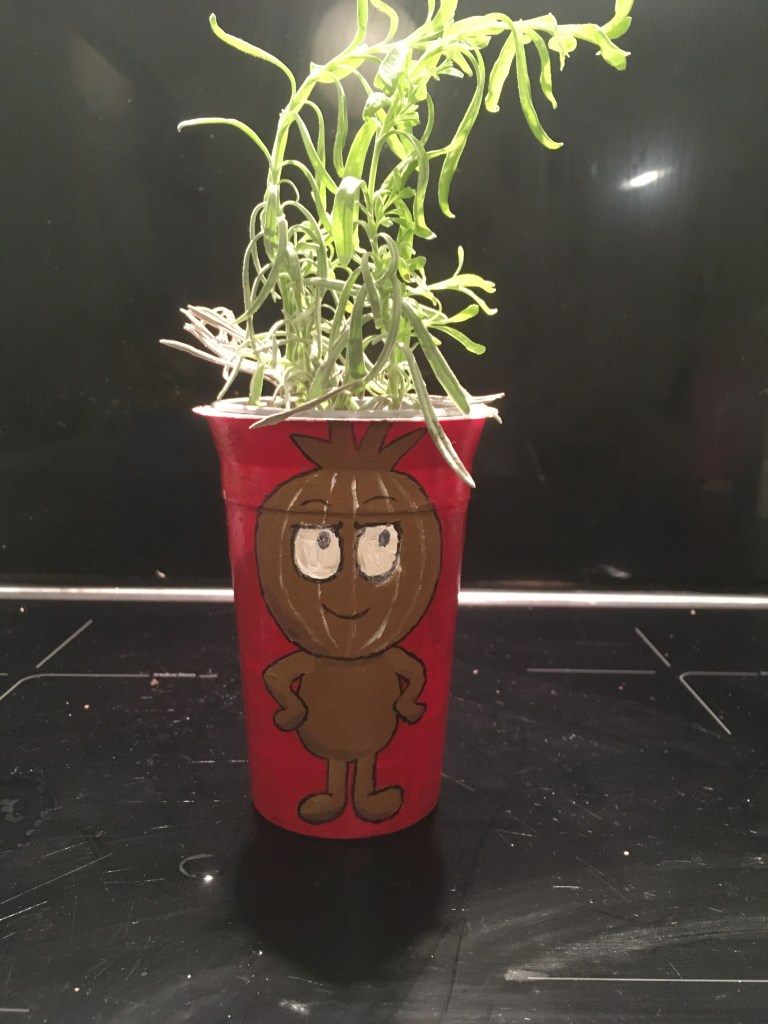
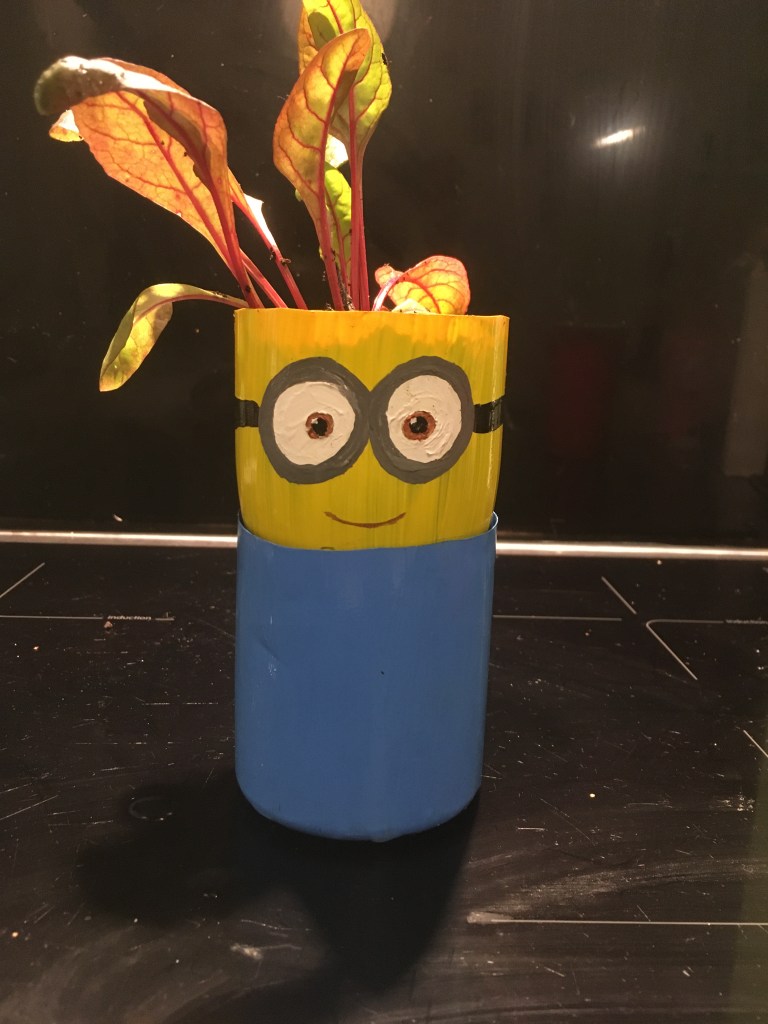
You can paint pretty designs on any kind of repurposed recycling pot as well as the repurposed plastic bottle pots. I’d advise using acrylic paint as it can be used on plastic and is waterproof afterwards. My little one had lots of fun making this pot with clouds. Quite a fun design is to draw a face on the pot and then whatever grows in the top of your pot looks like it is the pot’s hair. Again, you can see the little one loves cats, with this cat face she drew. I may be one of those awful coo-ing mothers, because I really think this is adorable and pretty good for a 5 year old. Hopefully, you can tell that one of these below is a minion. The other is a, slightly more obscure, vittra from ‘Hilda’ – who do actually have greenery out the top of their heads.
The vittra from Hilda has a lavender cutting
inside the base
The minion has a repotted chard seedling
Craft pots
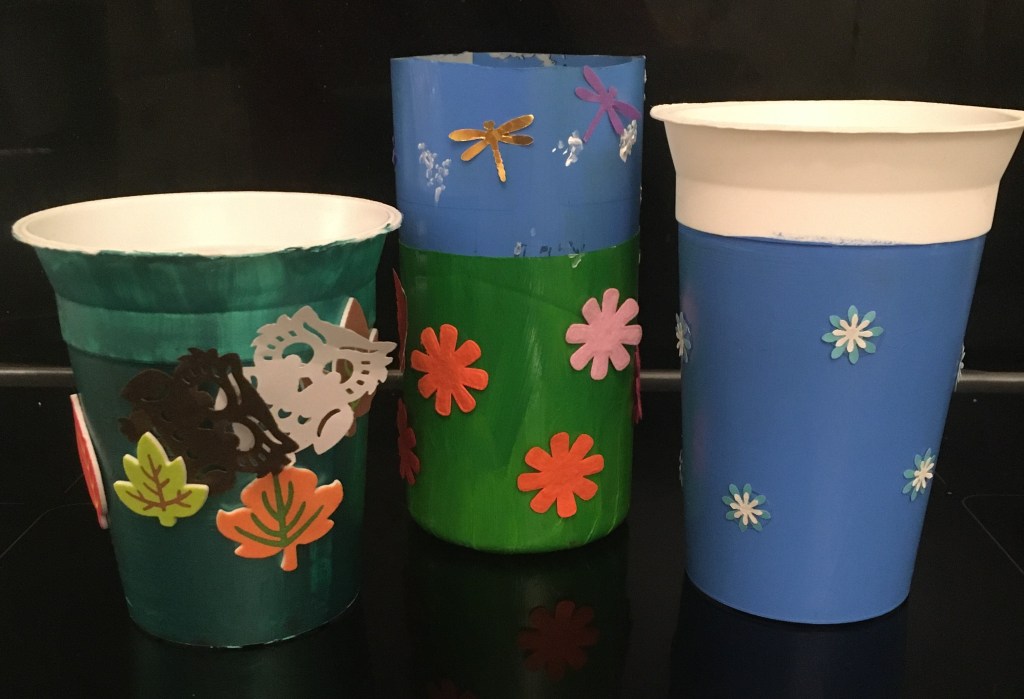
You can make a combination of painting and crafty pots too. This is so very easy for little ones. Glue dots and double sided sticky tape are great for letting little ones stick things on pots. We ransacked her craft box for the little things that she likes. We also had a few paper punches (like a hole punch but cuts shapes) that make really easy shapes. She used both the owl and the dragonflies. One pot has foam autumn leaf stickers. Acrylic paint provides green grass, blue sky and white clouds. Felt flowers and paper dragon flies are stuck on top. The last has 2 sizes of paper punched flowers layered and stuck on a blue acrylic paint base.
shame we never used the googly eyes
sticking on glue dots
mixed results
As we are currently in the joyous throes of COVID home-schooling it’s worth nothing that getting her involved in things like this ticks lots of boxes. She gets to exercise her imagination, she practises fine motor control as she draws, paints and sticks and of course she’s learning a little about sustainability. It’s also an almost zero cost activity (depending on what kind of things you have around the house) and involves no screen time.
An invasive perennial weed, thought to have originally been grown as food, that propagates aggressively through long underground runners.It is very difficult to get rid of, but can be done by careful sifting of the soil and perseverance. It thrives in the shade in neglected areas of soil. You could try eating it into submission. If you’re considering introducing it into your garden on purpose, here are some alternatives.
my current patch
I began battling ground elder when I was about eight whist helping my mum with the garden. Being eight, I had no idea about how insidious ground elder was. I spent around two days in the summer holiday pulling it all out of the ground, shaking off the excess soil and putting it in a plastic bag for the bin (we didn’t have green waste then, or a compost bin). It was not long before my newly weeded patch was, to my dismay, covered in ground elder again. This became a yearly pointless task. Every year this ever expanding patch reappeared within months of weeding . My own garden now has its own patch of ground elder. Luckily, my ground elder patch here is contained within a border. One side of this bed has a wall, separating the garden from the pavement. The other side of this bed is paved. I’ve been forbidden to cultivate this paved area by the husband because this is where we keep the bike shed (we like to pretend he gets a say in the garden so I’m sneakily adding to a collection of pots here). It was only three years ago when I began tackling these plants properly that I learnt that the roots run deep and very long and plants will respawn from any bits of remaining root.
How to remove
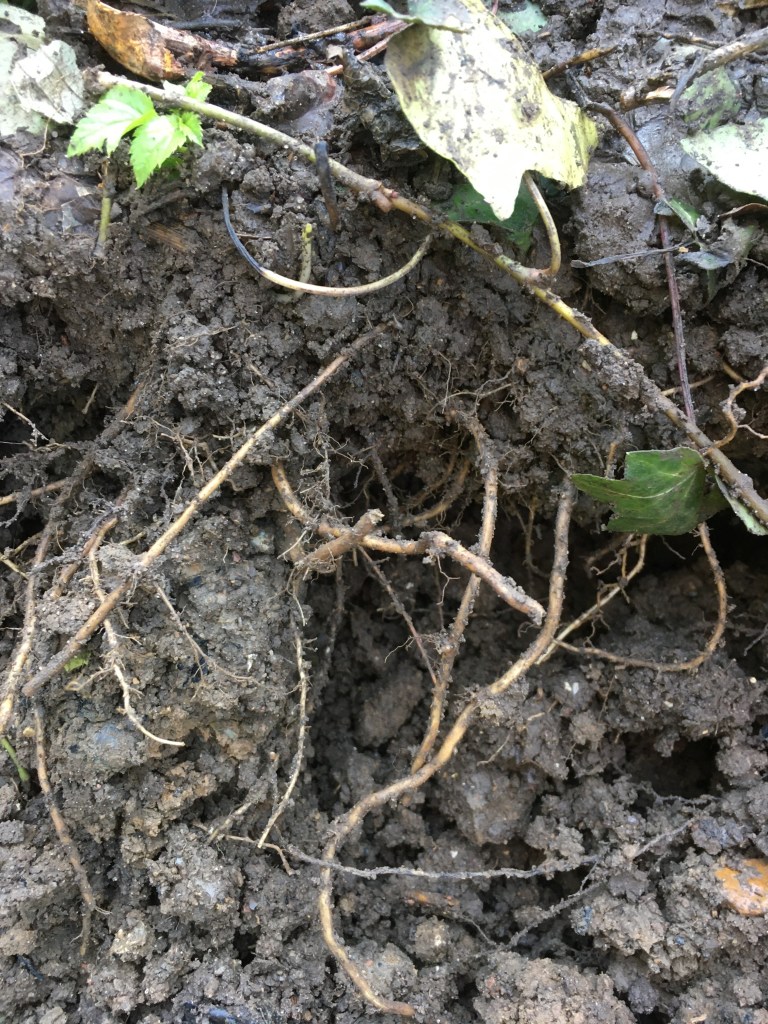
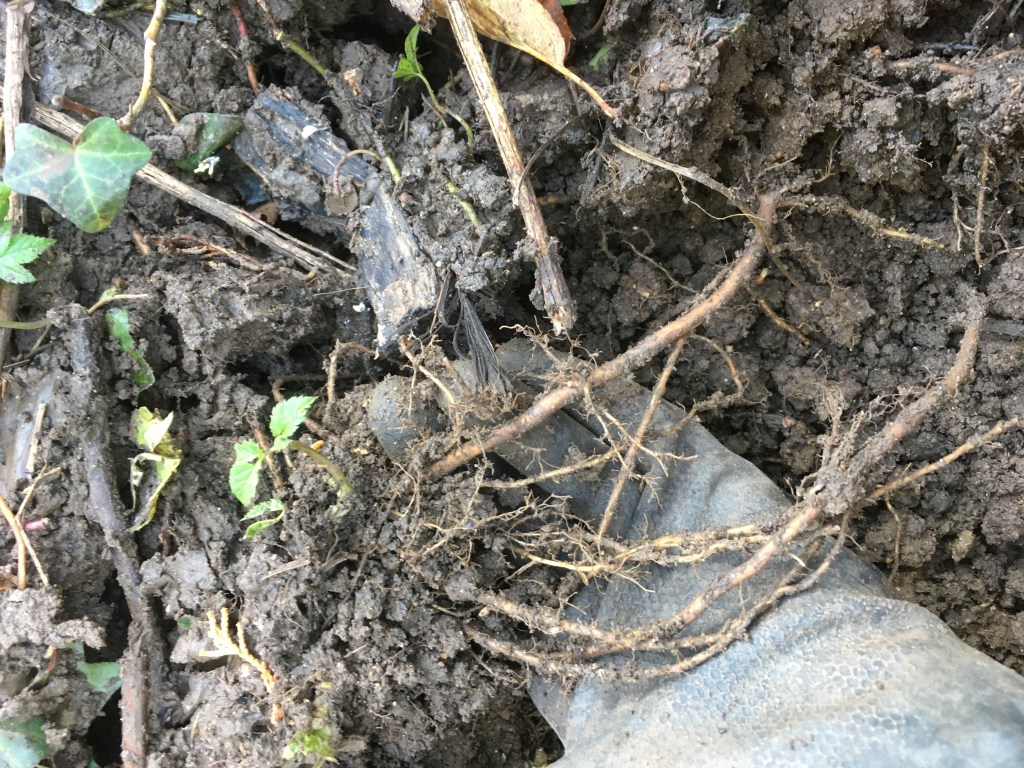
I have also removed them (fingers crossed) from a garden I have been working in. Hiding under the creeping ivy was a ground elder patch about 4 m x 5 m with an extensive underground network. The only way to remove it was to dig down about 20 cm deep in this whole area and sift through the soil (literally with a sieve) to make sure that all the roots were removed. The roots are brittle, so they snap easily and it’s easy to leave bits behind (this is where I was going wrong as a kid). Luckily, they are a lovely bright white colour and often are not covered in lots of root hairs, so they do pull out of the soil nice and easily if you take the time to find them. You must remove every last bit of root if you want to see the back of them. This is why they are so difficult to get rid of and often how they first appear in a garden. It could be something as simple as a bit of root hidden within the roots of a potted plant you’re putting in the ground. It could make its way to your garden through underground runners from a neighbouring garden or land nearby.
in amongst the ivy
you can see the ridge where I’ve begun digging down
exposing the roots
tiny leaf with long roots
the clump below
extended network
There are herbicides available on the market, but I wouldn’t advise that for the health of your garden. It can be removed by hand if you’re diligent enough.
the best size for eating
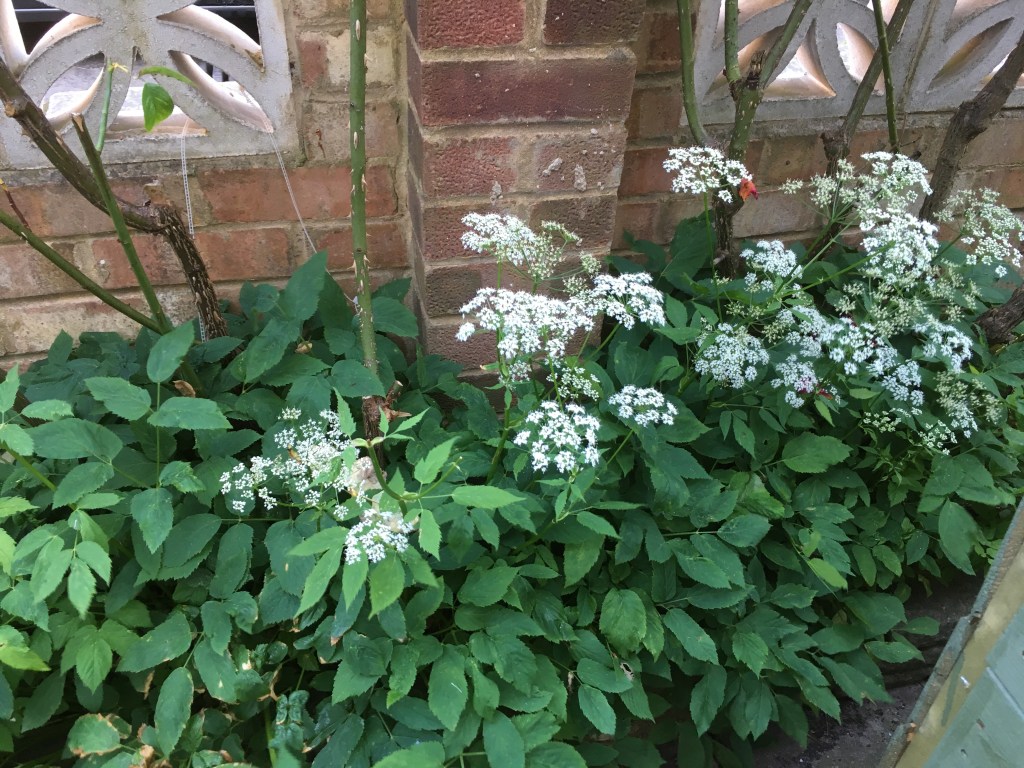
Why it is/was grown
I also found out when researching it that it is edible. It is actually not bad. It tastes a bit like parsley and if you pick the young leaves before they flower they can be very tender. It has some rather attractive white flowers in clusters that look like elder flowers (despite not being related), which is where it gets its name. Once it flowers it doesn’t taste as good and gets a bit papery. It is a tenacious perennial vegetable that grows well in shade where many other things don’t. It self-propagates freely using underground runners. So, if controlling this ground elder is destroying your soul you could try eating it into submission. If you have a shady garden that doesn’t grow anything you may find that this could be a vegetable that works for you. I have read that it was introduced by the Romans as food. However, be REALLY sure you REALLY want it before you introduce it and make sure it is enclosed within a barrier that is impermeable to the roots.
Better Alternatives
If you want something edible that grows very well in shade and/or provides good groundcover there are better options:
Shade tolerant perennial ground cover:
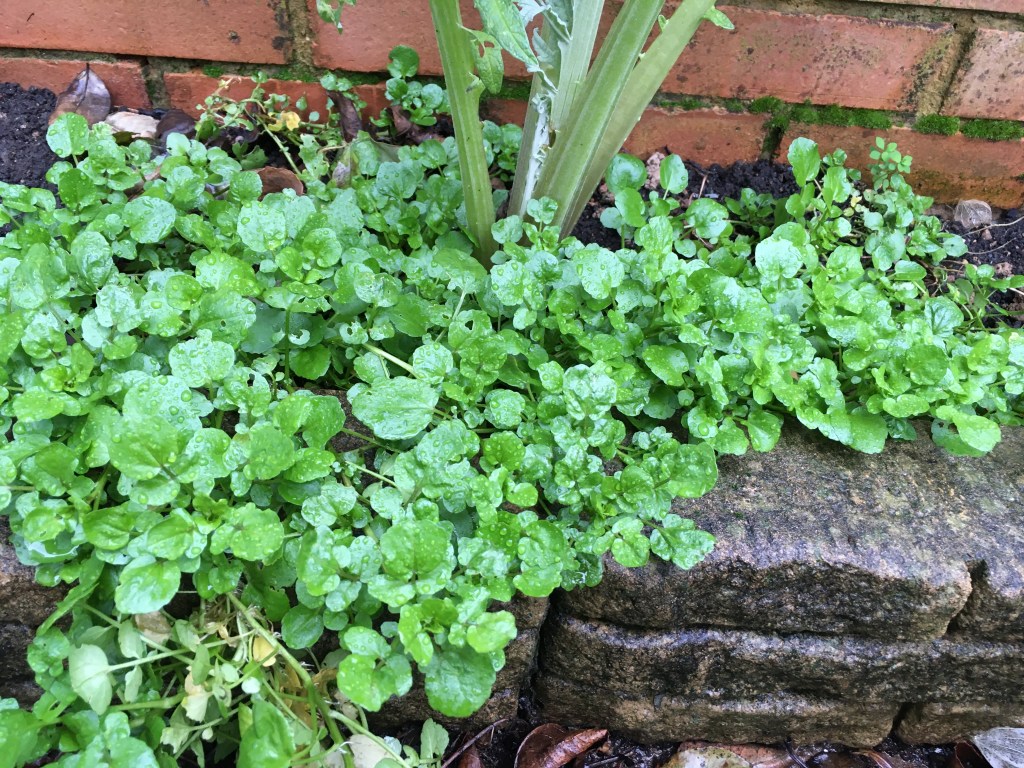
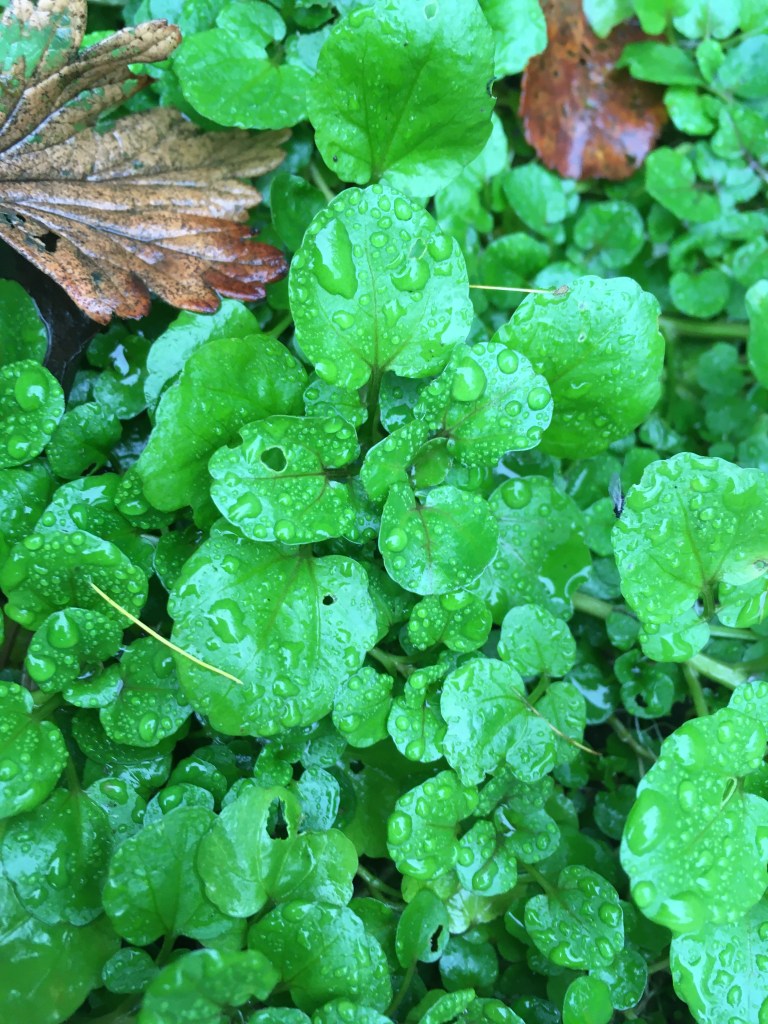
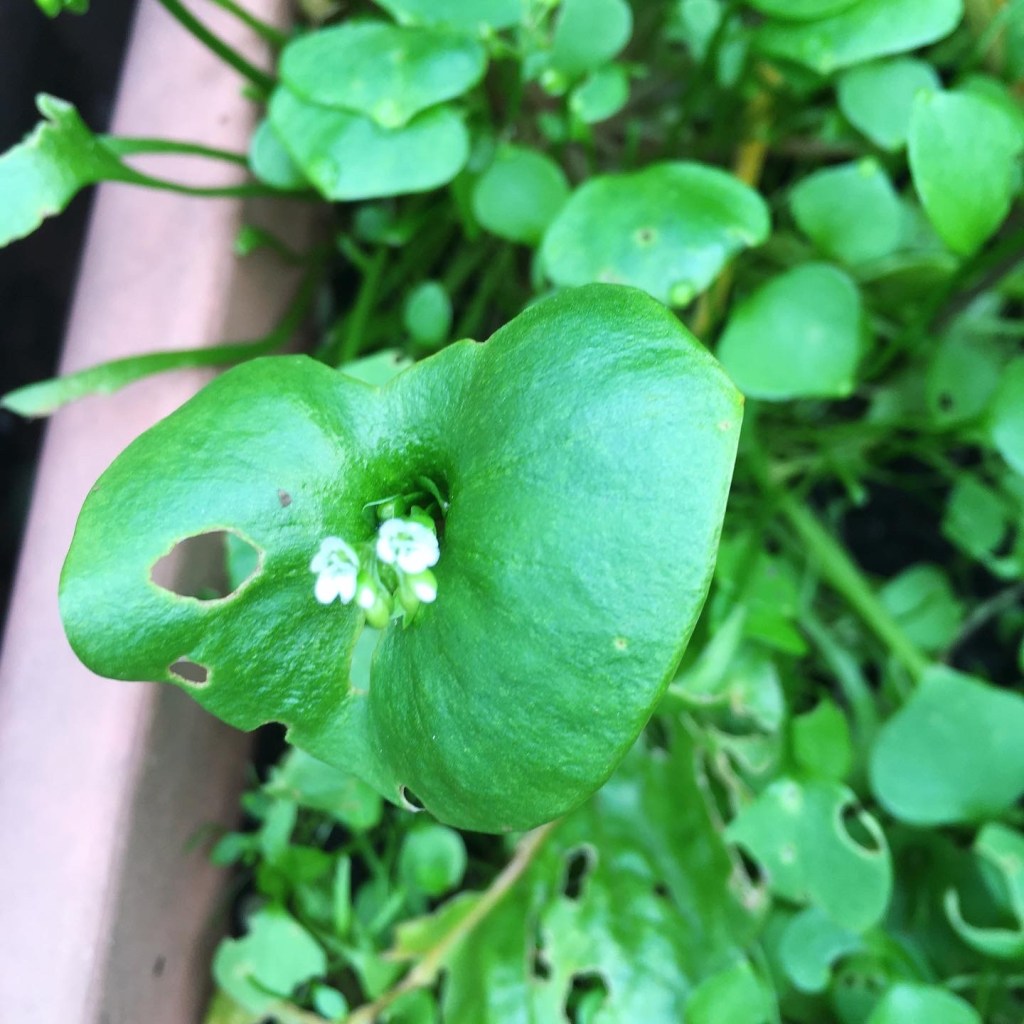
Watercressmakes a good creeping ground cover. It creates new plants wherever the stems touch the soil. Great in salads or makes a lovely soup. It does need more sun than ground elder but, contrary to its name, it doesn’t need to be grown in water. It does grow all year round (here England) when the winter isn’t too harsh.
Wild garlic and three-cornered leeks are both perennial and self-seeding. Three cornered leeks are more invasive than wild garlic, but easier to deal with than ground elder. Both have a lovely oniony garlic taste. Three cornered leeks will grow through winter, making it a great winter vegetable. Wild garlic is short lived, but lives through the hungry gap, so provides food in leaner times.
Alpine strawberries will propagate freely, unless you find a variety like fragaria vesca Alexandra which does not produce runners. You get fragrant little strawberries that grow fine in part shade.
Mint is also a great ground cover that does OK in some shade. It doesn’t do well with any competition though.
Violets provide small edible flowers and leaves that grow fine in shade. They are perennial but don’t spread madly like the other plants mentioned so far.
watercress
wild garlic
three cornered leeks
alpine strawberry
peppermint
sweet violets
Shade tolerant taller perennials:
Turkish rocket grows well in deep shade. The plant has rather bitter leaves but grows edible shoots like sprouting broccoli in great profusion (these can have a hint of bitterness though).
Hostas thrive in deep shade. They can be eaten as young shoots before they grow bitter. Apparently all hostas are edible but they vary in taste. The leaves can be variegated and vary in shade, size and flower colours.
hosta…
…eaten as young shoots called hostons
flower shoot of Turkish rocket
Self seeding annual ground cover:
Winter purslane and lambs lettuce grow great salad leaves and both make great ground cover. They both like the milder weather and thrive over winter. They grow fine in shade. Neither of them has networks of underground roots so even though they may self-seed themselves into a nuisance, neither are hard to eradicate, especially in comparison to ground elder.
Uncontrollable ivy tree taking up lots of space and creating lots of shade
Short version:
Don’t do it to yourself unless you have to cover something really quickly and have the time to chop it back 3 or 4 times a year… and take the clippings to garden waste because they can’t be composted. Check out some of the other options.
Don’t do it!
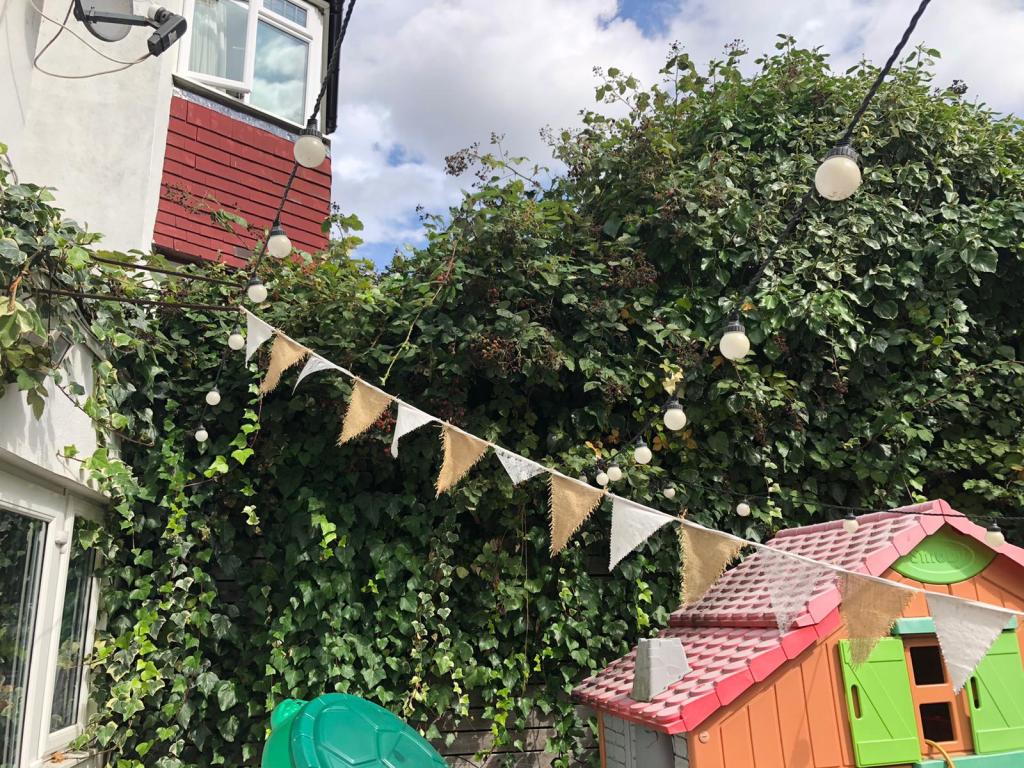
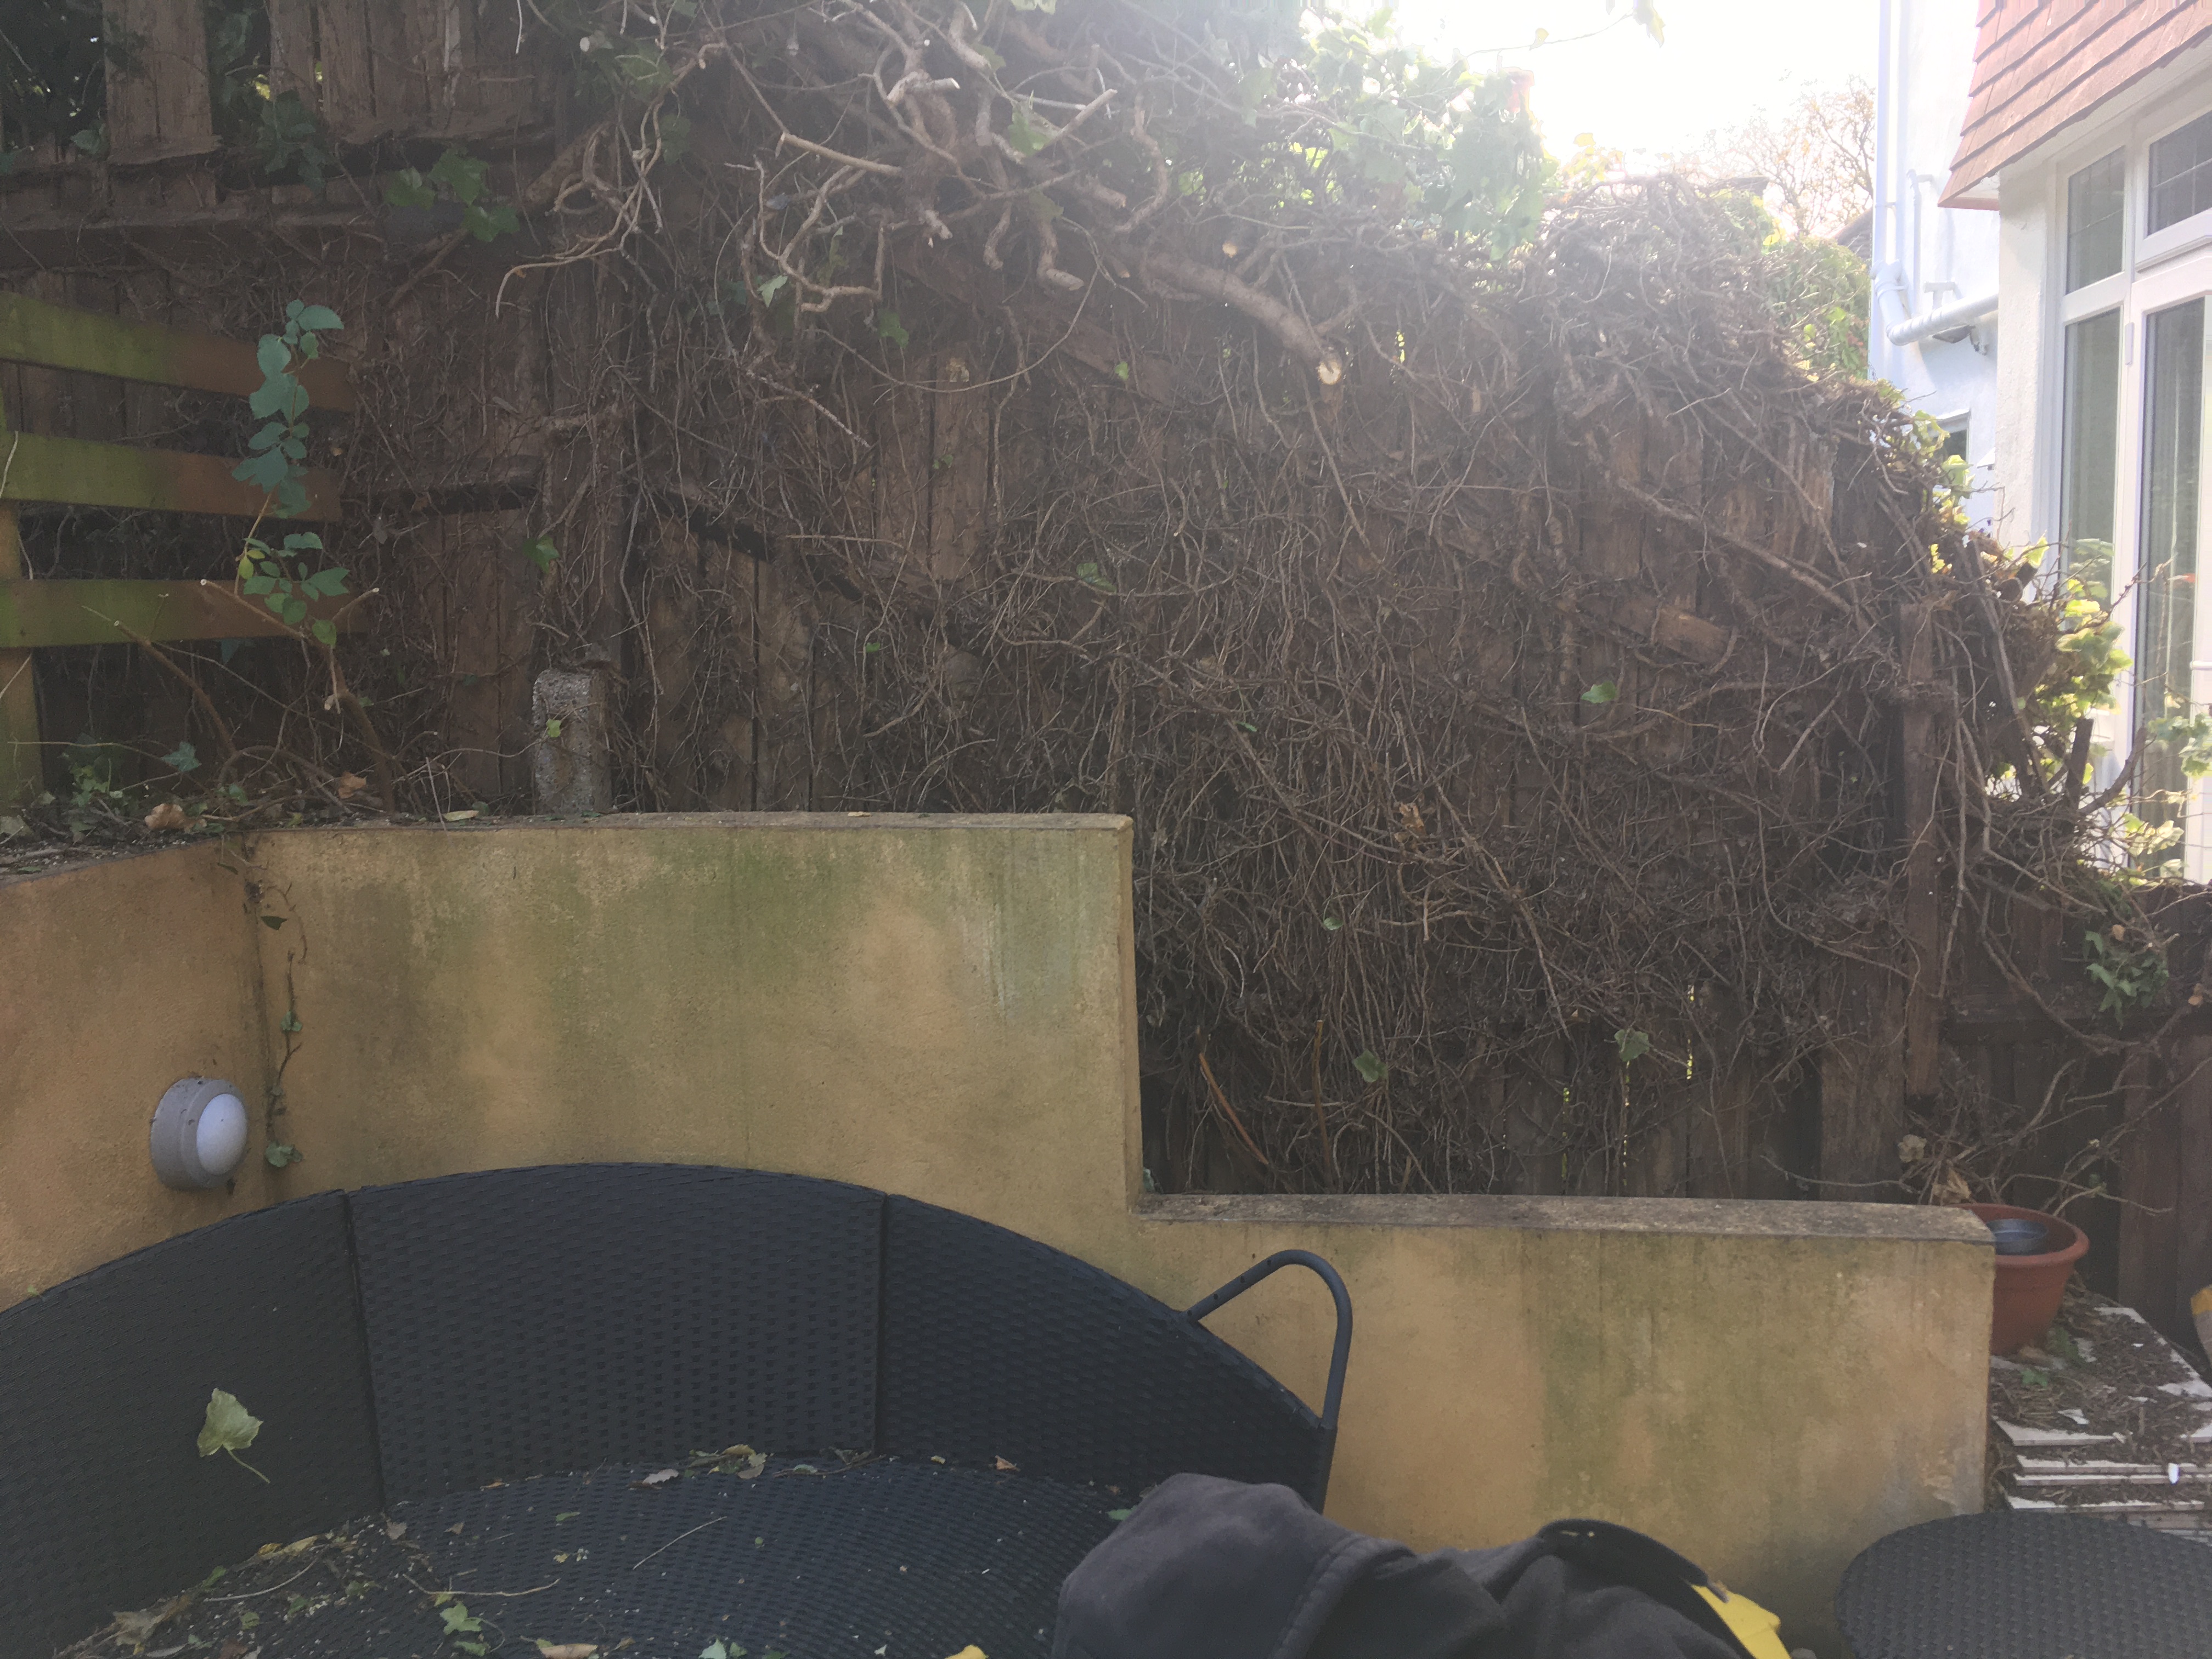
Being some sort of edible gardening evangelist, I’ve been in a few people’s gardens to convince them to grow lots of food. I’ve now also cleared out two gardens, to provide more space for growing the things they actually want. In both the main squatter was ivy, which had, in places, grown over itself and pushed out so that there was a crown of green foliage with lots of twiggy and brown growth underneath. Both gardens had walls of ivy 2m thick.
The ivy was sticking out into the patio by about 1m. The gap between the wall and the fence is about a 1m. Doesn’t look great bare, but now something can be grown in that space.
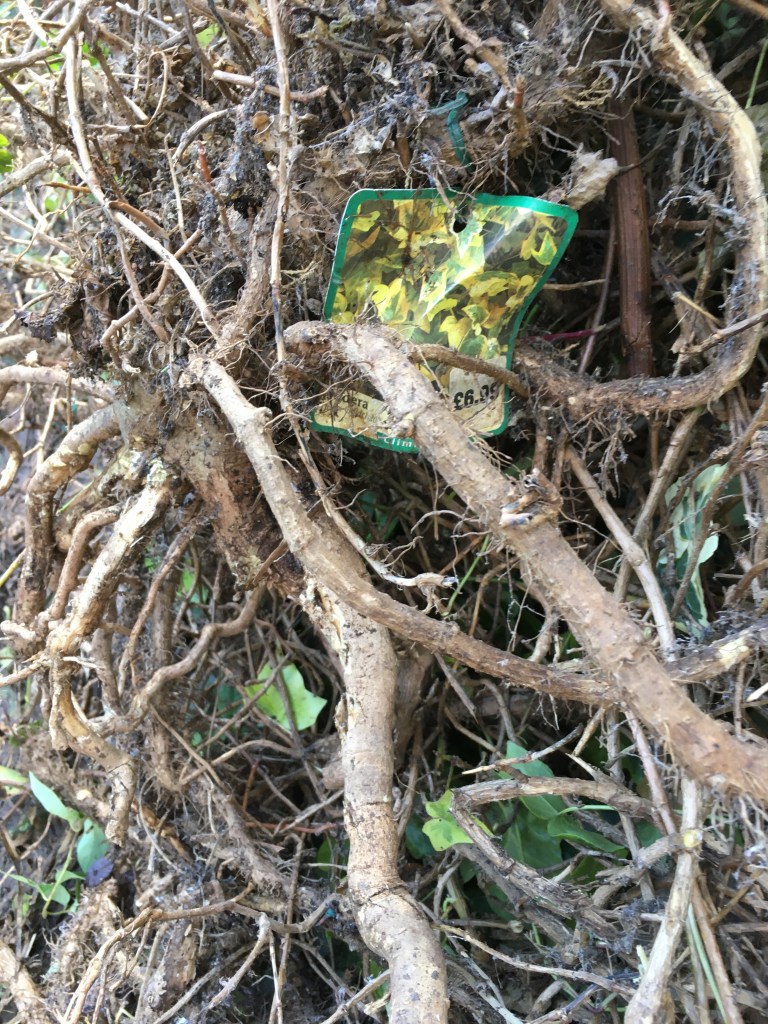
In one garden I had proof the ivy was planted intentionally, not by the current occupier but by a previous one. At the base of an absolutely massive ivy triffid I found a garden centre label. This bush had completely taken over the wooden fence and attached itself onto some trellising above and dug its little roots into the wood of everything damaging it. The weight of the ivy plus the weakening caused by the roots had caused this fence to bend and then the trellis attached to topple. The neighbour there also said that it had invaded her garden and she had been battling it for years.
Why?!?!!?
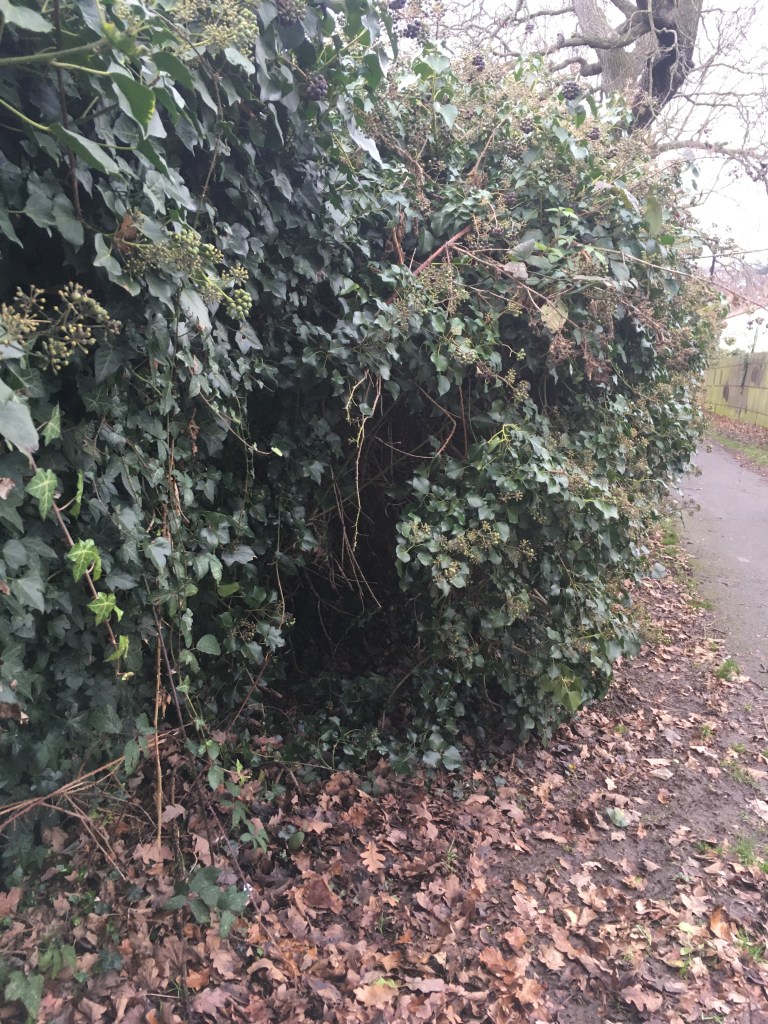
ivy sticking out almost 2m from a fence in an alley
Luckily this tree is healthy and the ivy doesn’t shade the top yet.
Many people plant ivy to cover something unsightly, quickly cover a fence, to add green to their garden quickly or to create privacy. Yes, it does do all these things very quickly but it’s worth considering that ivy grows quickly and CONTINUES to grow quickly. Once it has covered your desired area there is very little to stop it continuing to cover every available surface. Ivy is very tenacious. It propagates very easily. Anywhere that Ivy touches soil it can establish deep roots and start a new plant. These deep roots also make it very hard to pull it out. If you are unlucky enough to have lots of neglected ivy running along bare soil you may find that it is anchored itself in many places. Ivy also places its roots very close to structures such as walls, fences, trees and bushes which makes their roots very hard to remove. The fusing of the roots to wood or other plants means that digging out their roots sometimes causes damage to things that you’re trying to save. Ivy can damage brickwork and can weaken structures. It can also kill weaker trees as the aerial roots damage bark allowing insects and disease to enter and where the ivy completely covers the tree, the tree is in too much shade to photosynthesise well. You do sometimes see dead trees smothered with ivy. It’s ability to cover the ground also kills many other species of plants as they can’t compete, reducing diversity.
the tiny aerial roots that burrow
removal needs to be done carefully
these stems can get very thick over time
As thick as an arm at the base of a tree
The ‘trunk’ of this has been cut, but it’s coming back and there is much dead wood that needs to be removed.
Why you maybe might
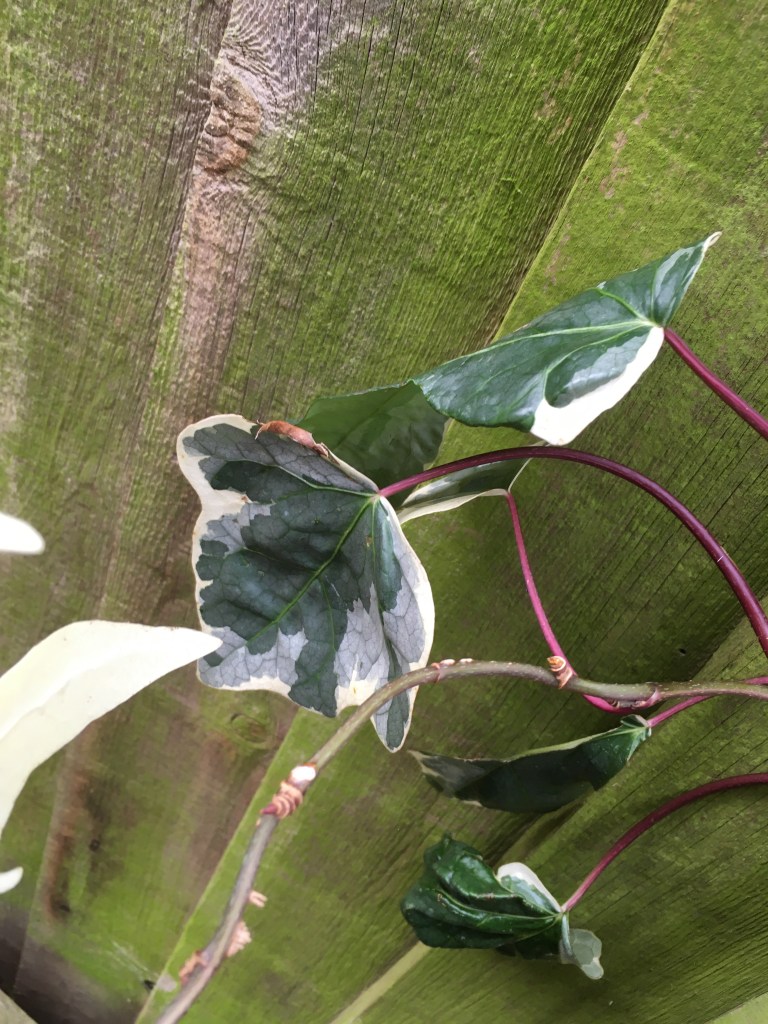
It’s not all terrible though. As previously stated, it does cover something quick with plenty of green with little input from gardeners. Ivy also tolerates shade well. It also comes in lovely, variegated forms. Birds can nest in its dense network of his stems and the berries also provide wildlife with food. Ivy also sucks up plenty of carbon dioxide and gives out oxygen during photosynthesis. I’ve also read that because ivy has a very large surface area (lots of foliage) it does mean it traps some of the pollution particulates well, which then get washed down to the soil when it rains. The dense foliage can also form a physical barrier between the pollution of roads and homes. In a city like London, having bare surfaces covered in ivy to remove some of the pollutants and greenhouse gas and provide more oxygen is a good thing.
berries
variegated
Alternatives
As with many things there are both positive and negatives. I would only ask that you consider the future when planting ivy. If you do not have the time to maintain and cutback ivy regularly it can very quickly get out of hand. You would be better off planting something slower growing that doesn’t propagate quite as easily.
Just in case any definitions are needed:
perennial – grows back every year annual – needs to be re-sown every year
evergreen – keeps leaves all winter deciduous – leaves drop off
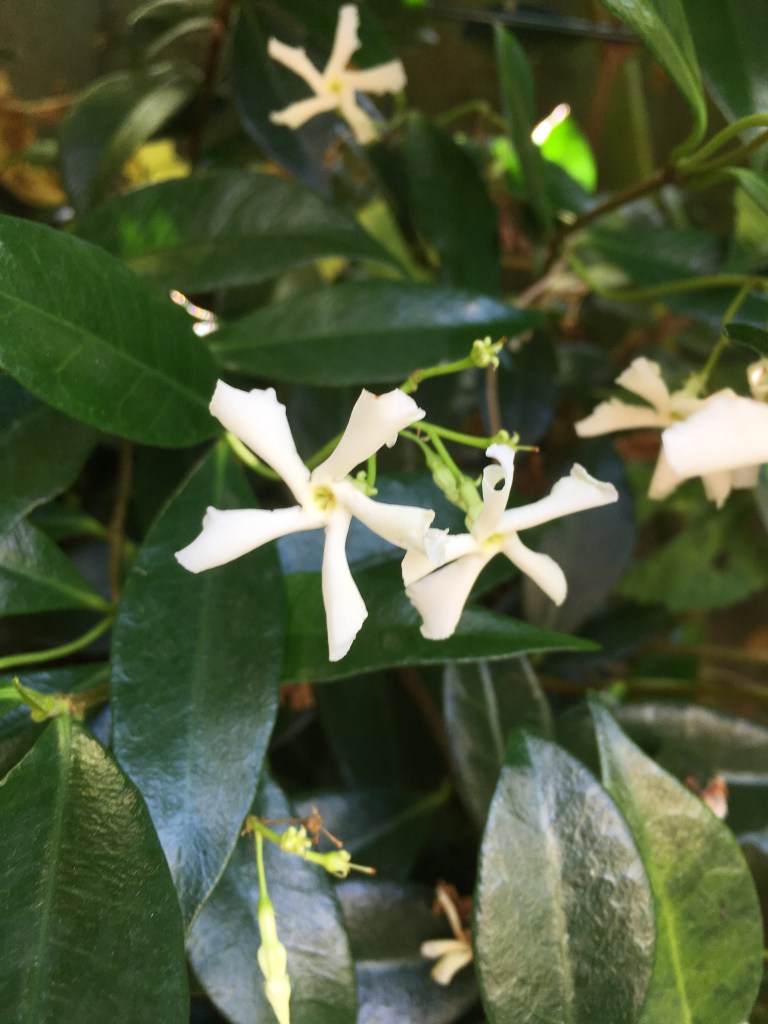
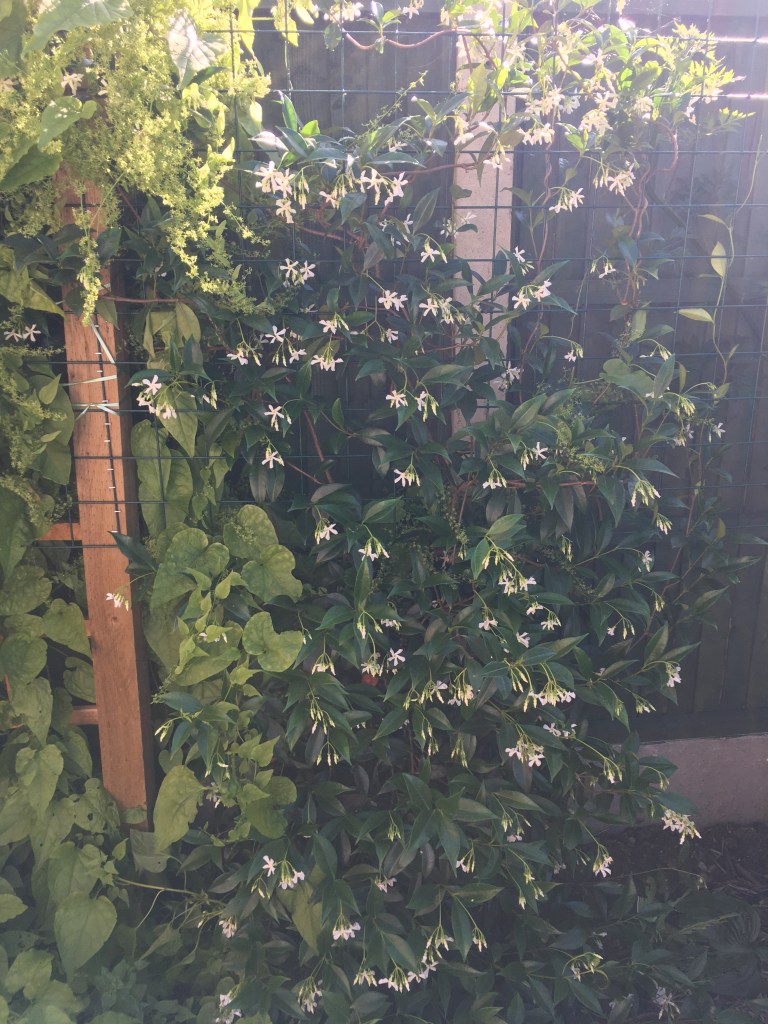
Inedible perennial climber – Star jasmine is an evergreen that covers structures very well and also has beautiful scented flowers. It doesn’t grow anywhere near as quickly and it won’t create new plants everywhere it touches the ground. Star jasmine is not edible but grows well in the shade. There are other beautiful and/or scented jasmines, clematis and honeysuckles that are semi evergreen. These are also not edible and need more sun than the star jasmine. None of these burrow into brickwork, fences and trees so you won’t have to deal with the damage after. This does mean that you do have to provide something for them climb but they won’t make a nuisance of themselves and, in my opinion, they are all much more beautiful.
star jasmine
star jasmine at 2 years old
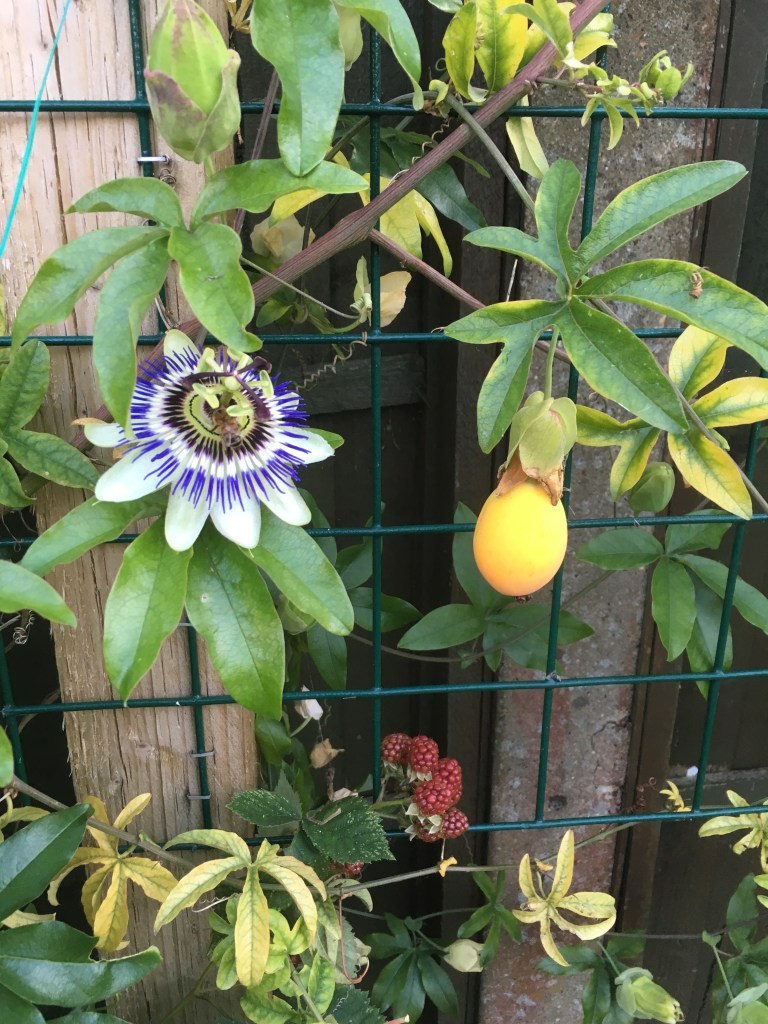
passiflora caerulea
Fast growing evergreen perennial climber with edible bits – If you want something quick passion flowers can be evergreen and the Passiflora caerulea, if grown in a sunny spot, can also produce bright orange fruit with edible seeds. Beware, though, as all other parts are toxic. It will cover something quickly and so need cutting back regularly. They use curling tendrils to cling so it’s easy to remove large sections of it. They don’t burrow into structures and they don’t propagate so easily too. Passiflora provide beautiful flowers and have plenty of leaf mass to suck up carbon dioxide. These need good sun though.
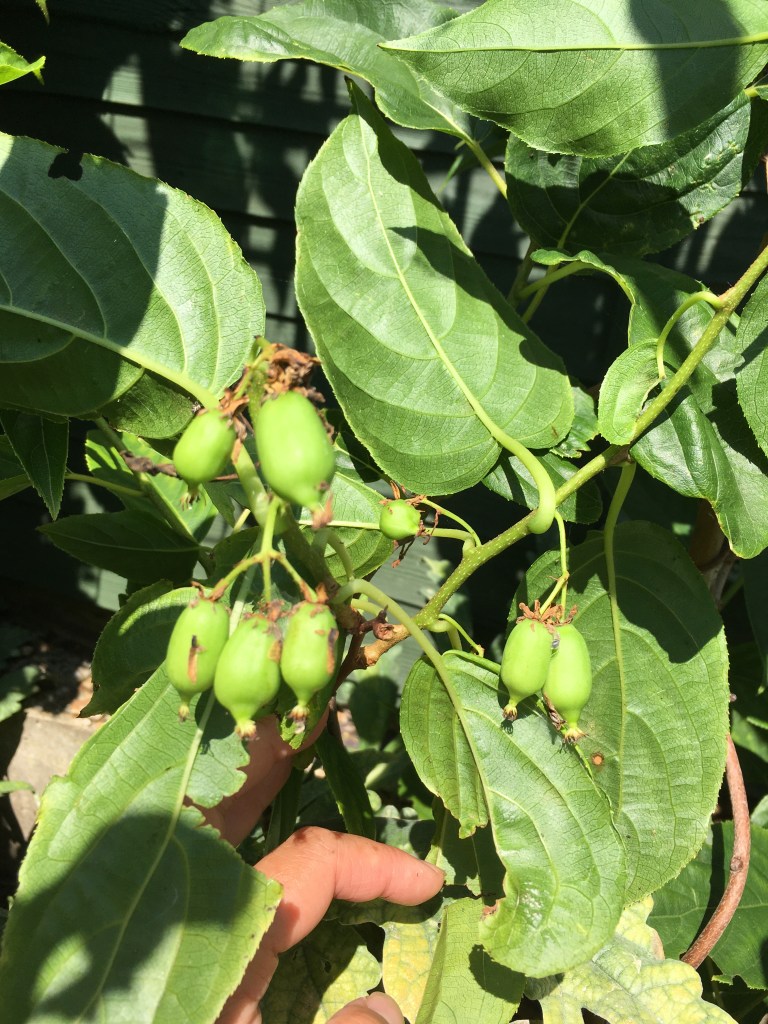
Perennial deciduous edible vines – Kiwi or grape vines are much slower growing than ivy and they do go completely bare over winter, but you could grow a green screen over the warmer months (when you’re more likely to be outside anyway) that has lovely edible fruit. They do need lots of sun and kiwis grow better in acid soil. If you want a vegetable – Caucasian spinach is a vine with edible, spinach like leaves and shoots. It isn’t technically deciduous as the whole thing dies back every year, but it grows very quickly and covers a wall in a season if provided with something to scramble up. It also grows well in shade.
mini kiwi
grapevine
Caucasian spinach
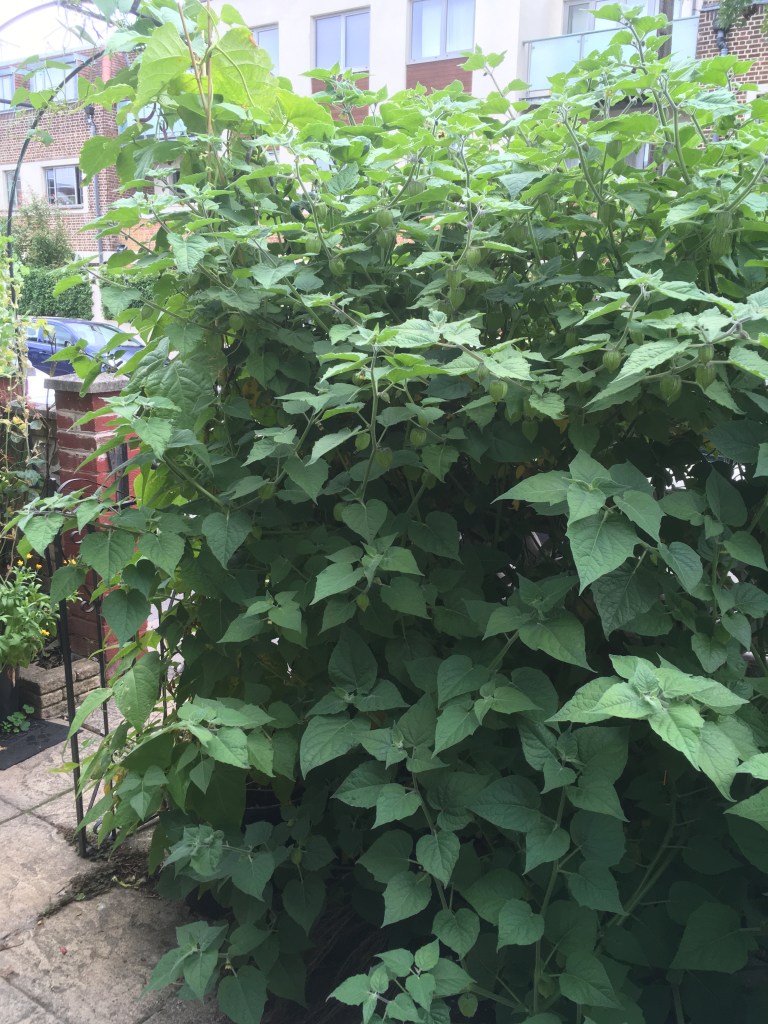
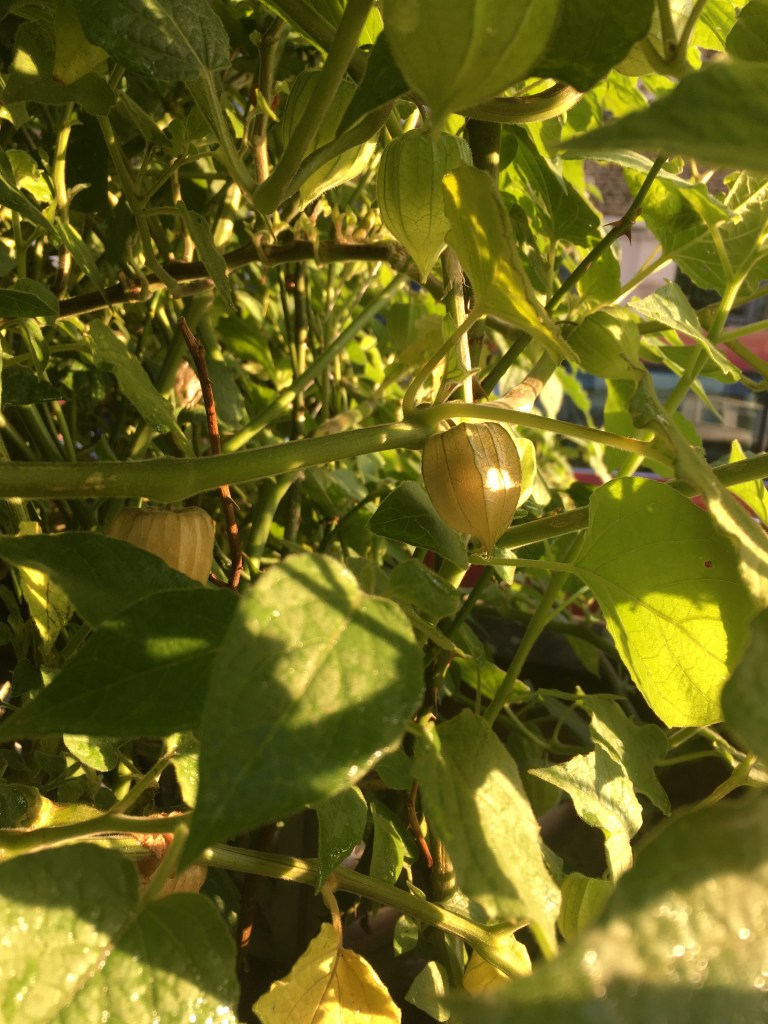
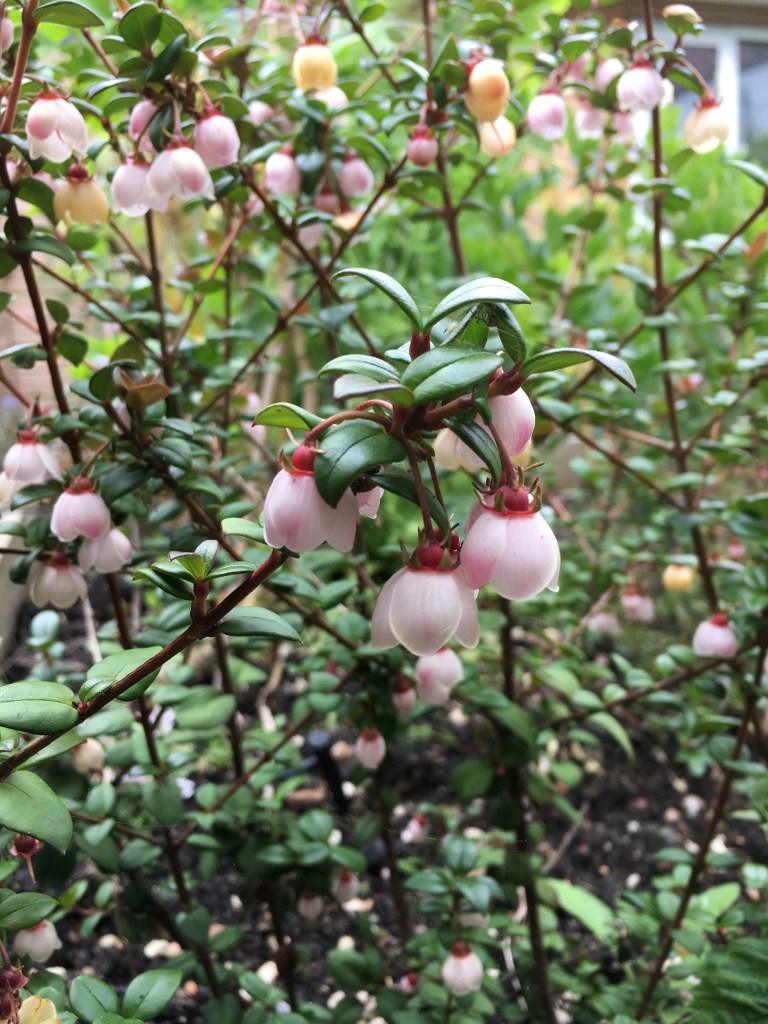
Edible perennial bushes Physalis (cape gooseberry) may keep some green over winter but they provide delicious orange fruit enclosed in papery shells. Physalis can get very large and bushy very quickly and can self-seed. It is much easier to remove than ivy though. Chilean guava is evergreen but slow growing so will take a while to establish.
2 yr old physalis bush
the edible fruit
flowers of the Chilean guava
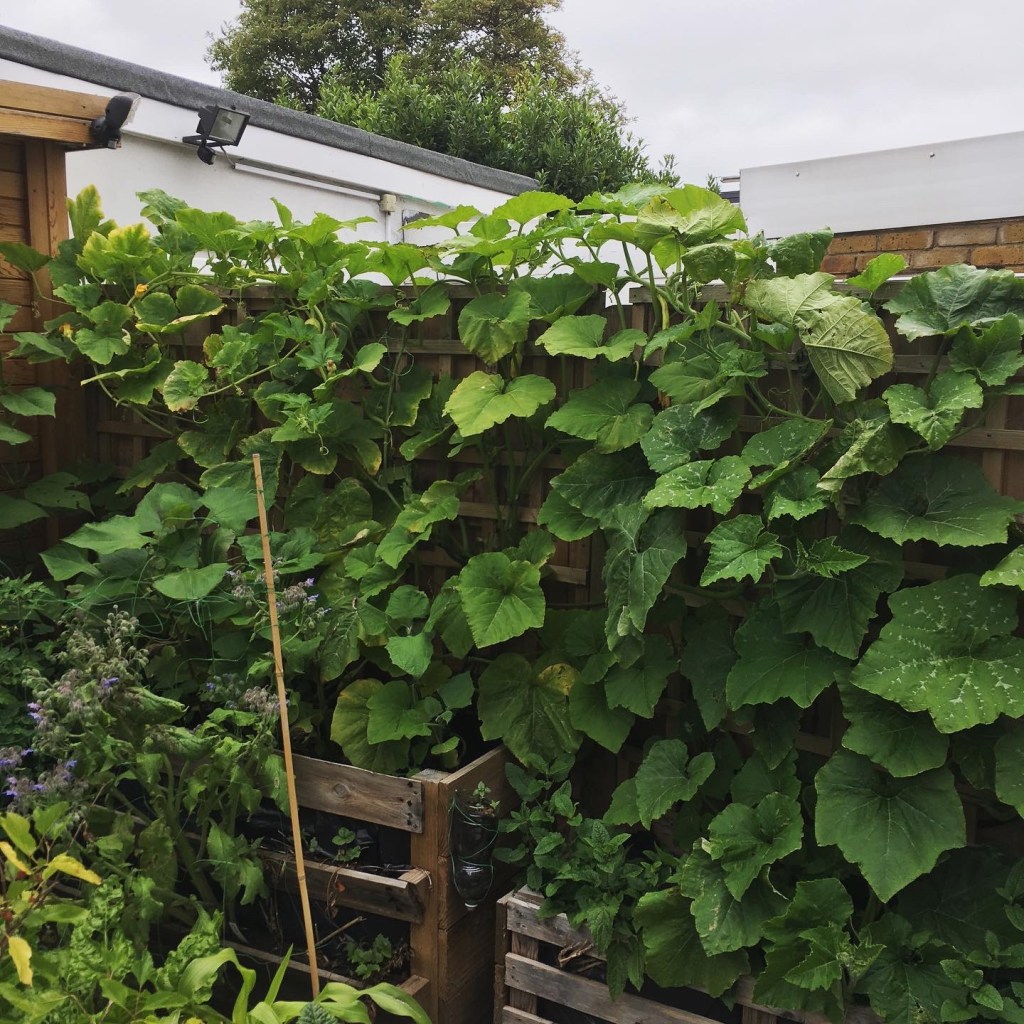
Edible annual – There are plenty of climbing beans and squashes that would cover any support in just a few months and have the bonus of providing you with something yummy in the process. Things like runner beans do OK in some shade. Squashes, sugar snap peas and fine beans need lots of sun. Trailing nasturtiums also climb trellises well and provide edible foliage and flowers.
runner bean wall
squash over a fence
nasturtiums
Hopefully these are some alternatives to planting ivy. Remember that any food you plant in your garden reduces packaging and waste. It can also reduce your carbon footprint.
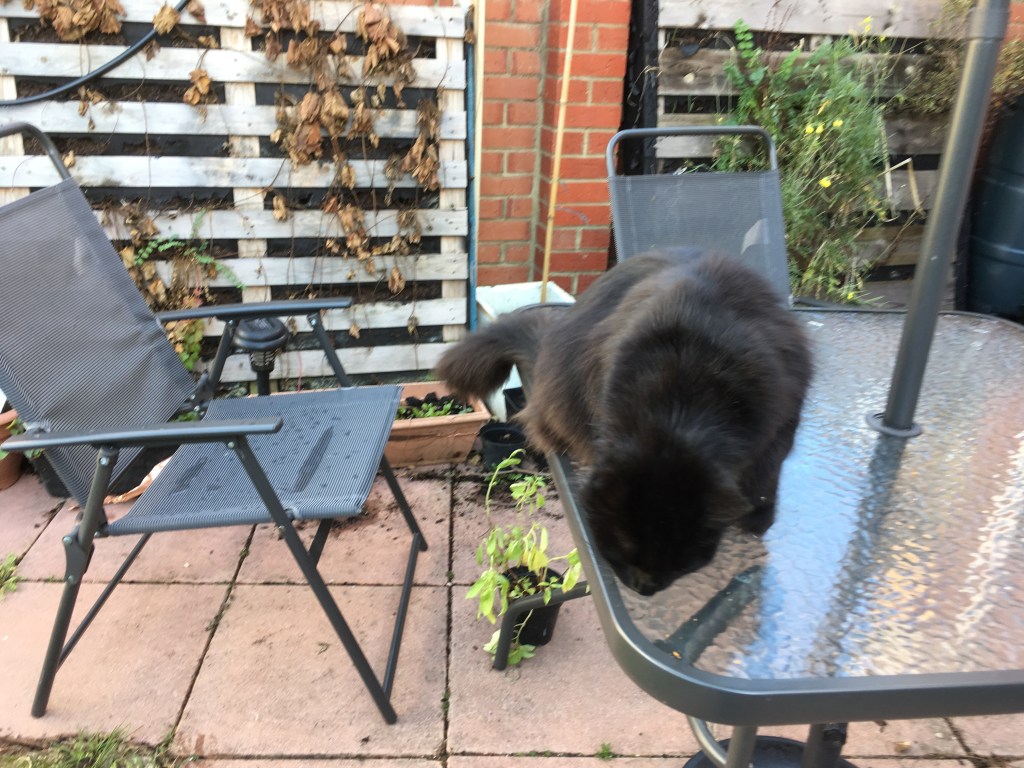
Rio, who has been mistaken by visitors as our cat because he was hanging around so much
Short version: Some of the issues caused by creatures in the garden and some of the ways I’ve explored to combat them, with varied success.
Before I get into this I would like to make it clear that I’m actually rather fond of animals…. We would probably have a pet if there weren’t allergies in the family. Doctors have advised against it. I even like cats (you might not think so whilst reading this), despite being them being little predators that terrorise birds and frogs/toads, which are beneficial to an edible garden. Annoyingly, they don’t seem to be particularly useful for deterring rats to the area. Or actually I’d love a couple of chickens – but little one is allergic to eggs so…er…. Anyway, there are things that certain creatures do that rile me up. This list was compiled from December alone:
Poo – I had to remove six poos from a single vegetable bed in one of the weeks, a total of 15 poos in December. I haven’t put in a photo because that’s just gross. Sadly, cat poo does not do the vegetable bed any good. Their faeces do not add much in the way of nutrients to the soil. They may also contain parasites that can infect humans or contain bacteria that is harmful. Sometimes the waste is slightly buried and is only found because of the smell. Sometimes it is just plonked on the surface. I’ve heard that cats that consider themselves to be the alpha of the area will not bury its poo. If they had the manners to bury their waste deep in the soil, without destroying the plants I don’t think I’d mind so much.
The smell like something had died – The neighbour who lives 2 doors down from me has a garden backing onto hers with a rat’s nest in it. You can then imagine my horror when in December I found a dead rat in my garden, under my child’s swing. I smelt it first. It was also the week of many poos so I thought it was a particular disgusting smelly cat gift. The smell was vile and overwhelming and gave new insight into the phrase ’smells like something has died’. Rats do pose a health risk with their leaky urine, though I haven’t seen any other evidence of their presence.
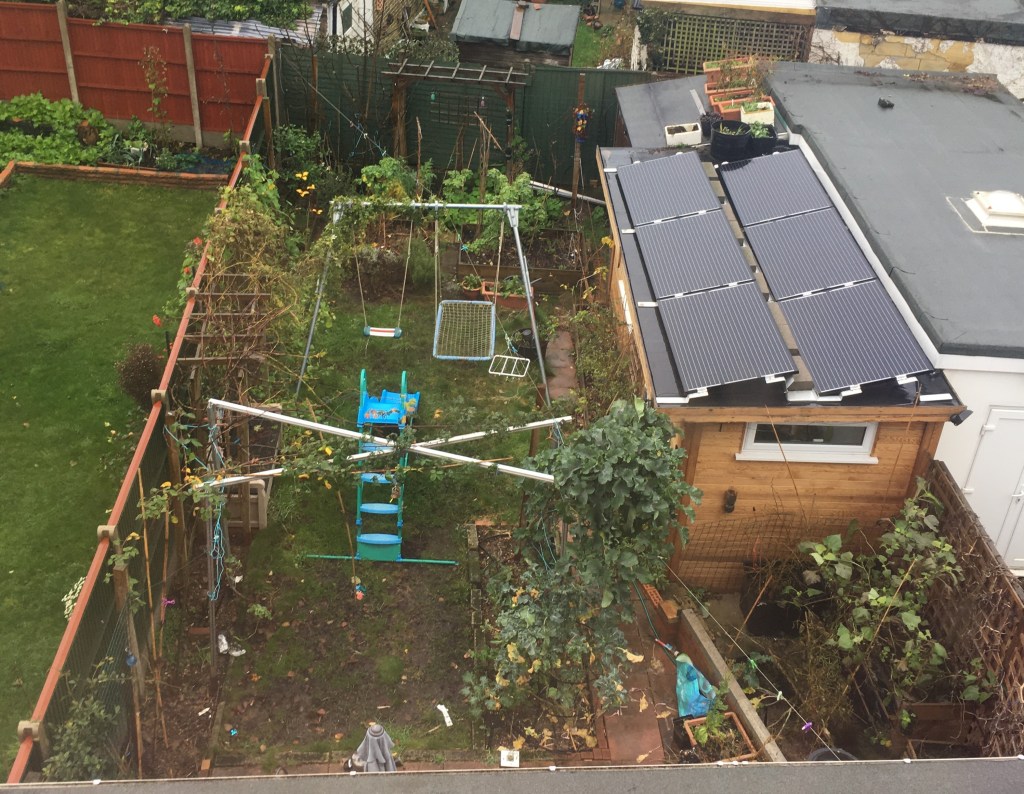
Digging – Now I don’t know whether the next culprit is a rat, a mouse or a squirrel. I have seen 2 out of 3 of these alive in the garden. One of these creatures has been digging up my pots. I sowed a whole load of seeds October / November. The pots were all full of seedlings. They are now mostly dead, and the soil is scattered everywhere.
2 pictures of digging…
… no pics of poo or dead rats
pipe chewed into many sections
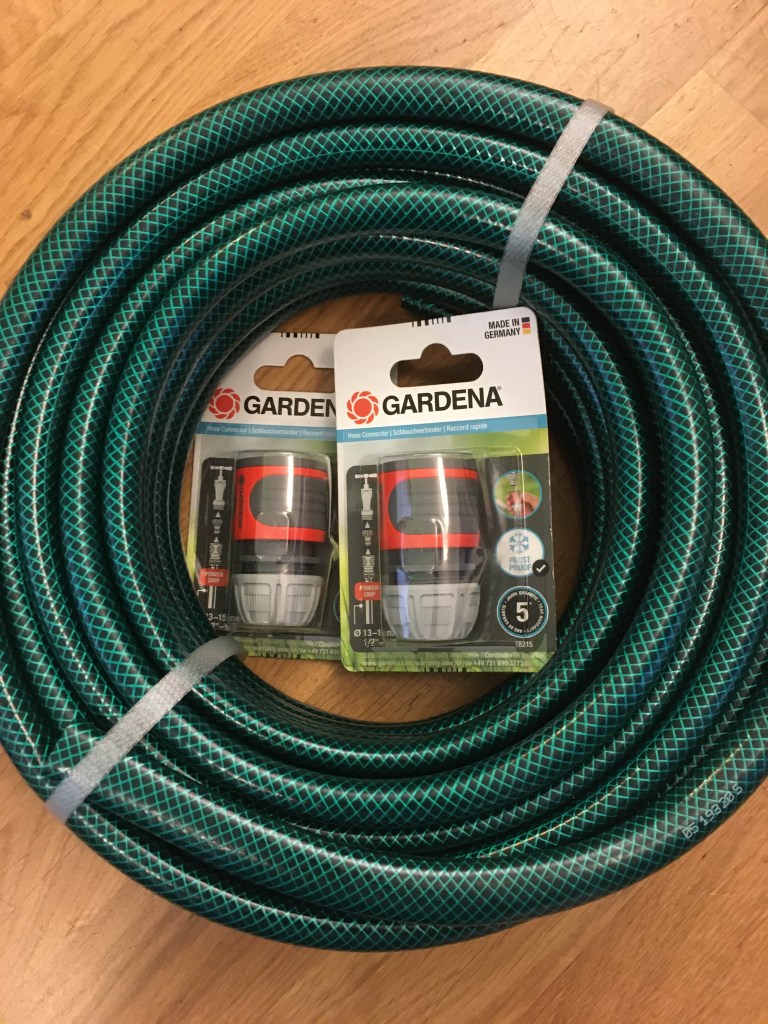
Destruction – I installed a water dripper system. It saves water as it drips it directly onto the soil rather than the leaves. Not soaking the leaves also reduces powdery mildew and fungus problems and it also saves lots of time in the summer and saves the lives of plants when we are busy or when we go away. A few of these pipes have been torn to shreds. Some creature has been gnawing at them, presumably to get to the water. I doubt I’ll be using it again before May, but it’s annoying that they’re going to need replacing.
Maybe these are problems you can relate to. The cat poo is the thing that bothers me the most, probably because, at its worst it requires daily removal. It is disgusting and I don’t even know where to put it after. There doesn’t seem to be any advantage to the garden. They don’t deter the other unwanted creatures, even though I have seen 6 different cats in the garden. They just dig up plants and poo. Occasionally they spray.
This is a list of how well things have worked for us:
Olfactory deterrents
Most mammals have sensitive noses so strong smells can be a deterrent. I’ve tried Rosemary oil, peppermint oil, orange oil and chilli powder. They did seem to keep cat poos down, but as soon as there was a rain or over too short a period (about a week) they were no longer effective. They kept the other diggers away too, but only for the same time period. I have read that planting lots of mint can help. It hasn’t in our garden, nor has lavender or rosemary bushes. Maybe we need more.
Chemical deterrents
This is also smell based but seems more dangerous than the plant based chilli or oils. We’ve tried something called catapult – which claims to deter cats with aluminium sulphate. You spray it liberally on surfaces and reapply after rain or a couple of weeks. I can’t say I noticed a huge improvement. There were still some visits. Because it performed less well than the oils and chilli we gave up on it pretty quickly because we do try and avoid chemicals. The label does also say it deters birds too which is not something we want to do.
We also tried something called ‘Silent Roar’ about 5 years ago. These are pellets that look like blobs of ceramic poo that have been soaked in lion dung. They instruct you to wear gloves when distributing them for both hygiene and so that the cats don’t smell your scent on them. They also advise not to let the cats see you dispensing as the cats then know it’s just you pretending to be a lion, which we found hilarious. These were effective for about 2 months but they’re not cheap and you don’t get much in a bag. It was only feasible in our previous tiny garden.
Sonic deterrents
There are motion detecting, high frequency sound emitters that are beyond human hearing. The cats can hear them, unfortunately they don’t seem to mind them. They showed their lack of dissuasion by pooing next to one of them. Holes are also dug in pots nearby, so it doesn’t bother the digging creatures either.
Physical deterrents
Not wanting to use chemicals or deter birds we then began looking at physical barriers.
Bamboo skewers – We hoped that these would form a forest of discouraging spikes. When placed densely enough the cats avoid the soil somewhat, but it did little to deter the small digging and chewing creatures.
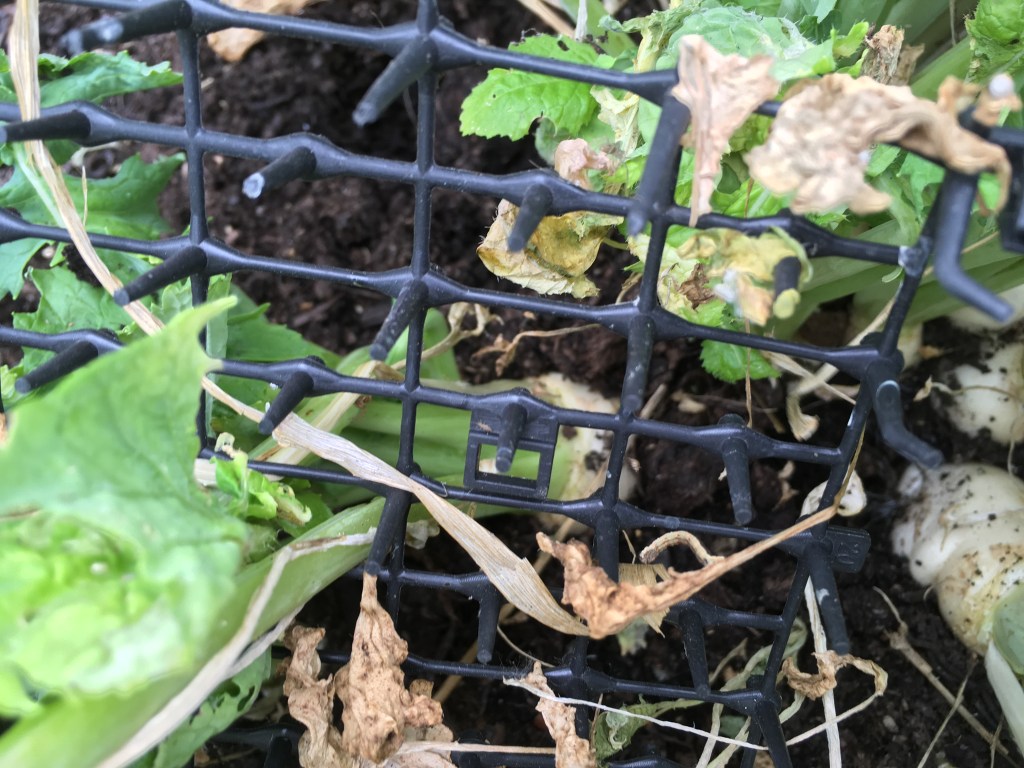
Chicken wire – I had hoped that this would discourage digging but allow the seedlings to come through. It’s hard to believe, but as I was installing it over some pots, I smelt something rather whiffy. I turned to see a cat. That cat had just dropped a steaming pile of protest on top of the chicken wire of the pot that I had only just finished. This did stop any digging though. Gave up on it as it was very difficult to weed and plant new things. Also some plants got stuck under the mesh.
skewers thrown about by cats
prickle pad
Yeah, I didn’t think that one through.
Prickle pads – this is plastic mesh that can be placed on the surface of the soil. All over the surface are little spikes. They’re not sharp or hard enough to cause damage to creatures (or me), but they are uncomfortable. This did stop the pooing and the digging – but there is the same problem of getting to the soil it and plants get stuck. This is not something you want to put on top of beetroots.
All of these things are not great for the environment either as they require energy and material to produce and transport. I have kept all the bits and will continue to use them until they fall apart, but I don’t think they’re worth buying more of in the future.
Layer of uncomfortable prunings – this works well for us…ish. Whenever there is bare soil to be left for a little while I’ll take the stems and twigs of whatever was last harvested or cleared from the garden and use that to cover the soil. This stops all the digging and pooing. It’s free and it’s environmentally friendly. The only problem is that it can’t remain in place when seedlings are growing as it blocks the light and squishes the seedlings.
Motion activated water sprayer
This is our winner for the cat poo problem. You hook up a hose pipe from the outdoor tap to the little contraption on a spike. It has a motion detector, which when activated sends a jet of water in an arc across the garden. On this particular model you can fiddle with the distance of jet (which is also dependent on how open your tap is too), the width of the arc and the sensitivity of the motion detector. The results are long lasting. This is actually our second one. After 3 years of mistreatment bits had snapped off, it had started leaking and it just wasn’t doing the job anymore. Whenever we have had it running the garden is feline excrement free. The best thing about it is that the cats’ behaviour changes. Even when the water hasn’t been switched on, I’ve seen a cat on the fence bolt when it has heard the click of activation. Our last one had been out of commission since June and the cat poos started appearing again about November. We installed the new one just before Christmas. The water was on for 2 weeks, on and off for a week and now has been completely off for a week. Since the new one was installed there has been one poo. I was a bit sad about this, but I had to admire the audacity of the cat. It had made its way over the shed and garden room roof, dropped down undetected into a pot that was behind the sprayer and left a poo there. That soil has now been covered with twigs. I’m not sure if the smaller creatures activate it but maybe they’re scared off by the spray when it happens.
video of the motion sprayer in action
It’s a bit of a bitter victory, as there are 3 cats on the road that we are rather fond of. They haven’t visited us in the past month, unsurprisingly. One of them used to visit still when the last sprayer was in place when we were in the garden. He had worked out that when there were humans about, the garden was safe. The other 2 are young and new to the road (so also new to the sprayer), so you never know. Maybe we can reach a happy medium. I like them. I just don’t like their poo.
It is easier to eat seasonally in the summer and autumn, but hopefully this week’s blog can give you some ideas about what you could grow in a UK garden (and maybe other northern hemisphere areas) over winter… which seems like a good idea when you see the news full of Brexit, lockdowns and of course becoming more sustainable is on my mind anyway after last week’s climate change blog.
Last week’s climate change blog inspired a panic of ‘MUST GROW MORE FOOD’!!! This week’s lockdown announcements also inspired a panic of ‘MUST GROW MORE FOOD’!!! Whilst this is still true, after assessing the garden in its current state, I realised how many things there were still in the garden to eat, even in January. The quantities are not so great, but the variety isn’t bad. It was actually one of my goals this year – to try and create a garden that would feed us more through the winter. In the summer, every day, we can pop out into the garden and bring something back to eat. there is a time, during the summer (changes depending on what we plant and how the weather is behaving) when we can eat fresh fruit and veg solely from the garden. Whilst I don’t think this is achievable for the winter, it would be fabulous if we could, at least, supplement our food shop with food from the garden. Currently we get maybe 4 or 5 meals a week that have garden vegetables. Sadly, this won’t last into February, but below is what we have been able to eat this winter so far. All of the photos were taken this month, though most were taken this week.
Persistent perennials:
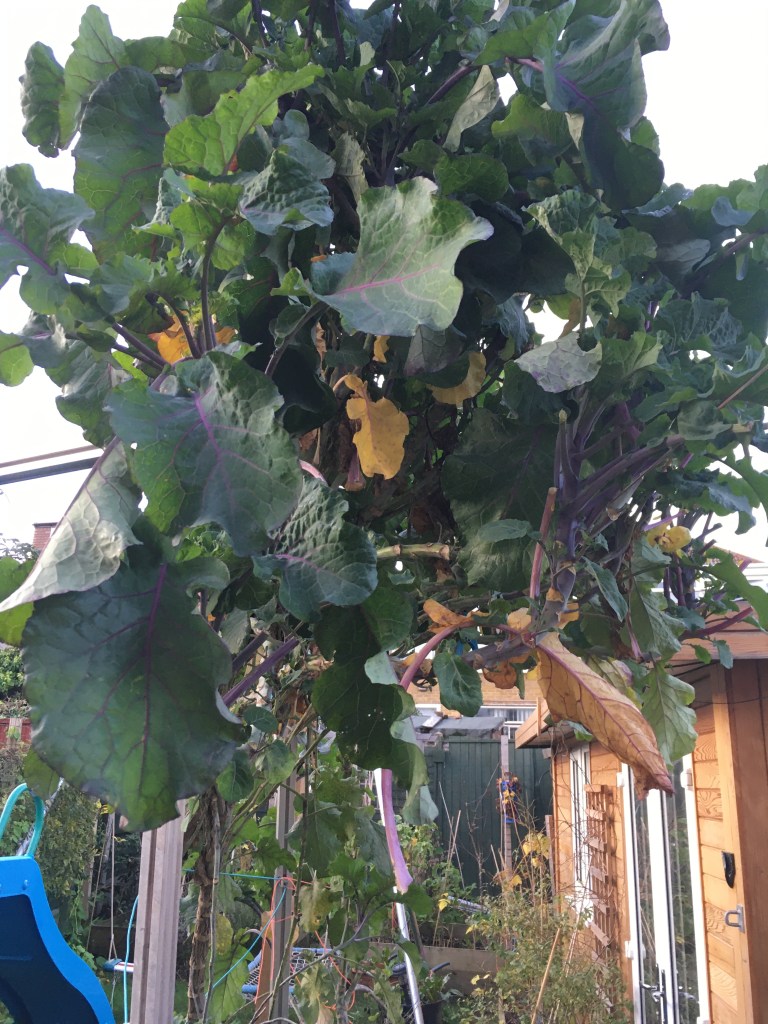
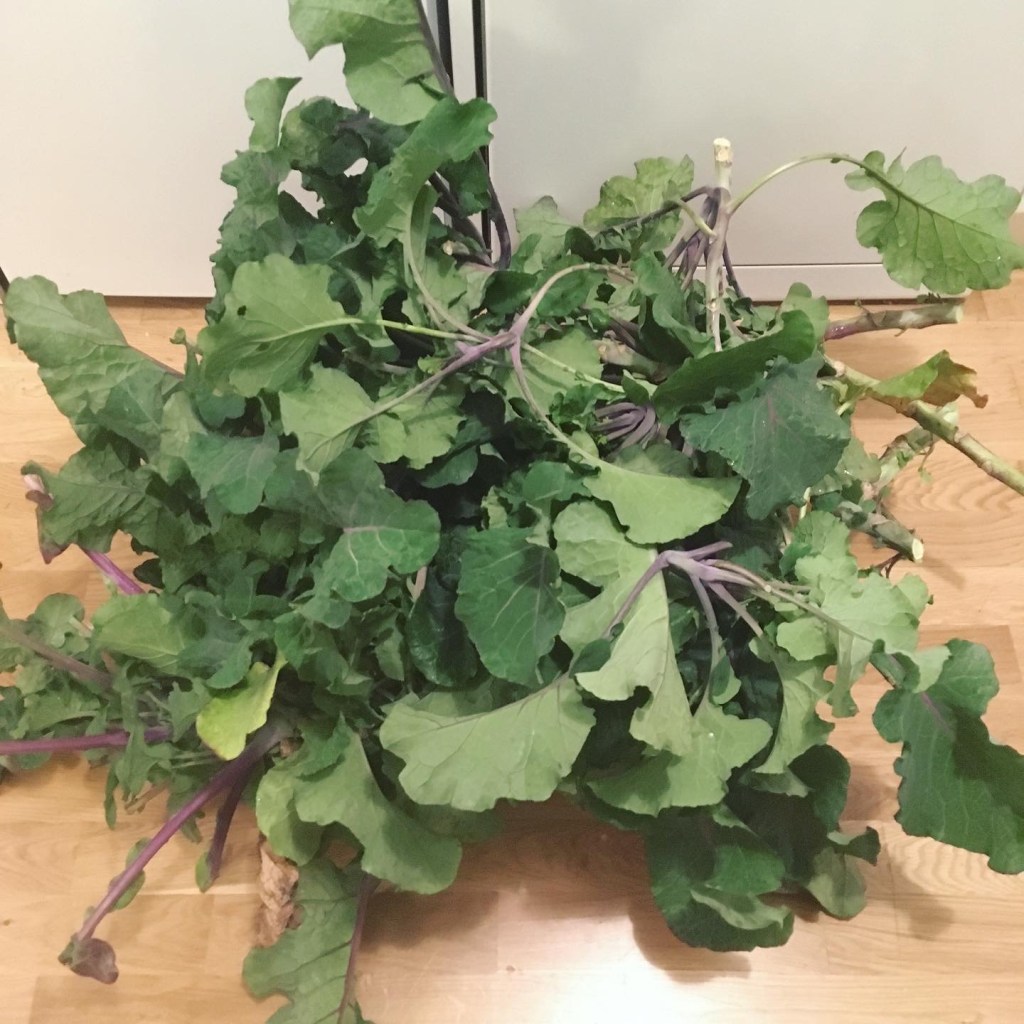
Purple tree collard – This is fabulous brassica and has grown huge (it was 10ft, now pruned to 8ft). We’ve mostly ignored it over the summer so now there is still plenty to harvest. The leaves are a bit tough, but that is remedied with some longer cooking times. It’s not as prone to powdery mildew as the Daubenton’s kale and as the weather turned some of the went leaves yellow. It does benefit from frequent harvesting to allow for more air circulation. Highly recommend this for large amounts of winter (and hungry gap) food. It also produces a lot for the amount of soil space that it takes up. It tastes great as kale crisps. Click for more info.
Before pruning
Eating the prunings has taken 5 meals so far.
Still need to take another foot off the top
Daubentons kale – we do have a problem in the summer with powdery mildew, especially when it gets really hot and humid. We have lost much of the growth this year and have had to chop it back quite severely, but this does much better in the winter. The growth is slow, but this, like the purple tree collard, does produce a lot of food for the space it takes. Click for more info.
Watercress – It’s refreshing to have a leaf that doesn’t taste similar to brassicas. The only problem is that it really is slow growing. It also takes up quite a lot of soil space. Click for more info.
Physalis – this evergreen bushy plant still has plenty of fruit growing on it through winter. The fruit doesn’t mature so quickly when the weather is cold, but the berries are a welcome fruit when there is no other fruit available in our garden. Click for more info.
Three cornered leek – It is illegal to plant it in public spaces because of what a nuisance it can become. Therefore, I was very careful with planting it in a border surrounded by walls and flagstones where it wouldn’t escape. I also planted it sparsely. It has self-seeded and spread very well. I have also grown it in the very shadiest spot, under the physalis bush. There’s enough for a couple of meals but hopefully next year this space will be totally full, and I can harvest it into submission. I do wonder if it would make a good winter substitute for grass. The only reason I haven’t (yet) is that in the summer it dies back completely so we would have a lot of bare earth that cats would just poo on. Click for more info.
Chinese chives – these are dying back with the cold weather but there is a little bit to eat still. This won’t make a complete meal, but it can be added to stir fries, soups, stews or sauces. Click for more info.
Walking onions – these have been planted in quite a shady spot, so they’ve grown rather slowly. There is plenty for stir fries, soups, stews or sauces. Click for more info.
frost hardy Daubentons
watercress
physalis
our sparse three cornered leek patch
lush three cornered leeks in the park that we hope to get
Chinese chives dying back
Perennials that need a bit of a hand:
These are root vegetables so need a hand because if you remove everything from the soil then there’ll be nothing next year. All the following 3 have the sugar inulin, so they can cause gas because they feed the gut flora – so a bad but good thing.
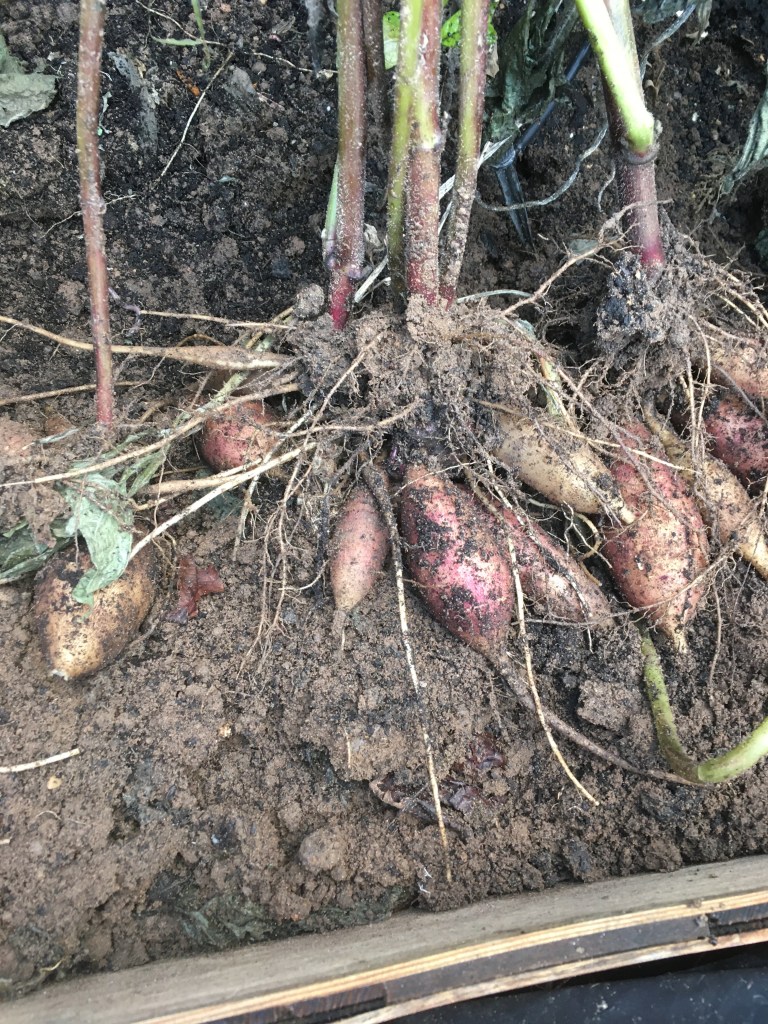
yacon
Jerusalem artichoke
Chinese artichoke
Yacon – I only harvested this, this week. They’re can be really easy to pull up, root system and all, if the soil is friable. Raw tubers have a texture of water chestnut and a taste of carrot mixed with apple. They get sweeter when left on a sunny windowsill for a week. They can be stored in the ground (as long as the ground doesn’t become completely frozen) over winter and provide a decent amount of food. Little one loves them raw, but we don’t have many uses for them beyond that. They need peeling as the skin is bitter. They grow back from rhizomes (so you can eat all the tubers), which can be stored in a pot of compost somewhere sheltered. Click for more info.
Jerusalem artichoke – This is a new one for us this year. I was surprised at just how much food they produced for the amount of ground space needed. They do grow very tall though (ours were about 10 ft) so plan carefully where to grow them. They too can be stored in the ground (if there isn’t a hard freeze) and become sweeter with a frost. They also store fine in a fridge for a couple of weeks. The skins can be left on and they are lovely roasted or sauteed. You need to leave a couple of tubers to grow the following year. Raw they have a texture and taste a bit like nutty waterchestnuts. Cooked they are like potato and taste quite like steamed artichoke hearts. Click for more info.
Chinese artichoke – these are harder to harvest as they grow very deep down into the soil and are fairly small. It’s fun for the little one to dig and spot them though. This does mean that you are likely to have left tubers behind, so they’ll grow back easily the following year. The tubers look like tiny Michelin men and are very fiddly to clean. They have thin skin that doesn’t need peeling. Raw they taste and feel like waterchestnuts with a hint of mild radish. Cooked they are more like taro in taste and texture. Fiddly, but fun. Click for more info.
Self-seeding annuals:
hardy lamb’s lettuce
flowers of the winter purslane
nasturtiums – taken just before the frost that killed them
Lambs lettuce – little one loves these as a salad leaf. The only reason I don’t grow more of it is that it forms very short plants, so they do take up a lot of soil space. A definite disadvantage in our small garden. Click for more info.
Winter purslane – eaten like lettuce, this also grows very short but it self-seeds so readily and grows so well under and around things that no matter how much we eat there is always plenty the next season. It is a bit fiddly to harvest though. Click for more info.
Nasturtiums – these are a fabulous plant to have in the winter. We have a trailing/climbing variety that uses the pear and apple tree to climb up. This is something we discourage in the summer, but in the winter when the leaves have all fallen and the fruit trees are dormant, we let the nasturtiums grow rampant and it’s a great non-brassica to have. Some of the plants will be ones that have grown through the summer and some of them will have grown from seed from September. They don’t deal well with frost so we must try and eat anything edible before the really cold weather to avoid waste. Click for more info.
Annuals:
All of the following are frost hardy and do well in the UK winters. The growth is slow though. If you plan it well you can have these almost ready as the winter starts and then the garden can act as a bit of a larder. Sadly, I didn’t plant many of them soon enough or in large enough quantities. I mostly waited to clear everything else before sowing them:
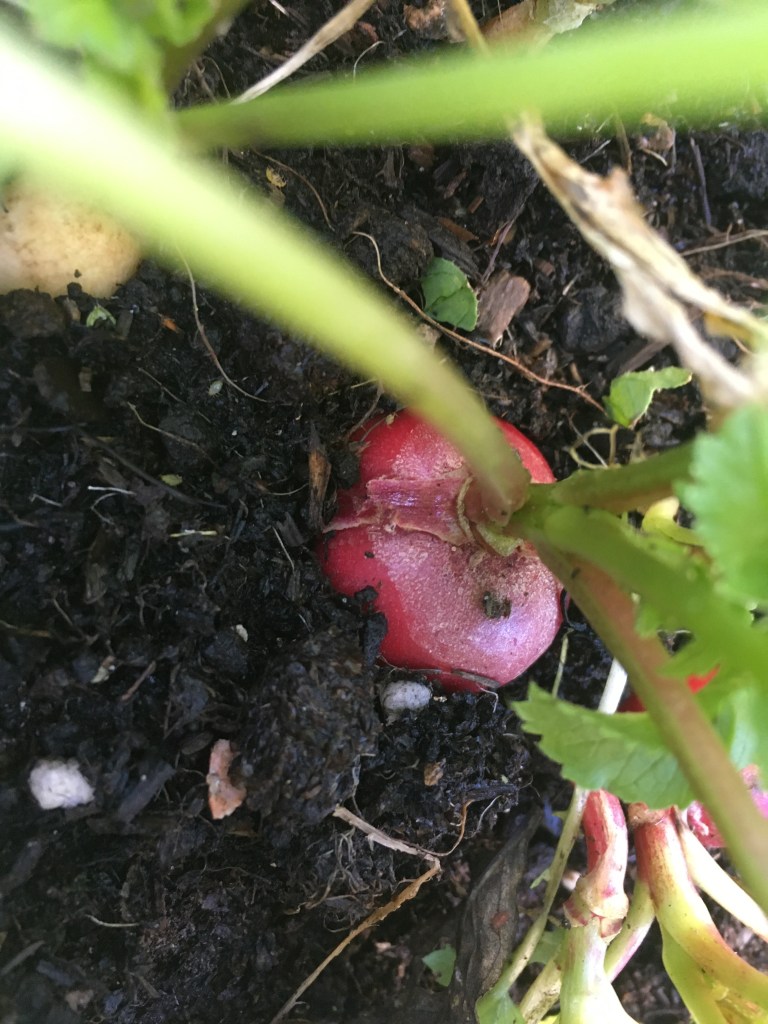
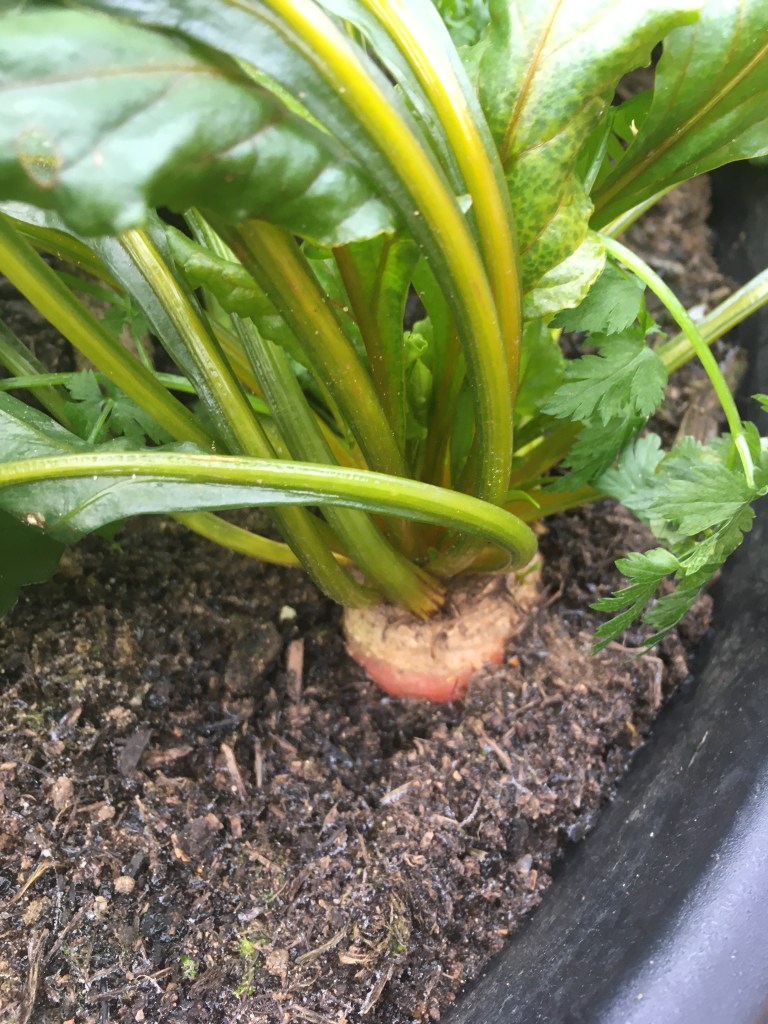
radishes still going today
and beetroot
peppermint chard given to us from a neighbour
pathetically tiny cauliflower curds
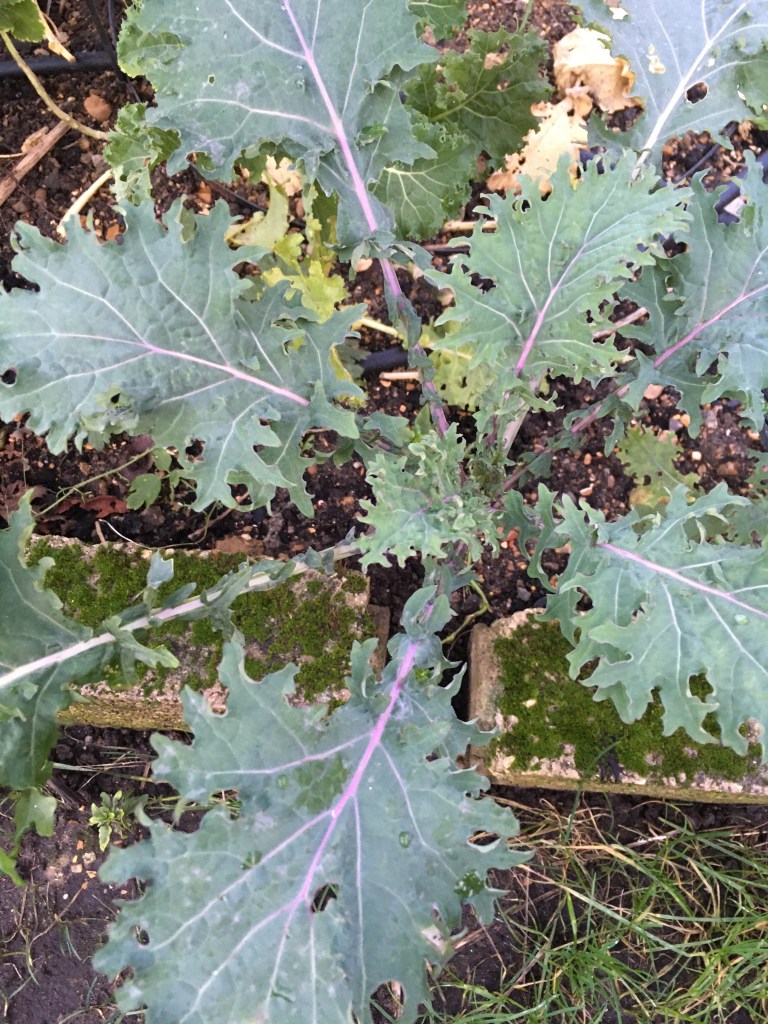
Red Russian kale
Radishes – generally grow quickly in warm weather, they need about 2 months to mature in late autumn. They haven’t grown much in the past month though. We also grow these for the greens overwinter. Click for more info.
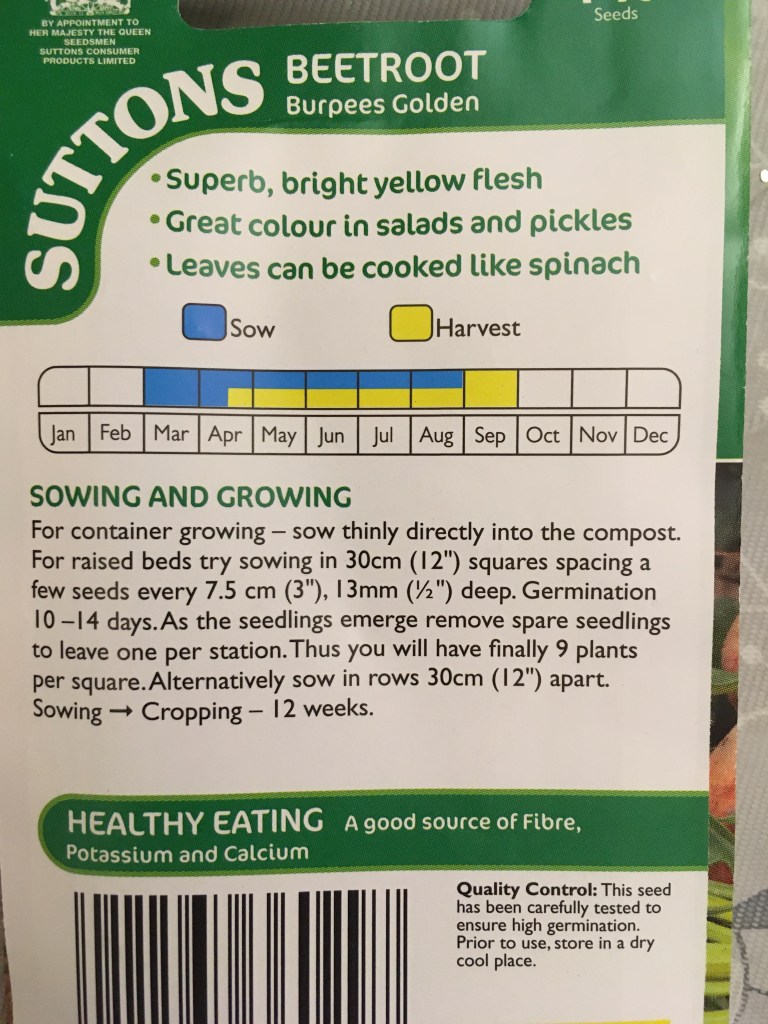
Beetroots – we grow golden beetroots as they’re sweeter. Little one will only eat the yellow ones. We only have about 3 left in the garden. We should have planned better and sown more.
Chard – most of our plants are actually from a neighbour. They’re quite little so aren’t providing much now, but they should grow really well in early spring and be a welcome harvest in the hungry gap (April /May when there is little else available). Click for more info.
Cauliflowers – these were planted in too shady a spot and the curds are tiny.
Annual Kales – have Red Russian and Pentland Brig. These are still quite small but hopefully that means that they may still be going over the hungry gap.
current batch of pea shoots
Indoors
Pea shoots – these can also be grown year-round indoors. It takes 4-6 weeks to get something to eat. These can be grown cheaply from supermarket dried peas. Click for more info.
Bean sprouts – these can be grown from dried mung beans year-round and only takes about a week. Click for more info.
Ideas for this year
Collards over kales – I’m sure the purple tree collard and the Daubentons will continue to thrive, but in order to keep producing lots of food over both winter and the hungry gap I think it’s work starting a couple more purple tree collards. 3 plants would provide enough for meals 3-5 times a week year-round. We might get a bit bored of it, but we’ll just have to find new interesting ways to cook it. It might also be a good replacement for a Daubentons. Whilst I love it for the tender tasty leaves, I’m fed up with dealing with the powdery mildew.
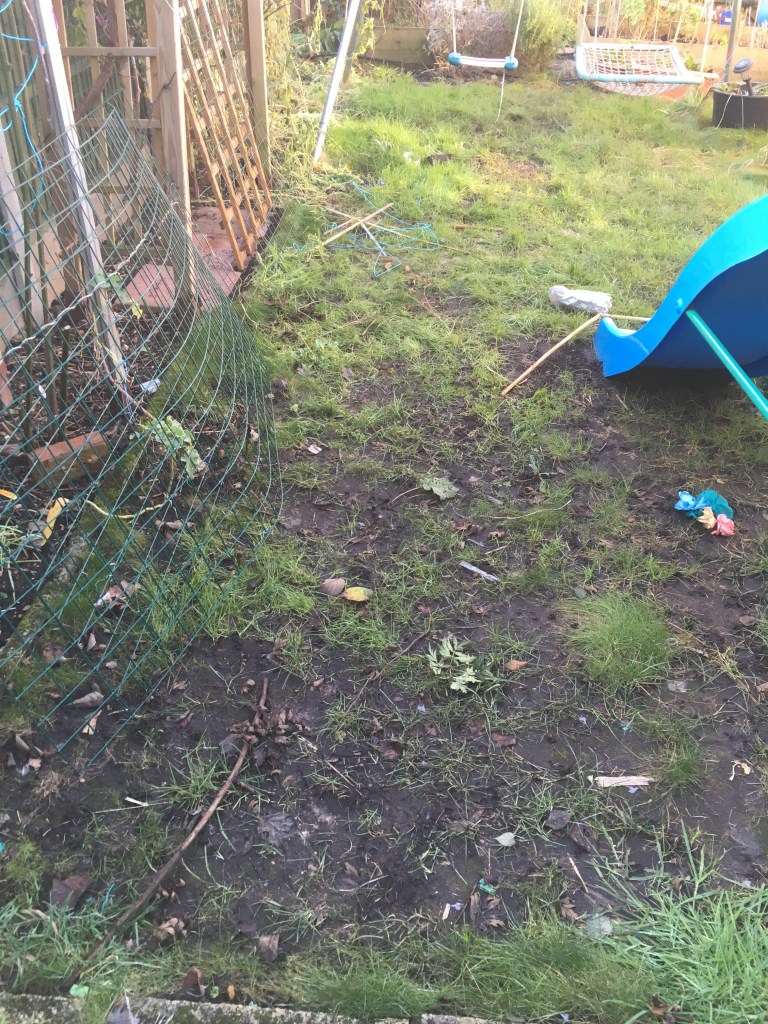
Grow food not lawns – To make the most of the space, I think it’s worth removing some of the patchy lawn (or just planting into the bare bits) to replace it with watercress, maybe try some landcress, Chinese chives and three-cornered leek. The Chinese chives and three-cornered leek thrive during opposite sides of the year so if I interplant them, the ‘grassy’ area shouldn’t get too bare. It’s worth sowing some winter purslane and lamb’s lettuce into this too. This means the area where the watercress currently is could support more chard, cauliflowers, or annual kale instead. These I’ll make sure I plant more of, and earlier than I did last year. Hopefully that means we’ll be covered in both winter and the hungry gap. We’ve tried growing edible flowers in the lawn but we’ve only managed to get a couple of each plants so far. We might also try some mint or lemon balm.
Lawn today
could also grow some purple clover for the edible flowers…
… and daisies are edible too
we could add some violets
lemon balm might do well too
the space currently occupied by the watercress
Think ahead – In August September the garden is rather full and it’s hard to keep up with the harvesting so it’s hard to think of the leaner months, but this is when I need to sow more beetroots and chard to prepare for winter. More radishes need to be sown in early October so they can be harvested in December and then they can be left to provide greens over the later months.
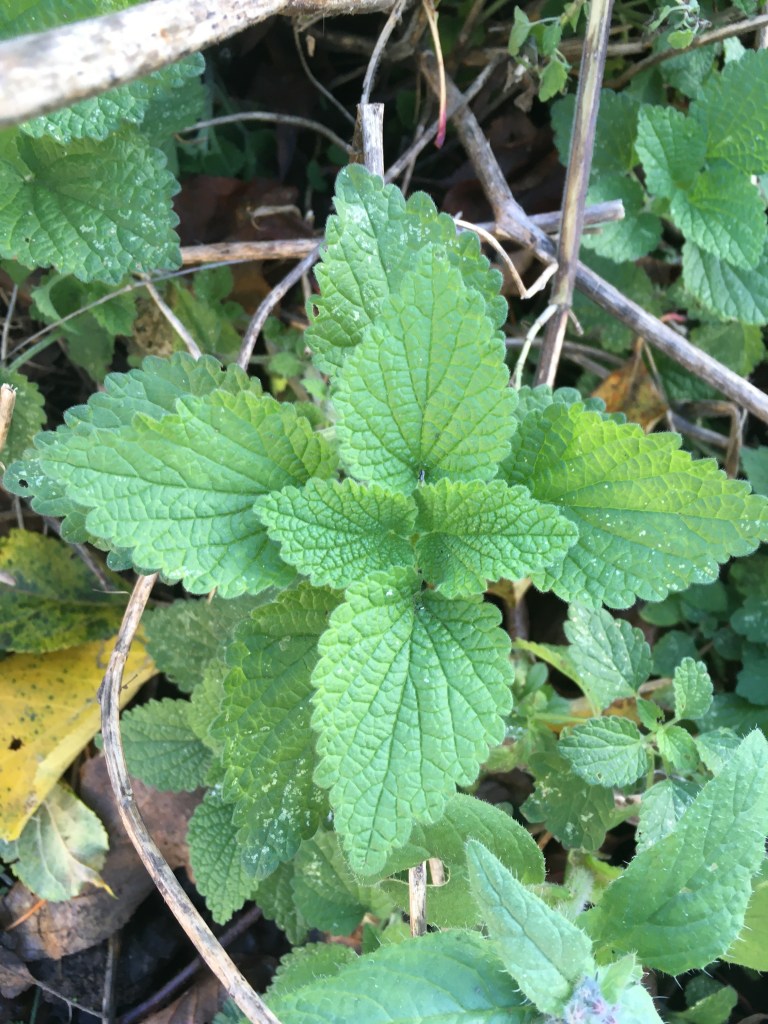
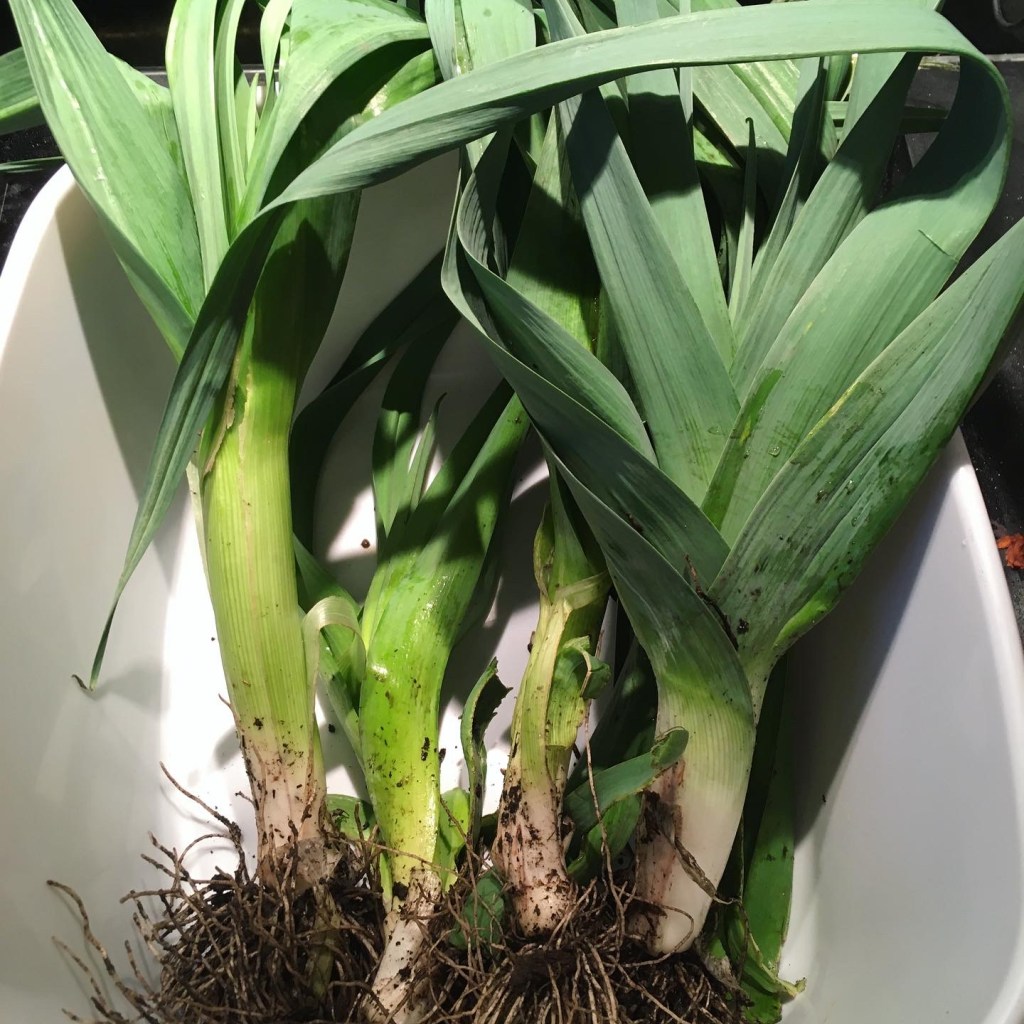
Leaves – There’s a few new things I’d like to try this year. We have a muskmallow plant that still has some green leaves so maybe this year we could grow more, for the flowers in summer and for salad leaves in winter. My neighbour gave us some leeks in the last week of December. If they grow well in her garden, they’ll certainly be fine 4m away. I’m dying to try growing tatsoi and texsel greens too. I’ve never been particulary successful with Oriental leaves like pak choi, choi sum and kai lan. It’s always eaten by everything else in the garden, from pigeons to slugs. I think it’s time to give it another go.
muskmallow leaves
leeks from the neighbour
we should have started these daikon radishes earlier
Winter squashes – We’ve never really grown winter squashes to store. We’ve grown tromboncino, spaghetti squash, red kuri and pumpkin munchkins and have always eaten them young or soon after they’ve gone orange. This year we’ve ended up with a tromboncino and a few pumpkin munchkins left over that we just never got round to eating. Our garden is small, so we don’t tend to get much left over. This year I think we’ll put a few more supports in and grow a few more things vertically. We’ll leave more tromboncino and spaghetti squash to ripen and cure and I think we’ll try ‘Crown Prince’ squash this year too.
Maybe this time next year I’ll be able to update with an annoyingly smug post about our garden success… er that is… if home schooling hasn’t sent me mad by then.
Short version: Human consumption of energy and demand for products is driving climate change. Everything makes a difference, from the green house emissions due to our energy uses to our personal choices leading to deforestation on the other side of the world. We are reaching a tipping point where another small increase of temperature could lead to a snowball effect that puts climate change beyond our control. If all our choices are causing climate change then we can make changes to stop it. We can make choices now, in our everyday lives to slow down climate change.
For some reason my other half saw fit to put on Climate Change – the facts by Sir David Attenborough on TV on Christmas Eve. Er… yeah… little bit hypocritical of us given the gluttony and consumerism in the holidays.
If you haven’t seen it (it is very much worth watching), these are a few points:
Greenhouse gases, mostly carbon dioxide and methane are causing the temperature of the earth to rise with dire consequences:
Death of species unable to adapt quickly enough.
Melting of glacial ice is leading to rising sea levels and unpredictable stormy weather is leading to flooding. Homes are destroyed and people are being relocated. The melting ice also releases trapped pockets of methane (a worse greenhouse gas than carbon dioxide) that exacerbates the problem.
Wildfires are raging out of control killing wildlife and destroying habitats and homes. The burning of the wood releases more carbon dioxide.
Deforestation is still continuing at a massive rate which is a problem for many species but inevitably for all, as the world’s forests, by photosynthesis, can suck up and store much of our carbon dioxide. With their ever diminishing size they are less and less able to mitigate human behaviour. Now a third of our CO2 emission is caused by deforestation. Rainforest is cleared and burned for soybeans, rubber, pasture for cattle and mostly palm oil. Demand in other countries is driving deforestation.
There have been some big changes like the switching from fossil fuels to renewable resources. Countries, depending on their situation are increasingly turning over the majority of their energy production to wind farms, solar cells or hydro electricity. There are other sources but these are the most prevalent.
Now this is the bit that is relevant to you (and me)… well all of it is relevant but it feels overwhelmingly difficult to comprehend and/or face the problem that we, as humans, have created for ourselves. Every person has a yearly carbon footprint. Everything we buy has some sort of carbon footprint. We can reduce this by simple things like insulating the house (which also reduces bills), buying less products (or by buying products of better quality that last longer). Because a quarter of the carbon footprint in the UK is food, that can be cut in half by:
eating everything you buy i.e. avoiding waste
avoiding air freighted food
reducing dairy and meat – especially beef and lamb
The take home message was that we can all change our own behaviour and convince others too. Right now, we can still halt climate change – but there is only a small window before we reach a tipping point.
So… all a bit bleak – but let’s try and make this easier to see. Firstly, CO2 is a colourless gas! A tonne of carbon dioxide is a bit abstract. You can think of it as a cube with sides of 27 feet – around 8.23m – so 557.44m3. (click here for the source)
Then what does that look like in terms of use? Well, driving 10,000km in a petrol car creates around 2.5 tonnes (a diesel car is higher).
As I understand it, these figures include energy consumption, transport, products and services. There will be some things that are improving as countries turn their energy sources over to more renewable sources. Here we can look at the Drax website and you can see what percentage of the UK’s energy is derived from which source. If you compare 10 years ago to last year, in rough figures – coal went down from 30% to 2%, gas also came down from 47% to 35%, wind went up from 3% to almost 25%, nuclear didn’t move much from around 17% and hydro, solar and biomass combined have gone from almost zero to 13%.
2010
2020
So much of what we buy have carbon footprints we don’t see. Take, for example, the box of chocolates that I’m feeling rather guilty about nibbling on:
Packaging – cardboard, foil, plastic – a tree was felled, metal ore was mined and extracted, crude oil was drilled and extracted as a raw material to make plastic… all of these things need a certain amount of transport and manufacturing and of course there’s also the dyes involved in the colours of the branding.
Ingredients worth noting:
Sugar – can be grown in the UK, but requires much processing.
Coconut oil – which isn’t grown here
Palm kernel oil – really REALLY bad as it is one of the main crops that drives deforestation.
Cocoa – which is definitely not grown here must be processed and shipped.
Milk products – the dairy industry is a pretty hard on the environment. Rearing cows is energy consuming and cows produce a lot of methane.
All the ingredients must be transported to the factory and the chocolates produced and package. Then there is transport of the chocolates to the shop (then my kitchen table). Wherever energy is used in manufacture or transport chances are it will have caused the release of greenhouse gases. Demand for the ingredients like palm oil supports deforestation. I’ve never really noticed any of that carbon footprint till today. You may be pleased to know that I no longer feel like eating them.
So, my message, in the first blog of 2021 is that it’s not too late to do something about climate change, but time is short. It does require governments and industry to make the big changes, but in turn, these changes can be driven by voters and consumer behaviour. You can do little things to make a difference. Any changes that we make, no matter how small, can make a difference – especially if everyone gets involved. You could start small to keep it achievable or just by considering more environmentally friendly options through the year you could make a difference. I’m sure you all have plenty of ideas. All are welcome in comments. I’ll be implementing some of the things I’ve mentioned in this post into New Year’s resolutions, especially considering the products I’ll be buying, but as always, I’m very edible garden orientated and I believe it’s not just about what you do yourself – but also about getting the message out there and encouraging others:
Grow food. I encourage anyone, everyone to grow some food, even if it’s just on a windowsill or a balcony. The growing plant will take in carbon dioxide. Any food you can get from what you grow will have a tiny carbon footprint in comparison to something grown using intensive farming methods or something that required transportation. I think you can also be pretty sure that the things you grow to eat didn’t encourage deforestation on some other patch of earth. Eating plants over meat is much more environmentally friendly. This is one of the things we, as a family need to look at most. We do eat far too much meat, but, if we can grow more tasty veg (and home grow is definitely tastier), especially in the winter months and maybe in the lawn (I’m thinking of replacing our diminishing patch of grass with a bed or maybe just sowing some things in the grass itself), then maybe we’ll find it easier to eat less meat.
Composting of kitchen greens and waste cardboard reduces transport of waste and reduces the need for fertilisers or shop bought compost, both of which have manufacturing, as well as transport, carbon footprints. Click on each of the following for more info: composting, fertilisers, reusing and recycling at home, reusing and recycling in the garden.
Grow more perennials and self seeders. I’m going to grow more of these this year as perennials store carbon and buying seeds annually does require them to be produced and shipped. Seed sharing with others would be another option.
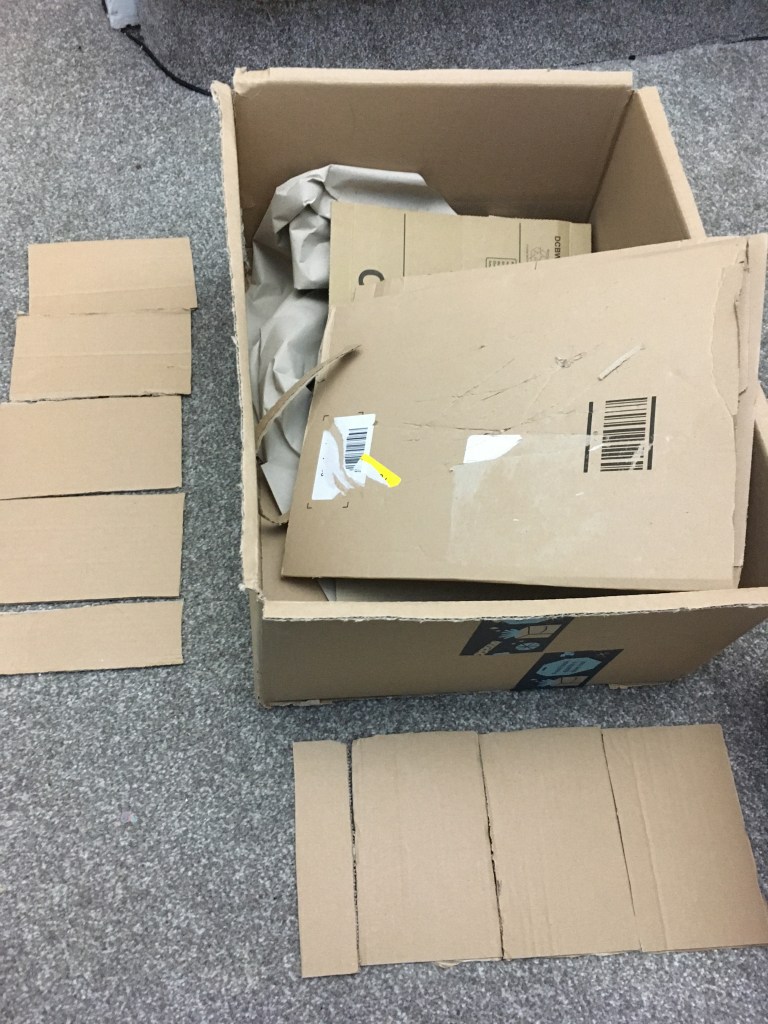
In December when you have little inclination to venture into the garden and you have the head space to deal with your seeds you can make a practical, repurposed seed box with the small Amazon delivery boxes and some cardboard or old cards.
There are only a few things that I can bring myself to do in the rainy, cold December garden:
Sowing – there are a couple of varieties of broad beans that can be direct sown outside still (a few herbs, and salad leaves, like lambs lettuce, can be sow inside or undercover ).
Harvesting – physalis, oca, Chinese artichokes, Jerusalem artichokes, yacon, cauliflowers, chard, three corned leek, chard, Chinese chives, kale, purple tree collards and the last few beetroots and radishes are available.
Removing cat poo and, last week, one dead rat that recalls the phrase ‘smells like something has died.’ To be honest this has put me off going into the garden more than the rain does.
Really preferring the indoors after that and in December I have the time and head space to sort out my seeds. With the plethora of ‘Black Friday /Cyber Monday’ seed sales and my ‘worst case scenario wife’ (and yes – he really does call me that) Brexit/COVID panic I now have a ridiculous number of seeds. Even if I annex the shed roof, parts of the lawn and fill abandoned water tanks and pots, I imagine I’ll still have plenty of seeds come 2025.
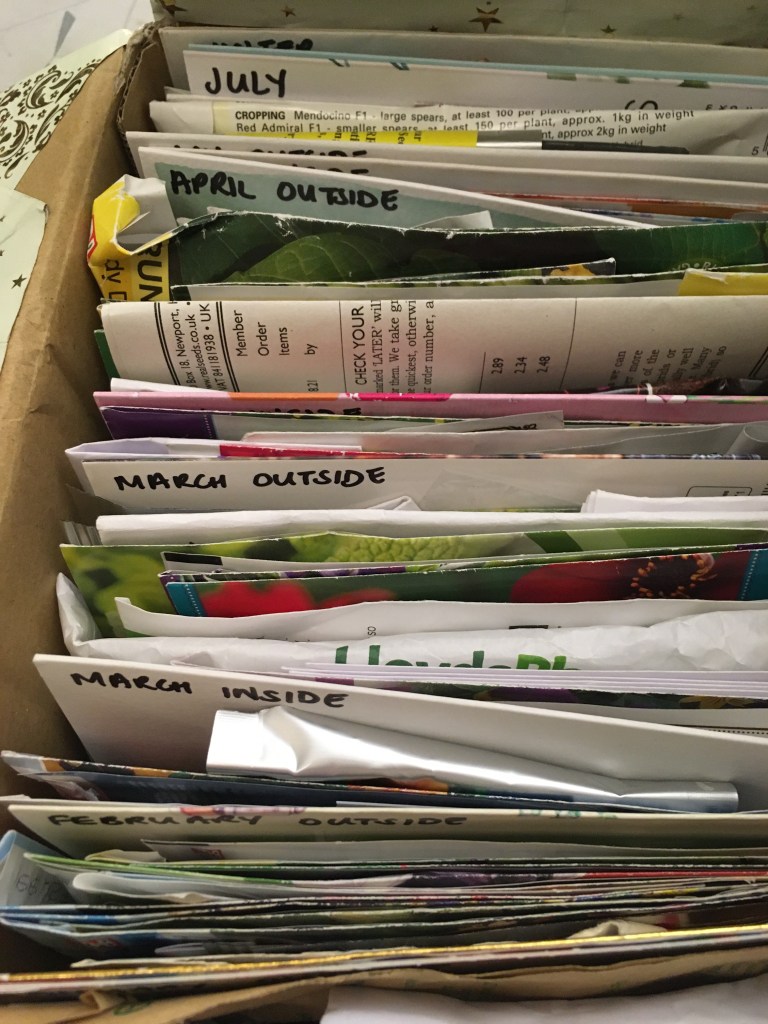
The number of seeds is overwhelming and through the year I find myself getting annoyed at trying to find things and forgetting to plant things. I’ve stored seeds in different labelled envelopes and jiffy bags, trying to keep my sanity. In addition, I have a large seed collection for the school edible garden that I look after too.
Most seed packets fit in perfectly.
I would love a beautiful, shiny, metal seed tin. It just seems like a nice thing. I couldn’t find one that was the right shape and size. I soon realised that beautiful was pretty far down my list. I want a practical seed tin. I want a cheap (or free) seed tin and, very importantly, I would like an environmentally friendly tin.
Free boxes
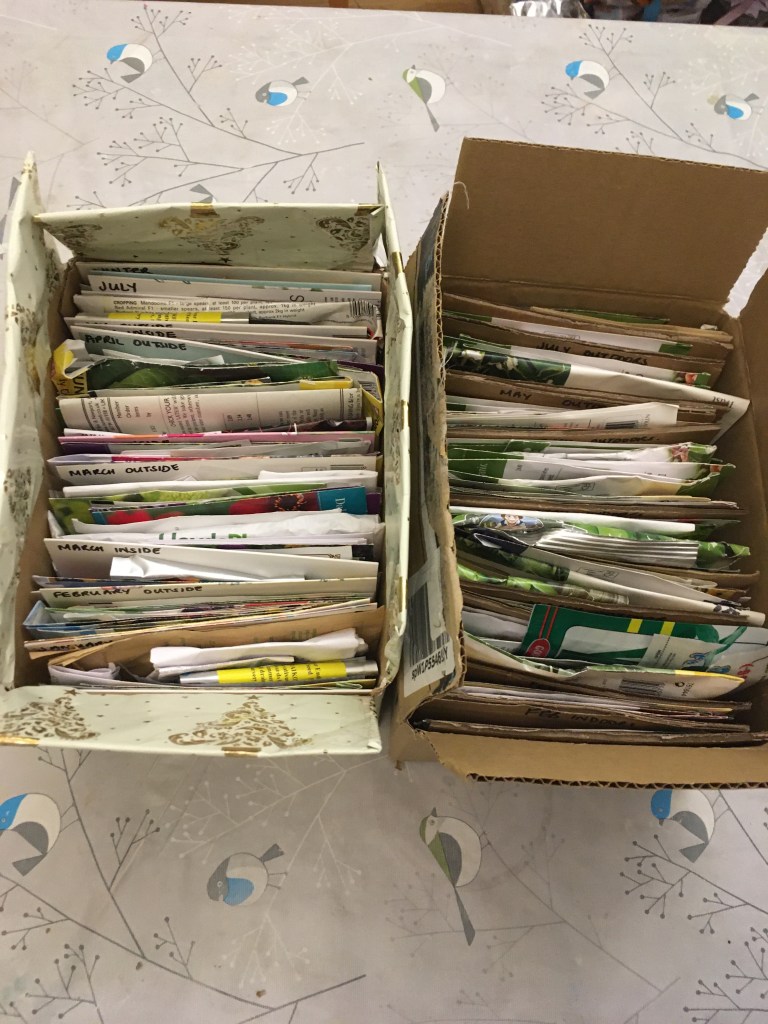
With COVID and school bubble quarantines we have done much shopping online this year, leading to the discovery that the small packaging boxes used by Amazon are the perfect size for a seed box.
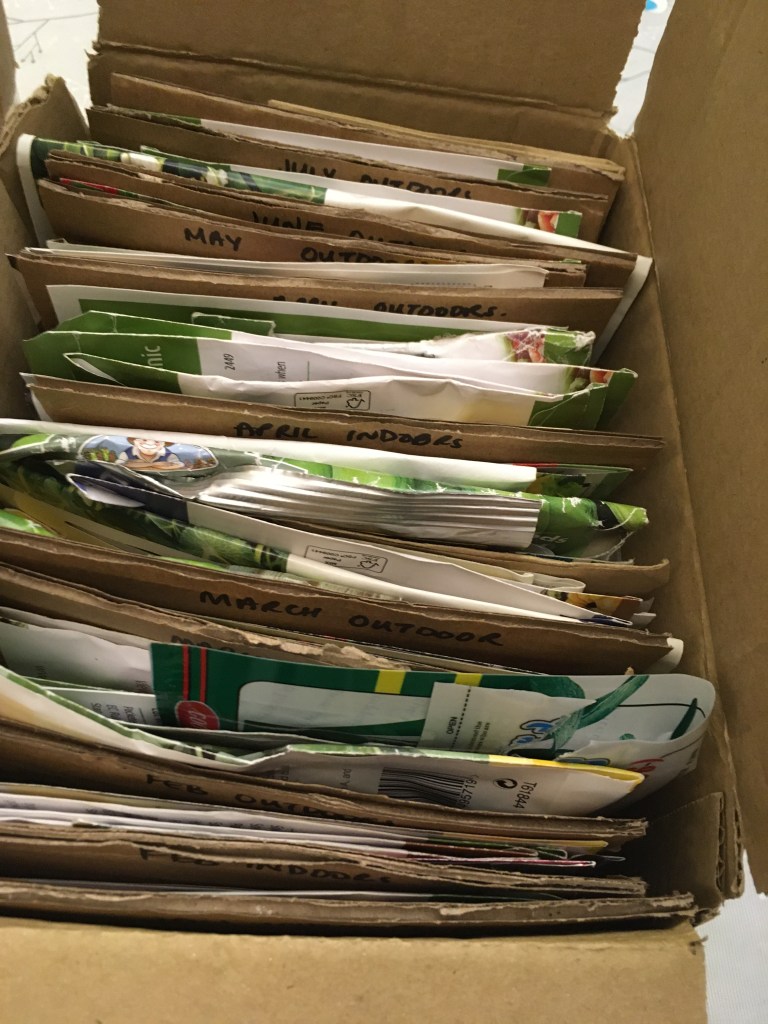
I find that this is a good way to organise seeds. Into the main sowing months February – May split into inside and outside with January, June, July, and August with only section each. In January I have nothing that I want to sow direct outside and by June there’s very little point in sowing indoors in pots unless I’m growing extra plants to fill up space outside as it becomes free.
Organising my seed packets
Indoor sowing is the only option – Sweet peppers are sown inside from mid-February to be planted out from mid-May so that goes into the February indoors section.
Outdoor sowing is the only option – Radishes and beetroots are direct sow outdoors from March, so I put them into the March outside section.
Early indoors or later outdoors options but outdoors is better – Carrots can be sown under glass/plant indoors from February onwards or direct sown from April. I make a judgement on whether I have space indoors and deep enough pots – as carrots are not so good with being transplanted or if I can wait for carrots another couple of months. I’ve put them under April outside.
Early indoors or later outdoors options but indoors is better – Summer squash can be sown indoors from March or outdoors from mid-May. Here, I think it’s worth giving large plants, like these, a head start. Recent years there has been some really erratic weather, so I’ve put these into March indoors so that they get as long as possible a season before weather turns cold or damp.
Waiting to sow to suit timing – Climbing beans for school if sown as soon as possible (indoors) then harvesting starts in July – when the kids are about to go on their summer holidays. The children don’t benefit from harvests during their longest holiday. Therefore, starting the seeds outdoors early July saves effort and means that they’re ready for the kids when they return. These have gone into the school box under July outdoors.
Using the box
As each month hits, when I have a couple of free days, I’ll pull out the suitable section and sow everything from one section in one go if possible.
With vegetables that can be sown in succession, once they’ve been sown, rather than go back into the original section, I put it into the next month that I think I’d like to sow them again. E.g. Radishes are in March outdoors – but when March rolls round, after I’ve sown the carrots I’ll pop them into April outside so I can sow some more in April. If in April I’ve run out of space in the garden I’ll pass them on into the next month.
Dividers
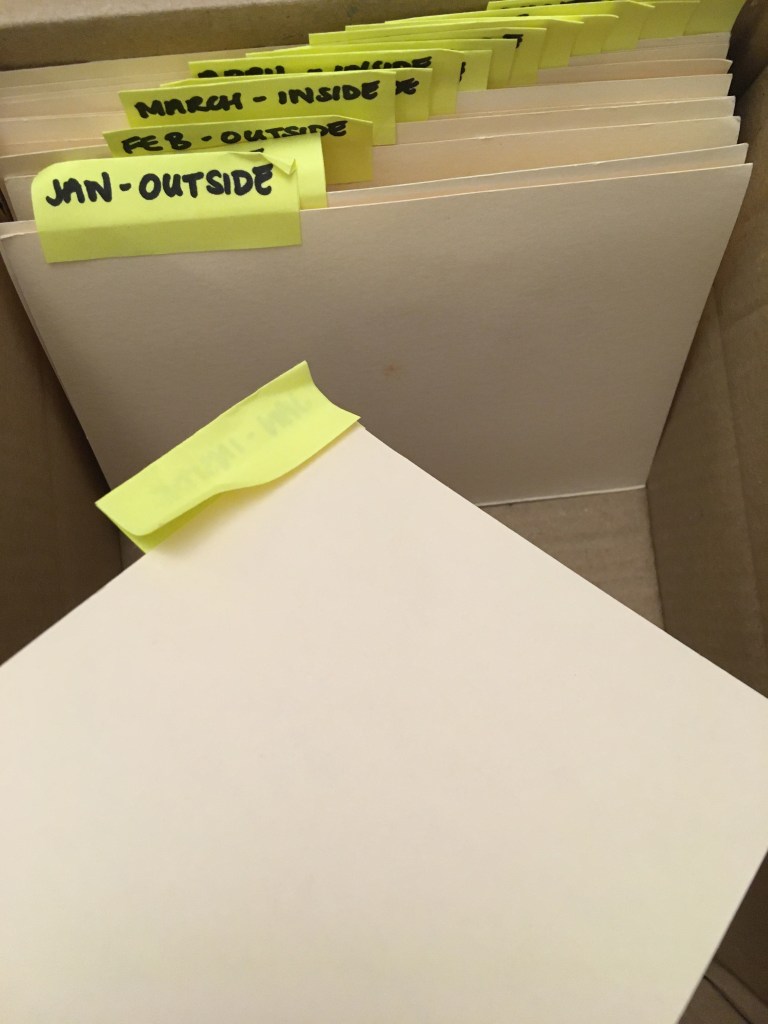
I did try making some dividers with some bits of card and folded over post it notes but the post it notes got a bit squished. I then realised that a flap was not necessary, and we could repurpose cardboard further and easily make divers from with the cardboard flaps of the bigger cardboard that we get deliveries in. This was a quick and easy step.
post it note dividers
The cardboard envelope in the big box was used to cut the flaps ups
simple but effective
At the beginning of December, I found some old Christmas cards, as well as some birthday and thank you cards. I’ve kept them because they are beautiful or have lovely messages written inside and I can’t throw them away. I am a bit of a hoarder but would like to find a use for them beyond stuffing them in a box and forgetting about them for the next 5 years. Some of the cards were a perfect size for the box. So I used them as dividers. With some creative trimming others had readable messages still or lovely fronts. It’s a lovely way to repurpose (and they could still be recycled a few years down the line too) and I still have them as mementos.
I wrote on the back of the cards (because most of these were white) with a marker.
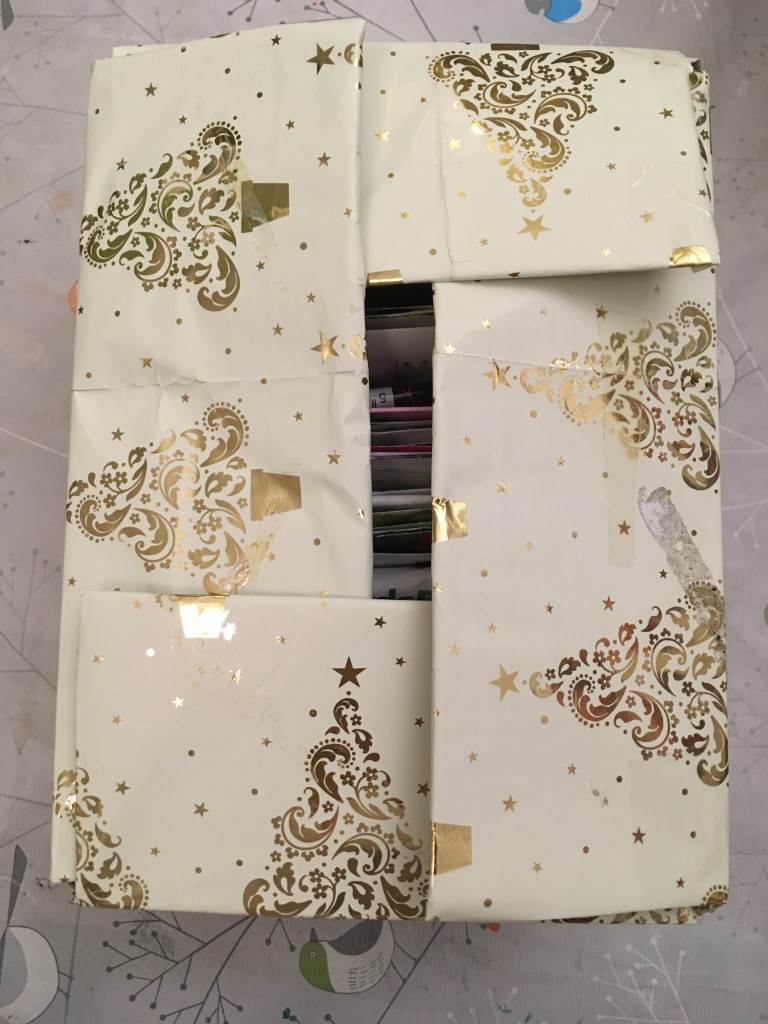
The outside
With the cards I found some used Christmas paper. So …er…definitely a hoarder. I often try and keep big, not so crumpled paper after unwrapping. I always assume I could reuse it but by the next Christmas I can never find any of the paper I had put away and/or I realise that it doesn’t look very nice and/or the Sellotape glue reside on it has gone a bit funny. I decided that this paper was perfect for covering a box. I had 2 similar looking boxes and whilst it was easy to tell by looking inside which box was mine and which one was school’s. It got a bit tedious having to check every time. At one point I even had a third box that I was building for someone.
The paper wrapped box, of course, is a bit tacky and there’s a few little bits of Sellotape glue residue on it, it’s very obviously Christmas paper and the trees are upside down on one side, but I feel a little good about life every time I pull it out. I know that I’ve given that box, those cards and that paper a second use (and they can all be recycled after when it gets too tatty). It’s a completely guilt free box. There was no energy used in the manufacture of it (the seed box I mean – obviously the original box did, but it has already served the purpose for which it was made), no resources were used to create it, no fuels were used to transport the box, no storage was required, and no money was spent on it (other than paying for the double sided sticky tape). It was also a fun craft project.