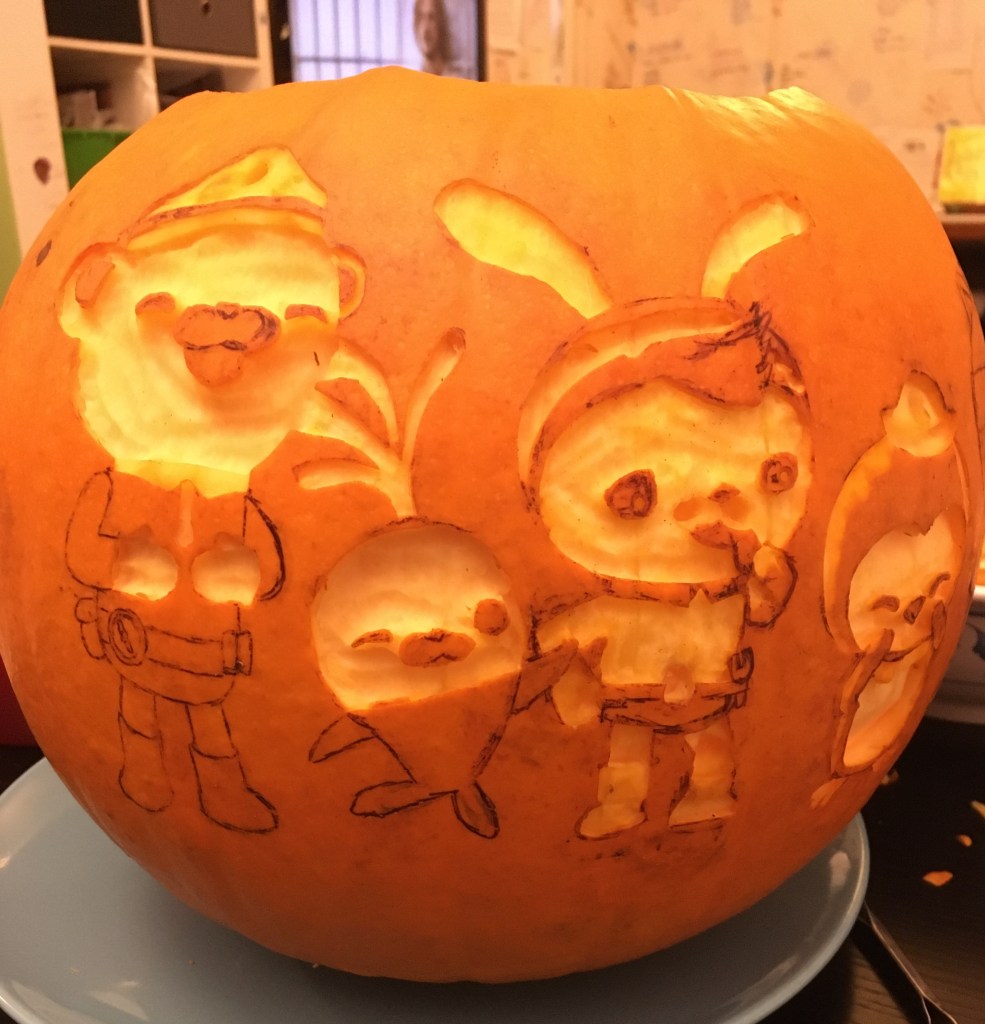
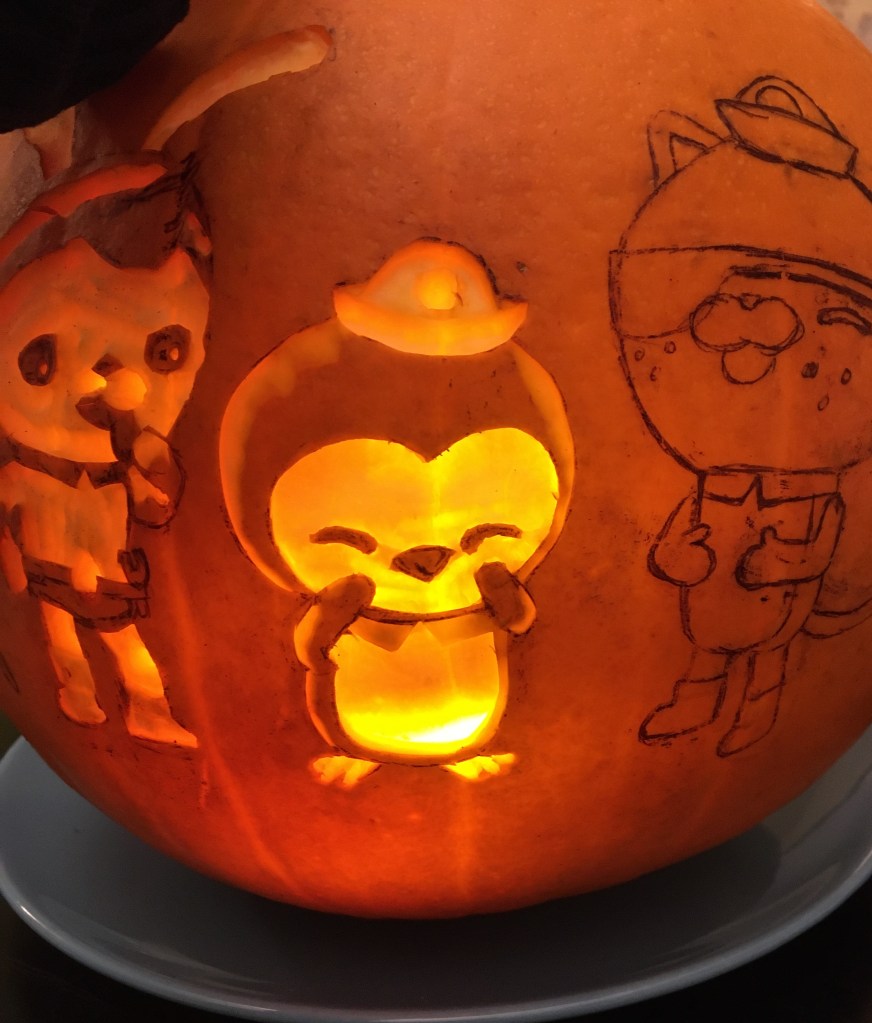
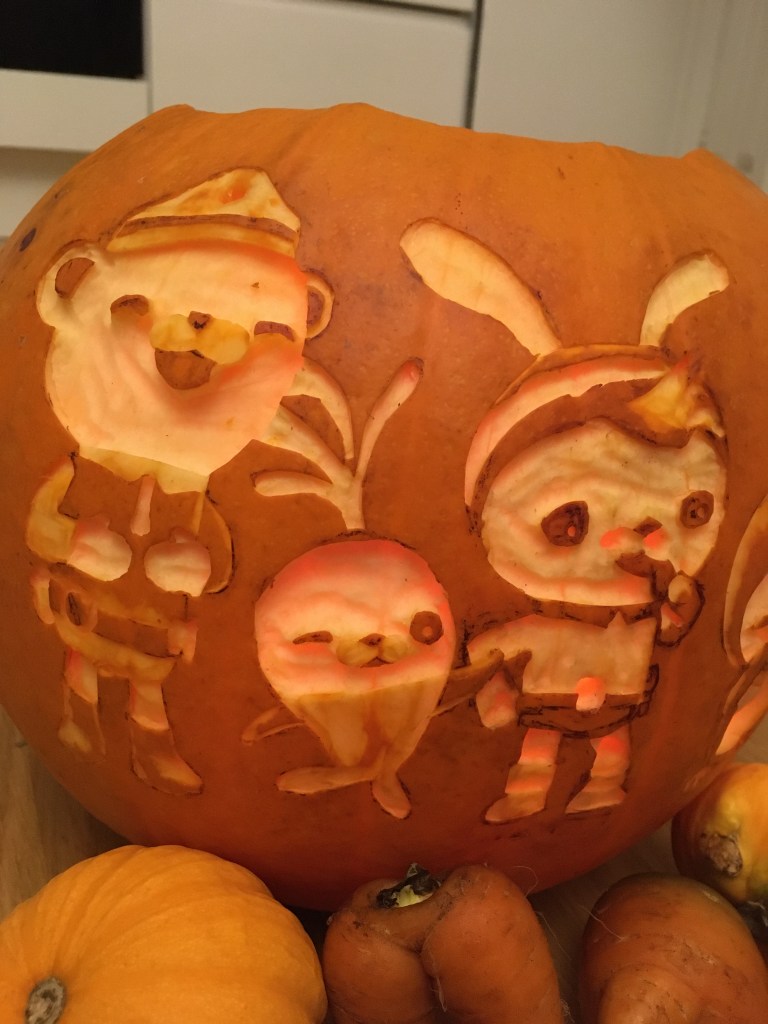
Another Halloween has rolled round and with it the excuse to carve another pumpkin. This year little one asked for Octonauts. Yes plural. I really should have pinned her down to a single one but she found it hard to choose. I then made the mistake of buying a very large pumpkin. Yup, I’m afraid, as usual, I didn’t grow this one. I still can’t justify giving so much space to a huge pumpkin vine in the garden for the sake of a tasteless £1 Halloween pumpkin. Yes, granted, I could plant a carvable pumpkin that tastes good too but I like to stick to red kuri pumpkins. These taste great and can be trained vertically to save space.
Anyway, a big pumpkin just made the temptation to do something challenging too hard to resist. so here it is, this years Halloween pumpkin.
This is little one’s pumpkin. She drew her design on the pumpkin in biro. I then cut the outline of her shapes with the Thai carving knife. She then gouged out most of her bits with a little carving tool. I kid you not. That was the scariest 20 minutes of my Halloween. I just hovered around her both hands ready to grab, rearranging her hands so she wouldn’t hurt herself.
Last year’s pumpkin carving post goes into more detail about how it was done. This year there are just a few photos from the process, which you may not be surprised to know, took a friggin’ long time. So long that in the end I couldn’t be bothered to try and cook something out of the bland insides this year.
pencil
biro
carving
more carving
testing
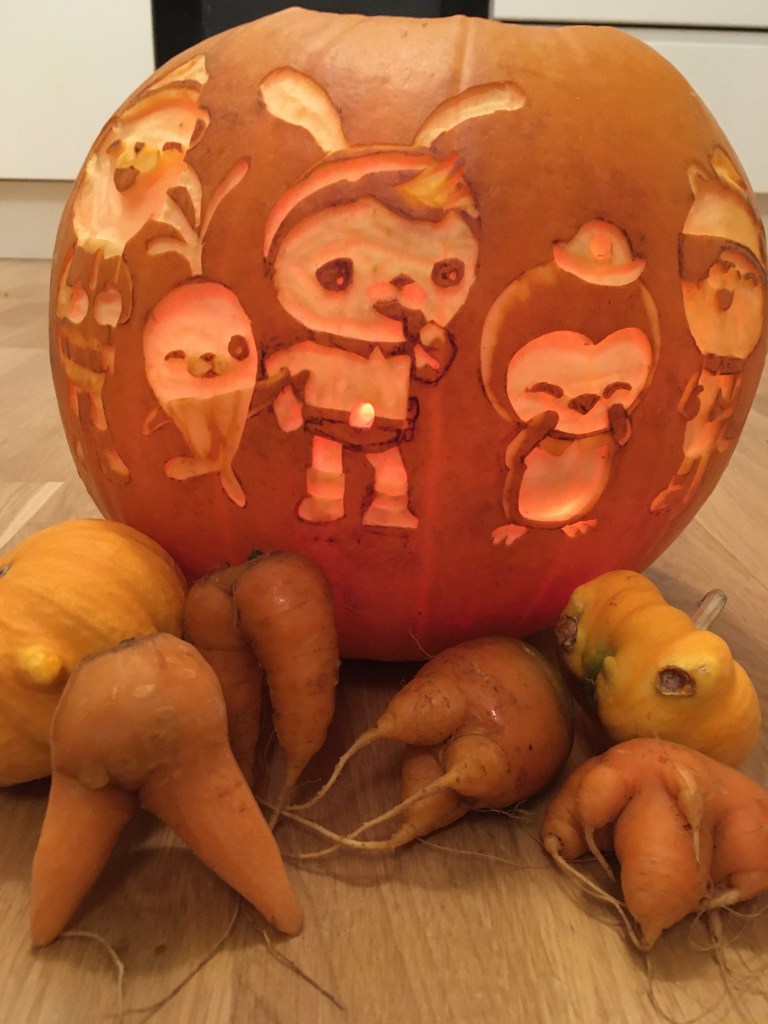
Here it is in the light with some creepy veg that we DID grow in the garden. The carrots grew like this because I added too much fertiliser to the pot. The pumpkin munchkins grew like this, I think, because the young fruit had been pierced by the berry pirates (aka Southern shield bug).
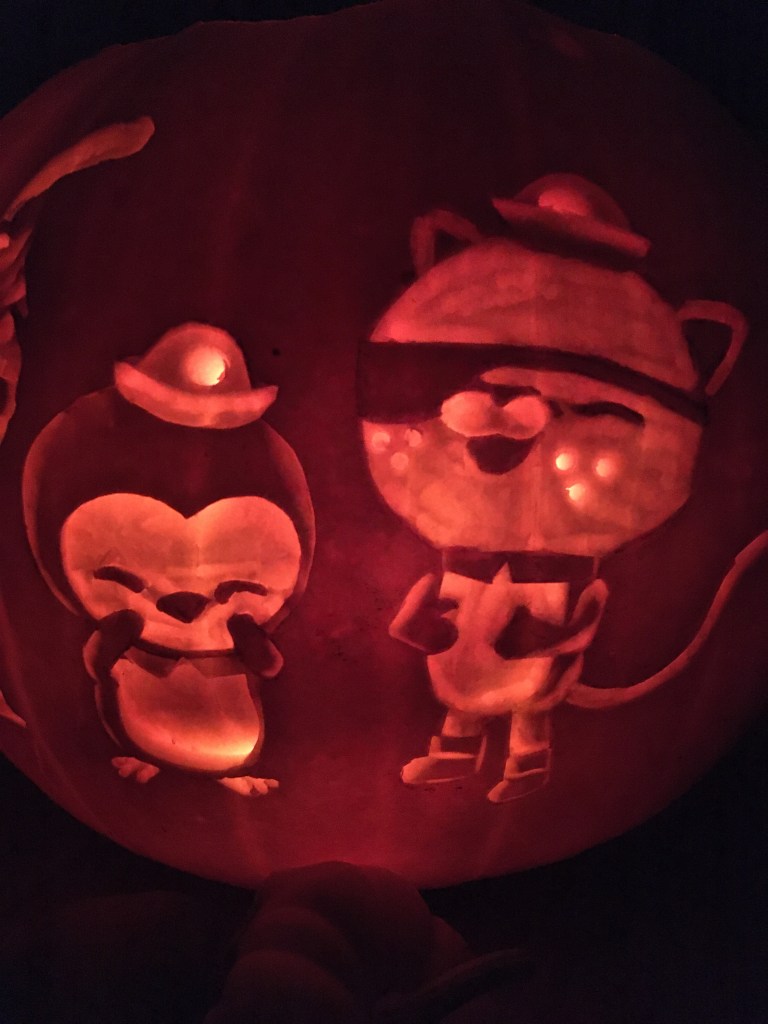
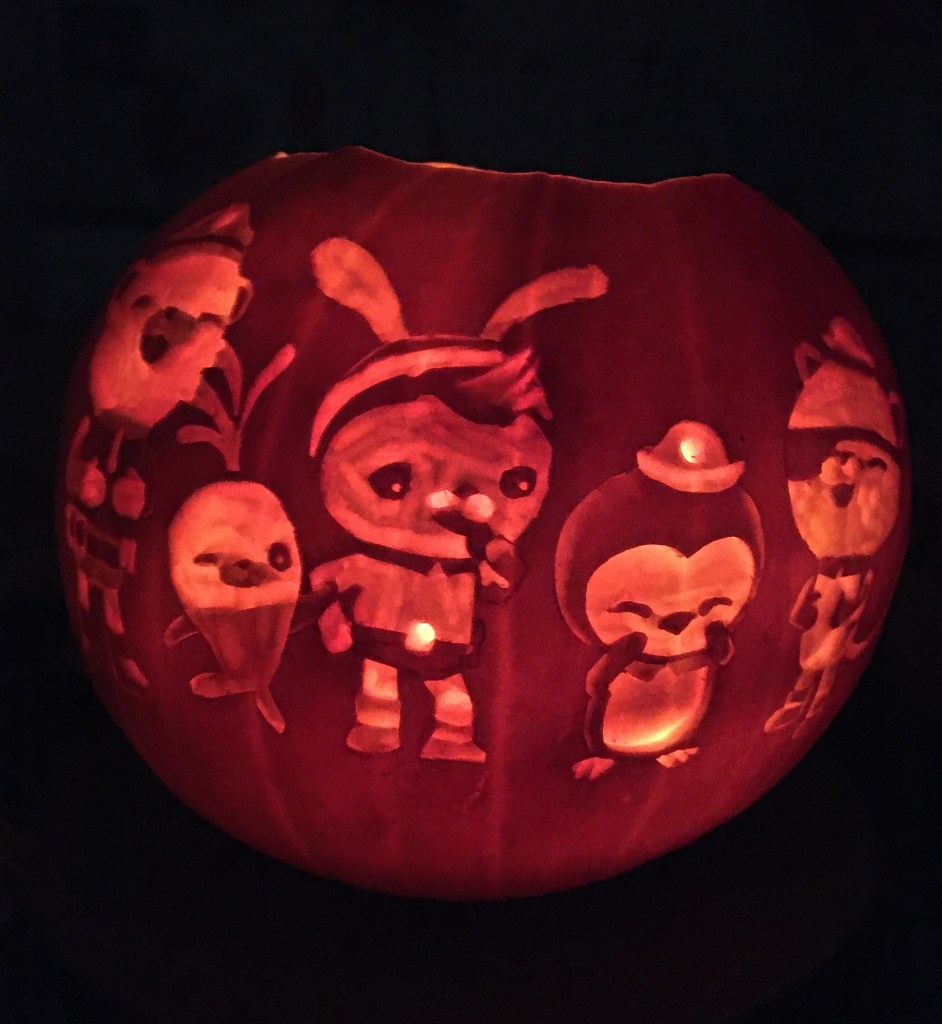
And here are some more photos because I’m sadly rather proud of it and it took sooooo long….
I like to carve pumpkins. You can get different shades if you don’t go all the way through. The deeper you go the lighter the tone will be. I used a Thai fruit and vegetable carving knife. ‘Carving’ pumpkins are usually bland and watery.
Every year I get really excited about carving a pumpkin for
Halloween. I’m afraid I can’t grow a pumpkin for carving. Not because they don’t
grow – but if I go through the effort of growing a pumpkin then I am blimmin’
well going to eat it…. All. That’s the problem. If you carve a pumpkin you will
be sacrificing a shell of at least 1cm thick in order to maintain structural
integrity. I just can’t bear to do it. Pumpkins in the shops cost around £1 so
it’s a no brainer. They are also not grown for taste, though I put this to the
test almost every year.
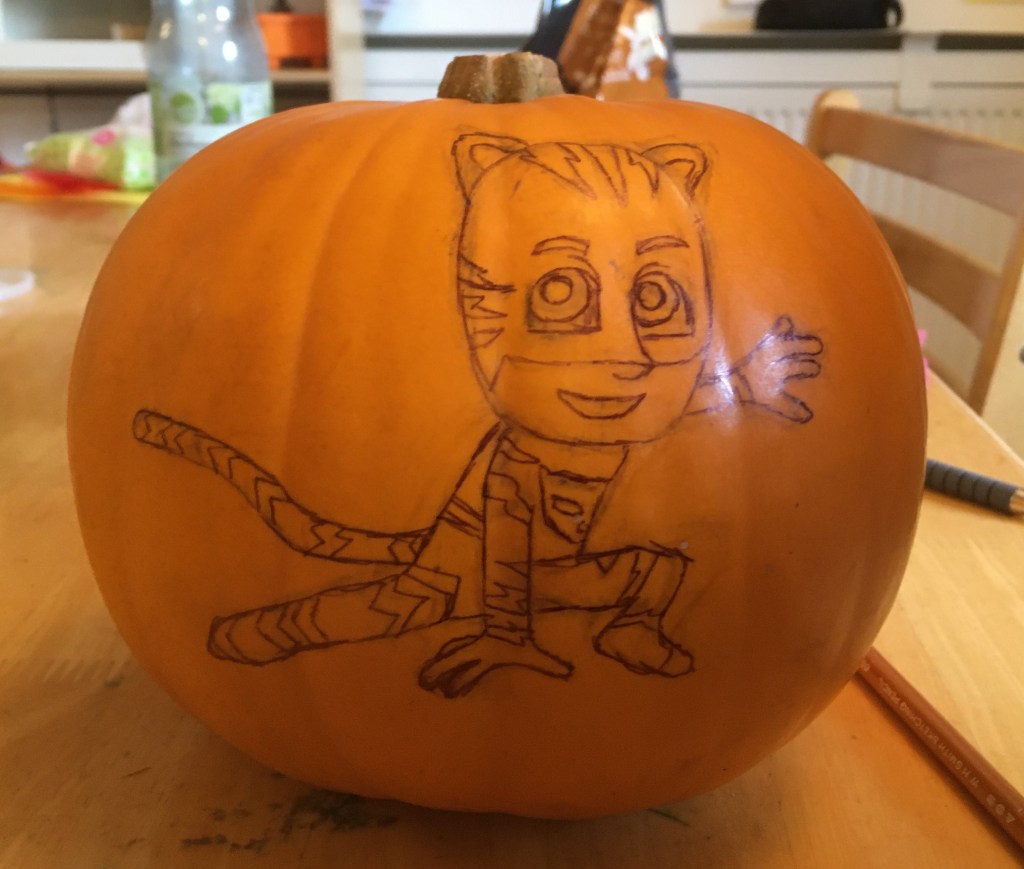
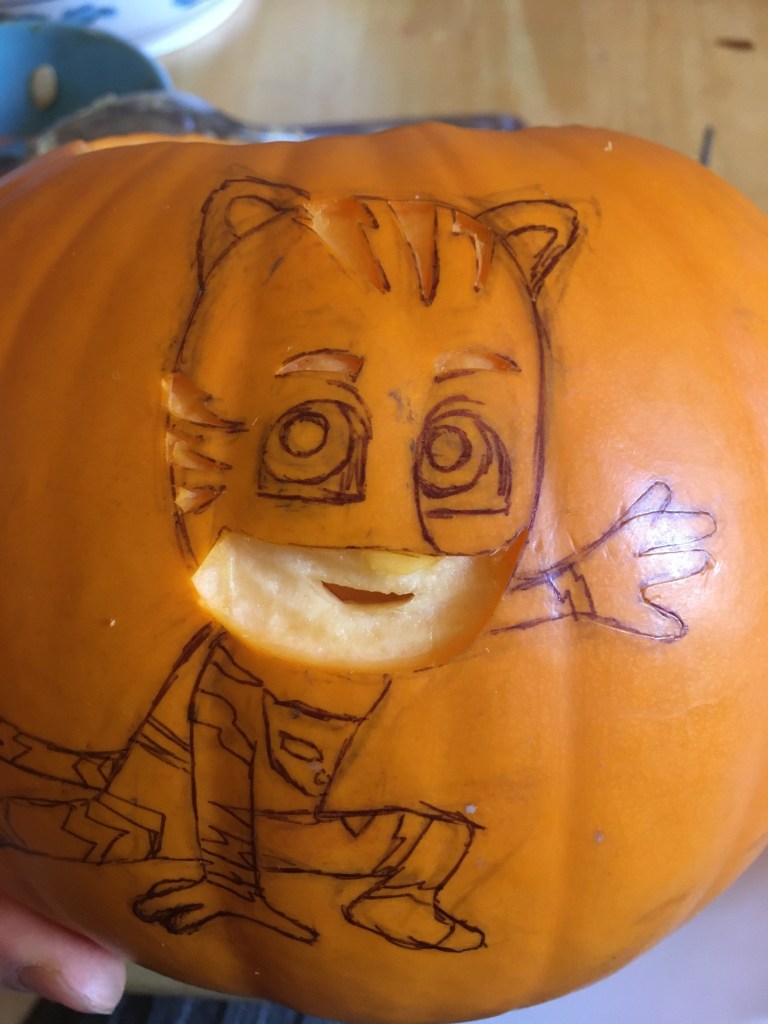
Little one chooses the theme. This year she wanted PJ Masks. We negotiated it down to Catboy. This is my step by step:
Choose a smooth skin.
Using a 2B pencil sketch it.
Go over definite lines in biro
These are the 2 carving knives. They came from Thailand where fruit and veg carving is a big thing. The small very sharp one is the one to use. The bigger one is only used to cut the hole in the top. I have washed the pumpkin, the tools and my hands after drawing so that anything put into the white bowl to be eaten will be clean. The blue is for waste.
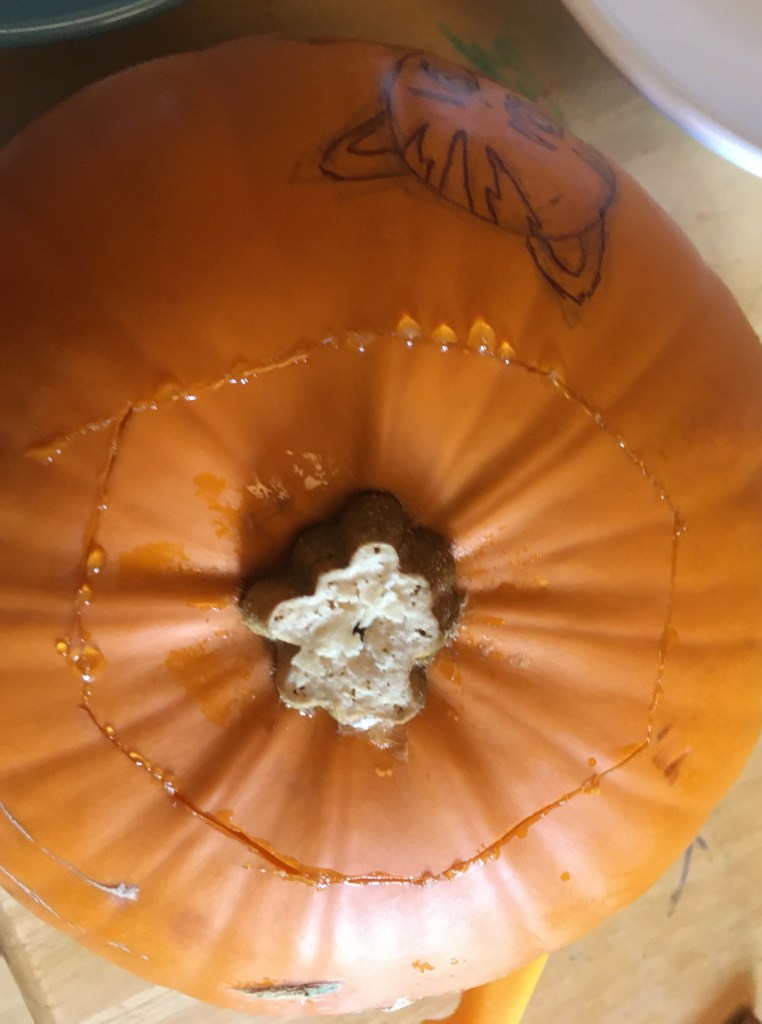
Stab straight down in a circle
Lever off with a table knife
Just the pulpy seeds will be holding it in place
Scoop out the seeds which you could roast and eat. Use a sturdy tablespoon to scrap out the insides until the whole shell is around 1.5cm thick. It will take some welly. If in doubt leave it thicker. You can always scrape more out after if it’s too thick.
Before you start carving decide which bit will be the darkest and which will be the lightest. It is the opposite of shading with a pencil. The lighter you want something to be, the deeper you need to carve. This was my plan:
Pupils and the inside of his ears to be the darkest – leave the skin on.
Whites of his eyes and teeth to be the brightest – cut out completely.
Stripes are the lighter than the main material – cut deep without breaking through.
Right arm needs to stand out from the rest of the body – both edges of the arm to be deeper to make them lighter .
Smallest finger on both hands need to look like they are was behind the others – second to last finger (which looks like it is in front) needs to have a deep cut at the top edge to appear lighter.
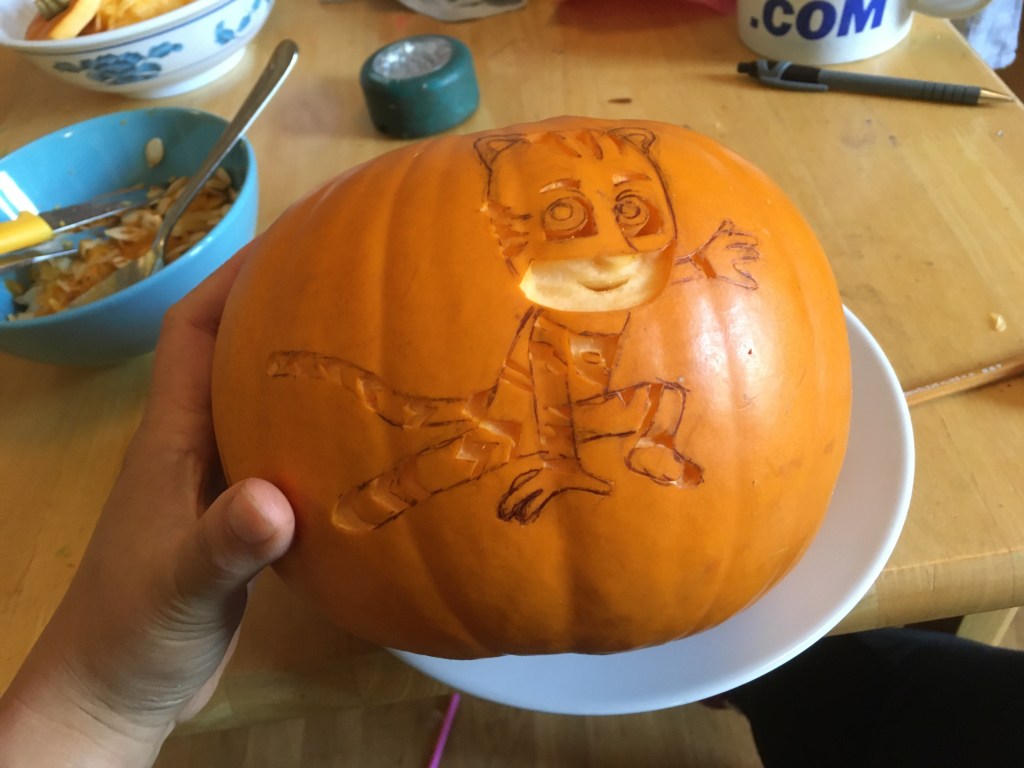
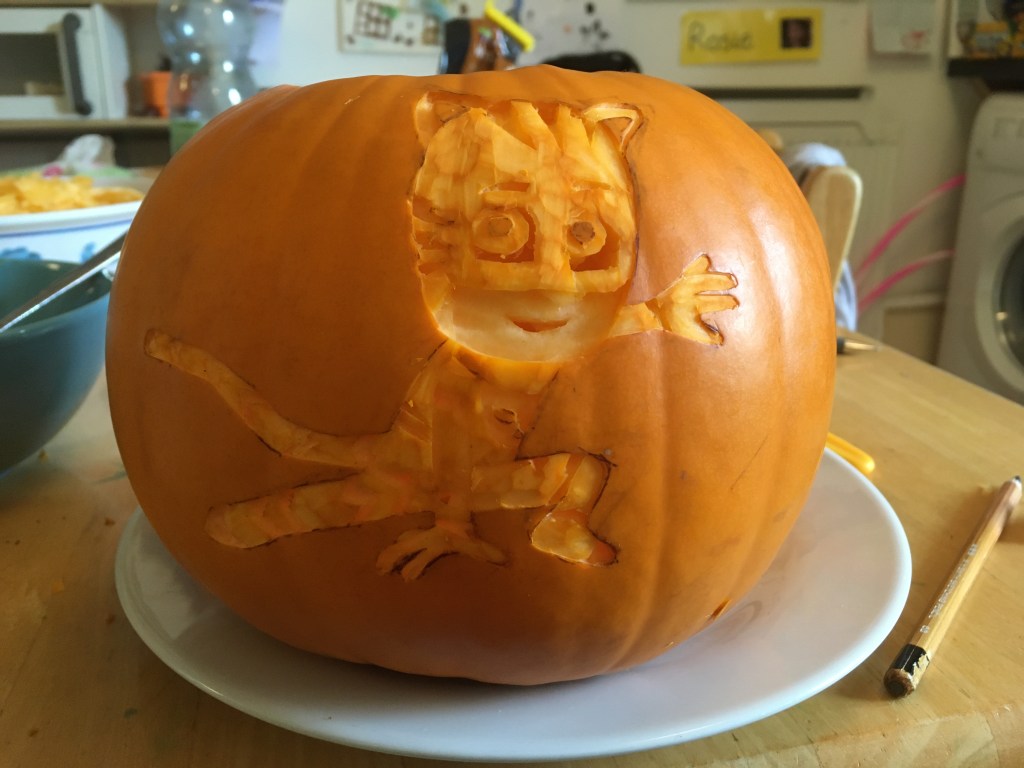
Carve out the lightest bits first.
Then you still have either the biro lines or the edges of the carved parts to guide you.
You can put a torch behind to check if you’ve carved deep enough
Then for the rest of the figure just a very thin layer of the skin was removed. Except at the right arm and the fingers.
Lit with a torch in the light.
Lit with a torch in the dark.
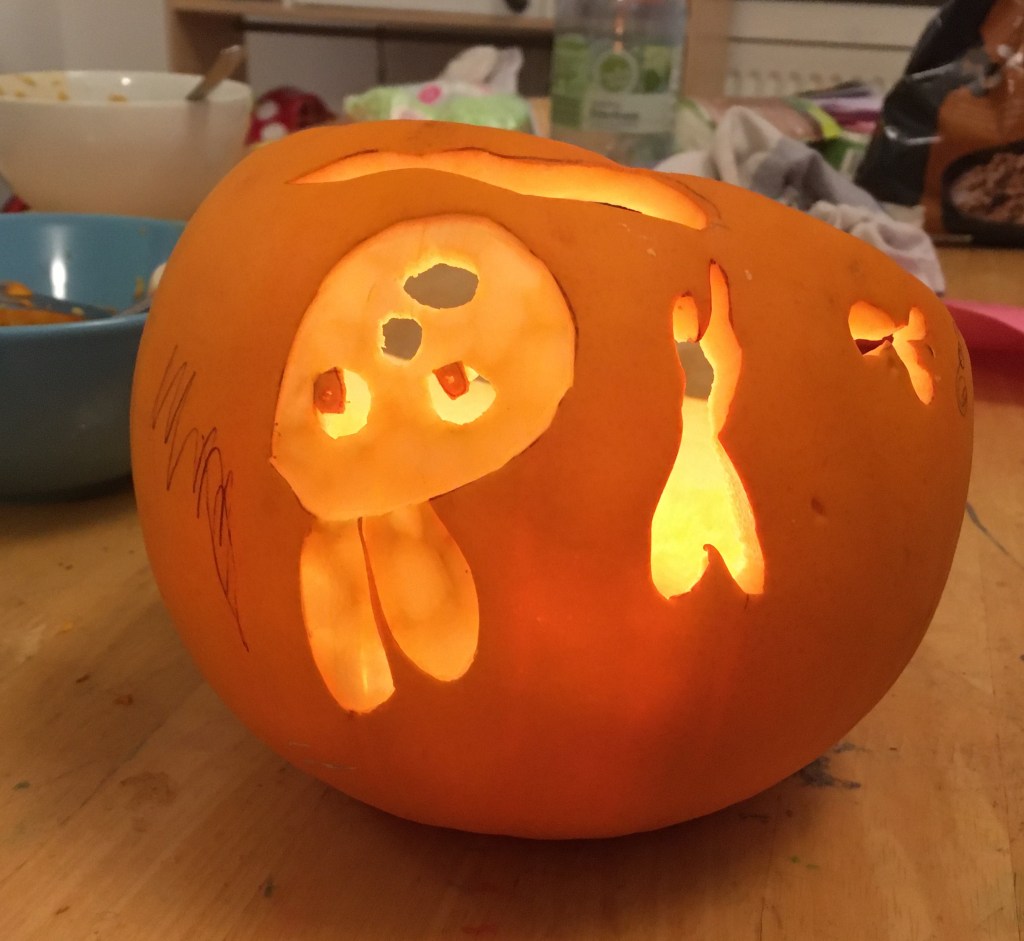
I gave another pumpkin to my little one to draw. This is supposed to be a 4 eyed monster head on legs.
I cut it out and she poked 2 eyes out with a cheeky finger and now it actually looks like an upside down decapitated bunny… Worrisome.
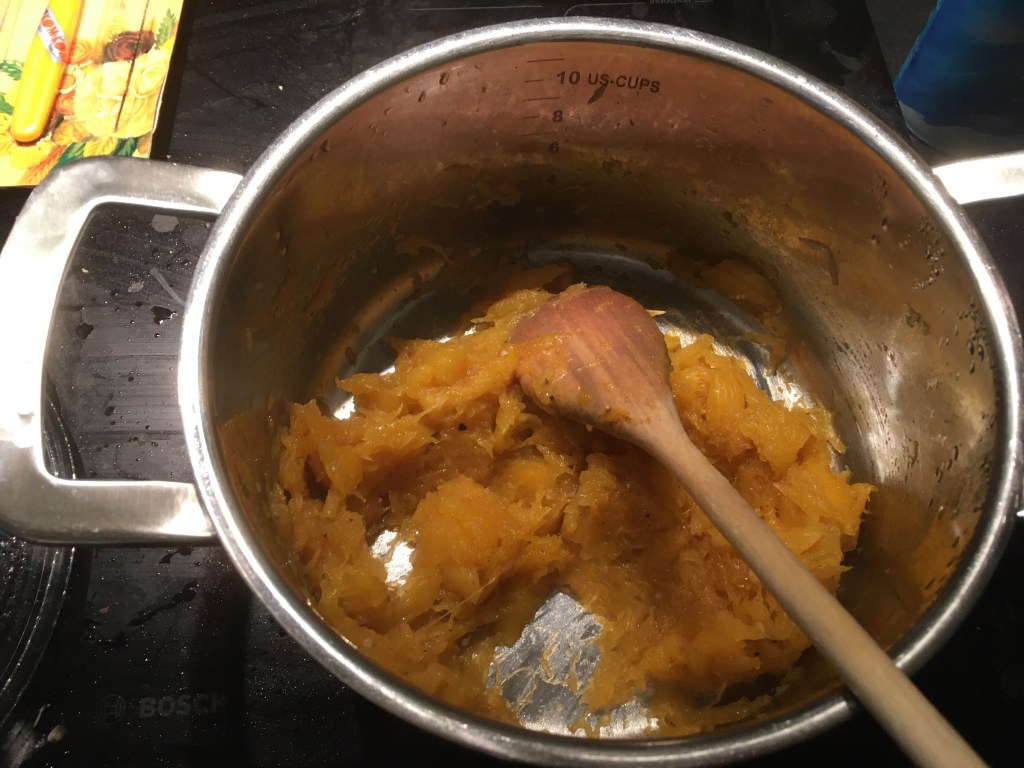
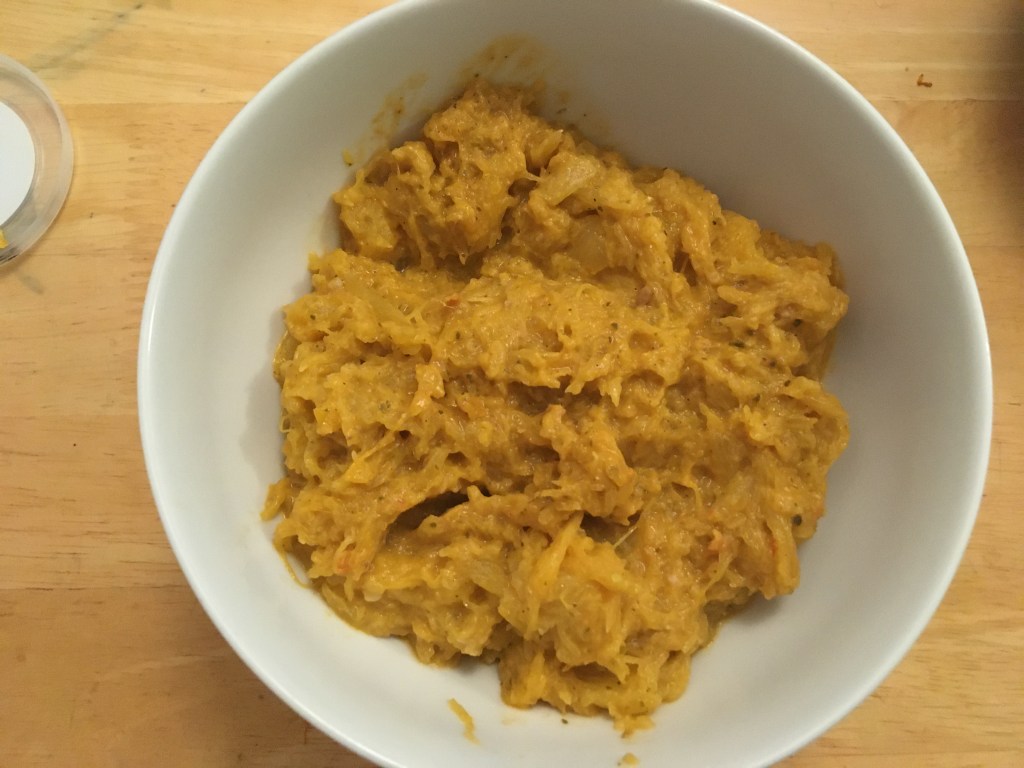
I tried to make soup with the salvaged pumkin
It was bland, stringy and watery. I ate it anyway
Later in the evening, after the pumpkin had been sitting outside for about 5 hours, I had another look. A slug was having dinner.
This morning I looked again and a cat had pooed in the bunny head pumpkin. *sigh.
So post Halloween you can fill the pumpkin with soil and plant something in it. You can then bury the whole pumpkin in the garden and the breakdown of the pumpkin will add nutrients to the soil around the new plant. The best kind of seeds for this is something that needs stratification – a period of cold before it will germinate. Planting the seed straight after Halloween (in the Northern hemisphere) means that the seed will get a period of cold before germination and the pumpkin will get time to breakdown in the soil before the seed germinates. A perfect candidate would be something like Caucasian spinach, wild garlic seeds or nuts like hazelnut and walnut. Pears, apples, cherries and peaches all need a period of cold but you might not like the variety that grows. The plant that grows may not provide fruit that tastes like the fruit the seed/stone came from. Also if the fruit was shop bought it may have grown under different conditions to the ones you have in your garden. You can read more about why the fruit can be different in ‘Pollination, fertilisation and variation’
Here are a few from previous years:
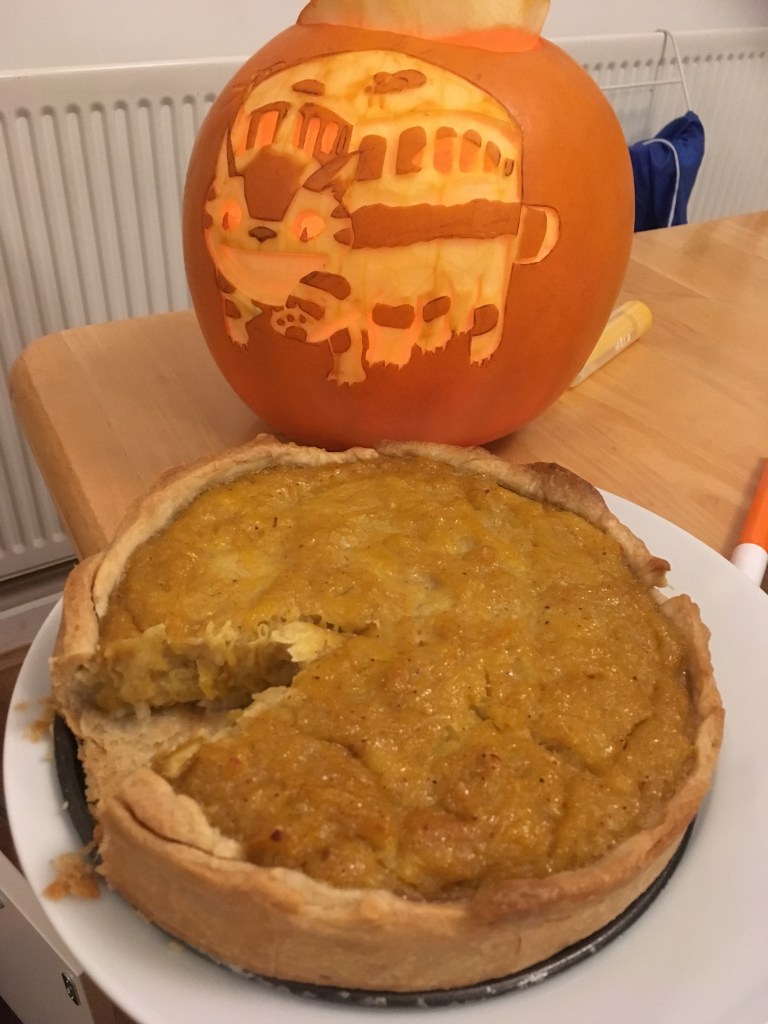
This is the cat bus from ‘My Neighbour Totoro’
The pumpkin pie I made from it was pretty bland
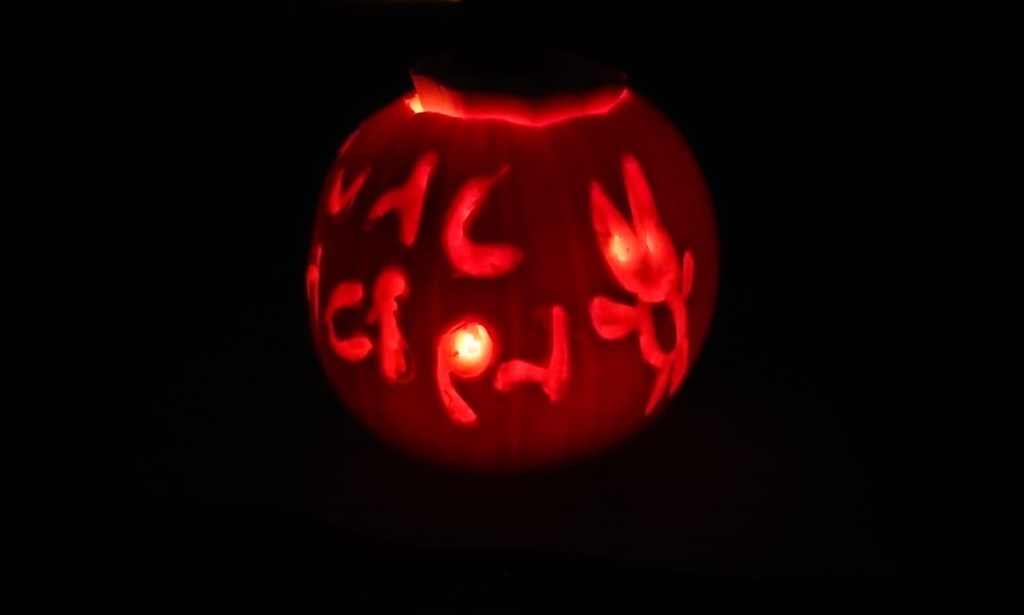
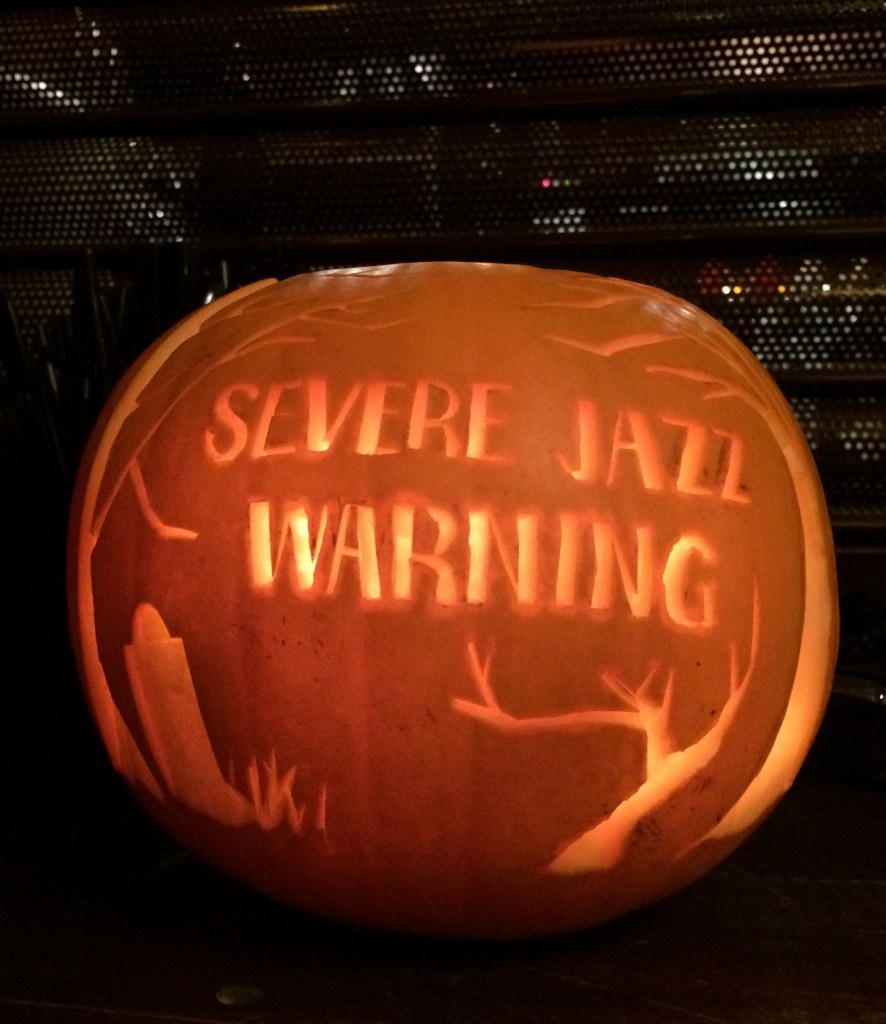
The big band I sing with does a Halloween gig. I carved our logo one year.
…and this was the other side.
For my nephew, Joel.
Yes, they take a long time and no, I’m not sure why I enjoy it so much. It’s probably because I’m trying to avoid doing something else. Yesterday it was either ‘Catboy’ or saw 0.5cm off the bathroom door that had swollen too much to shut and replace the lock. I did that today and now my arms and shoulders hate me.